black bean and beet veggie burger

black bean and beet veggie burgers

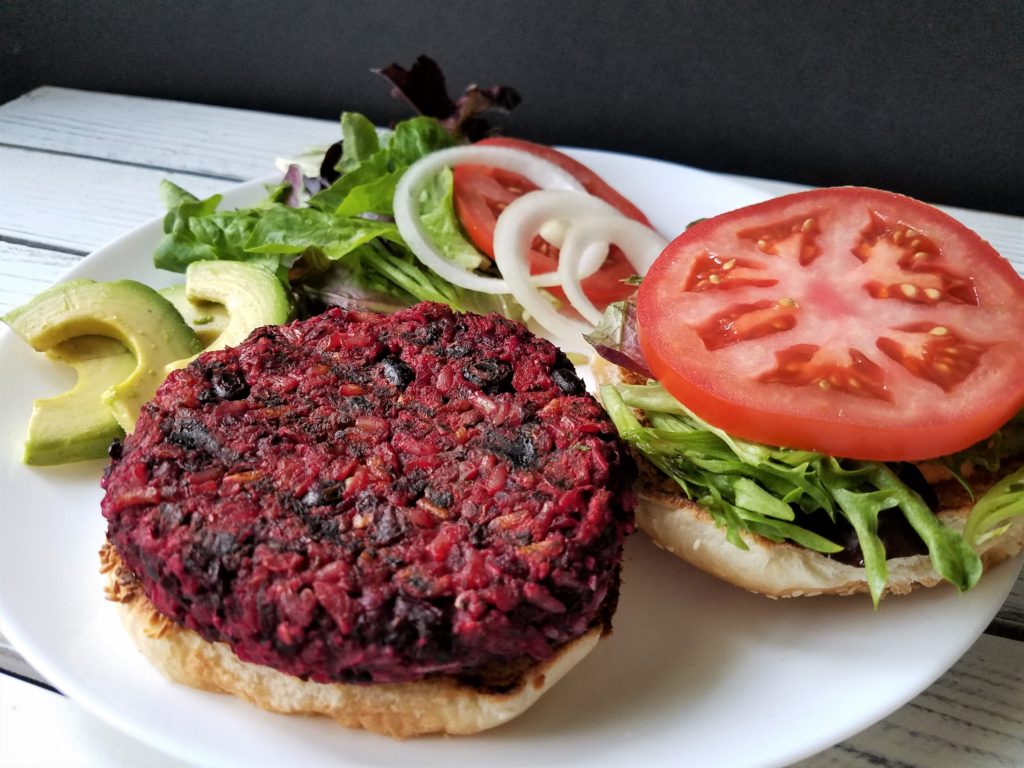
Looking for an amazing veggie burger recipe? Meet my black bean and beet veggie burger; it’s a triple B – beans, beets and brown rice. It’s my riff on the Northstar Café veggie burger, a Columbus favorite to both vegetarians and meat lovers alike. If you live in Columbus and haven’t had one yet you might not be able to call yourself a true Buckeye – just kidding – not really kidding! Northstar Cafe is our “go to place” not just because of this burger, but that’s the big draw. It’s always on the itinerary when friends and family come to visit which makes me wonder if they are coming to see us, or if it’s the veggie burger they’re after! We have literally driven straight from the airport to Northstar more times than I can count!

veggie burger

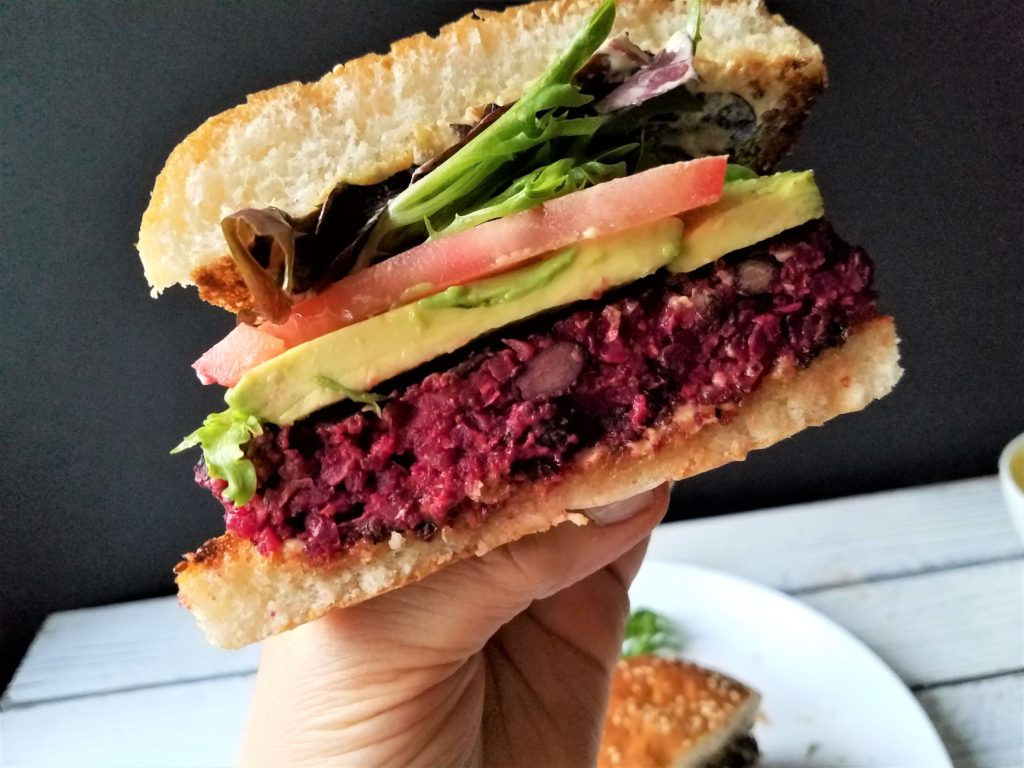
Wonder why these burgers are so popular and crave able? First off they are served on a buttered and grilled brioche bun and topped with white cheddar cheese. They’re hearty from the rice and beans, sweet and juicy from the beets, and have a warm smokiness from the chilies. The prunes are the one ingredient you wouldn’t think belongs, but boy do they! They add a sweet caramelized flavor which is surprising and delicious. It’s tender on the inside and has the texture of a regular burger. Once grilled, the burger forms a nice smoky charred outer crust. It’s this combination that make an amazing burger. together all of these ingredients give the burgers that umami* you want in a really good burger.

veggie burger

My take is so close to the original I even surprised myself! I have always had a thing for recreating food from restaurants and bakeries. Remember my copycat of the Little Eater root vegetable couscous? More recently I posted my version of NYC’s Levain chocolate chip cookies – I hope you have tried them! They should both give me some street cred. Replicating a recipe is like a food puzzle and I love puzzles! I take the original, break it apart, write down all of the ingredients I can see and taste, then try to put it back together again kind of like humpty dumpty. Then through trial and error plus many, many versions, a winner emerges and this is it.

veggie burgers

There are so many reasons to love these burgers: they are super easy, extremely tasty, plant-based, vegan, gluten free (if you use gluten free oat flour), hearty, very satisfying and they have everything you look for in a regular burger with the added bonus of being vegetarian. My husband said it would be fun to call them a triple B burger because they contain beans, beets, and brown rice. What do you think?

veggie burgers
veggie burgers

If you’re ever in Columbus definitely check out Northstar Cafe and see for yourself why they are so famous. But in the meantime, give my black bean and beet veggie burger a try and you just might earn honorary buckeye status… Enjoy!

This recipe makes 12 – 5 to 6 ounce burgers.
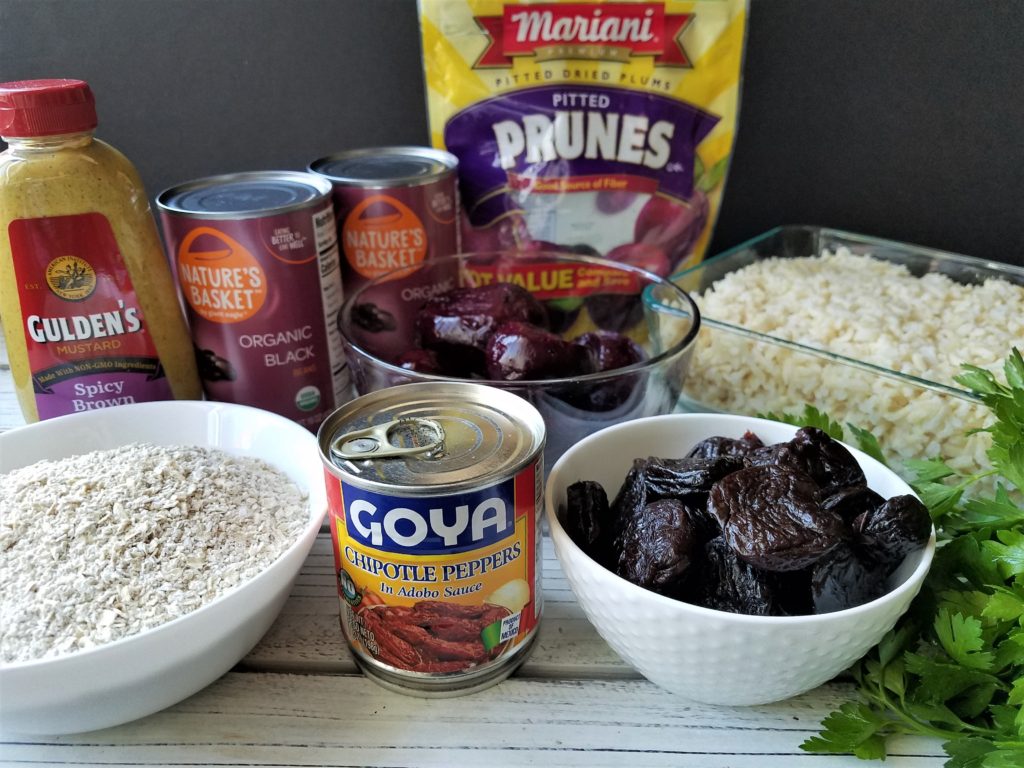
ingredients
1 ¼ cups dry brown rice cooked according to package. Yields 5 to 6 cups cooked
1 pound roasted red beets or precooked**
2 cans black beans drained and rinsed (set 1 cup aside)
½ to 1 cup oat flour (directions to make your own below)***
2 cups fresh parsley leaves (will yield about ¼ cup minced)
1 heaping cup prunes (careful to check there are no pits)
2 tablespoons chipotle chilies in adobo sauce (I used Goya chipotle chili peppers in adobo and used 2 peppers and purred them with the mustard)
1 to 2 tablespoons Gulden’s spicy brown mustard
1 to 2 teaspoons salt (or to taste)
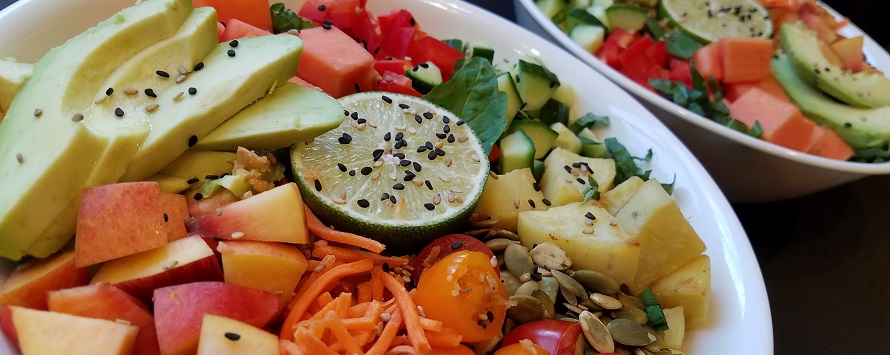
optional toppings: white cheddar cheese, field greens or shredded romaine, tomato, diced sweet onion, pickle, avocado
mustard sauce
5 tablespoons mayonnaise
3 tablespoons Gulden’s mustard

directions
Before you get started: Take a large 5 quart glass or metal bowl and set aside. All of the ingredients will go in there as they are ready. Prep all of the ingredients individually in a food processor (except the rice) then mix them all together. It may seem like there are a lot of steps but some ingredients are canned, and you can cook the brown rice and roast the beets a day beforehand.

ingredients for black bean and beet veggie burger

Cook the rice according to package directions, cool and add 5 1/2 cups to the bowl. Set 1 cup aside for later use if needed.

Beets: Cut roasted beets into quarters and place into the food processor. Pulse about 5 or 6 times or until you have pieces a little smaller than a pea. Place in the bowl. Roasting directions follow at the end.

Drain 2 cans of beans and rinse. Reserve one cup whole beans and add to the large mixing bowl. Put the rest of the beans in the food processor and pulse about 18 to 20 times or until it’s broken up but still has some bean pieces. Add the beans to the bowl.

the rest of the ingredients
Check for pits in the prunes then place them in the food processor and pulse until broken up to about the size of a raisin and add to the bowl with the beets and beans.

Puree the 2 tablespoons of chilies and sauce with 1 tablespoon of mustard. You could just use the adobo sauce if the chilies are too spicy. Mince the parsley and add to the bowl.

Add the rice to the bowl and pour the rest of the ingredients in as well. Using gloves, mix everything together. Season with salt and pepper then add the oat flour ½ cup at a time. You only need enough to hold everything together. Use ¾ to 1 cup depending on how wet the other ingredients are.

Mix thoroughly and make 11 to 12 (5 to 6 ounce) patties. When making the patties, try not to compact them. Form them firm enough to just hold together. If not using right away, wrap them individually in plastic wrap. They freeze beautifully in the uncooked stage.

to cook
Heat a grill pan on medium high heat. Spray the pan with cooking spray. Place the patty in the pan and cook about 4 to 5 minutes on each side. If you want cheese, add it after you flip the burger. Cook until you have nice grill marks.

to serve
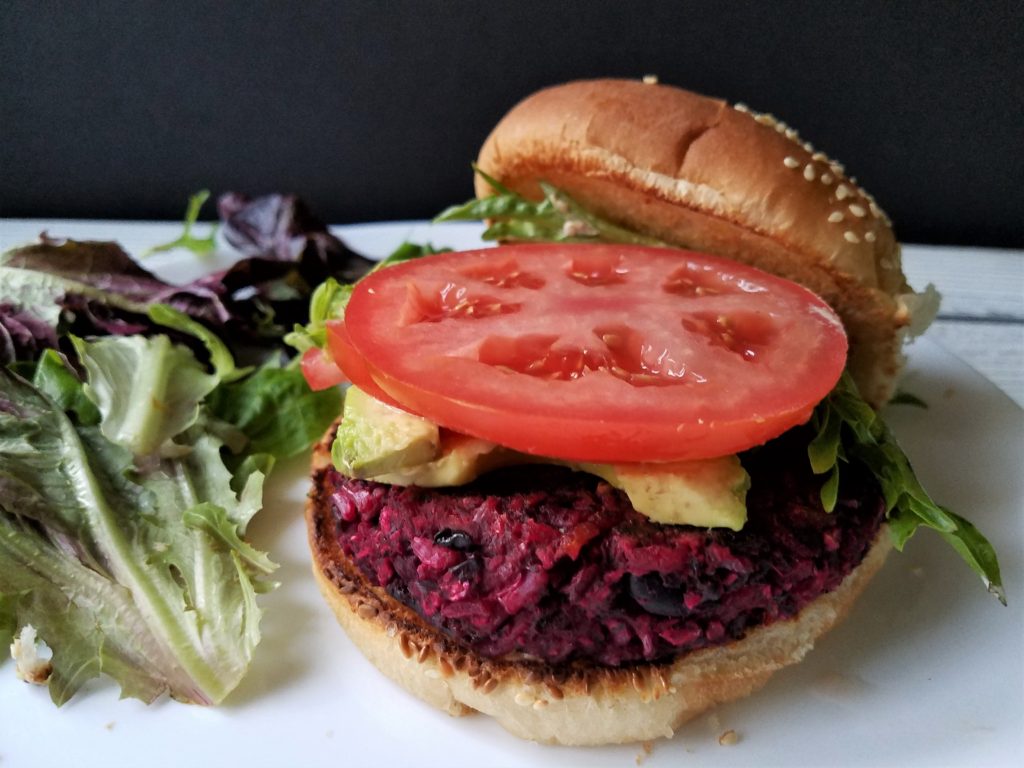
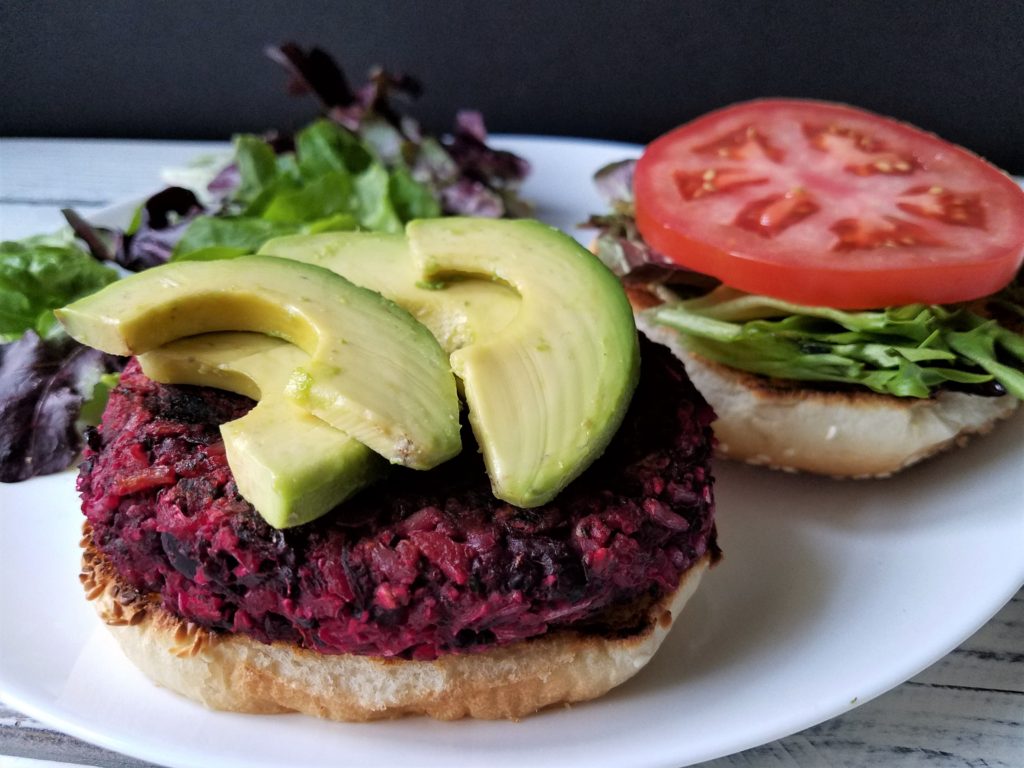
I like to serve the burger on a nice soft bun toasted in a pan on the cut side. Then put the mustard sauce on both sides of the bun (sometimes I use guacamole – also delicious) place the patty on the bottom, lettuce, sliced tomato, pickles, and diced onion – However you like to have your burger. If you’re not eating bread carbs, try a roasted sliced sweet potato bun. I think that would taste great.

recipe notes
*umami is called the 5th taste added to sweet, salty, sour and bitter. Real Simple magazine says umami usually describes indescribable deliciousness making something savory, rich, yum.

I like the taste of roasting the beets but, in a pinch using precooked beets are perfectly fine. Aside from canned beets, you can usually find the Love brand shrink-wrapped in the refrigerated area of most groceries this would be my second choice if I can’t roast them. Just make sure they are plain beets in water – definitely not pickled!

roasted beets

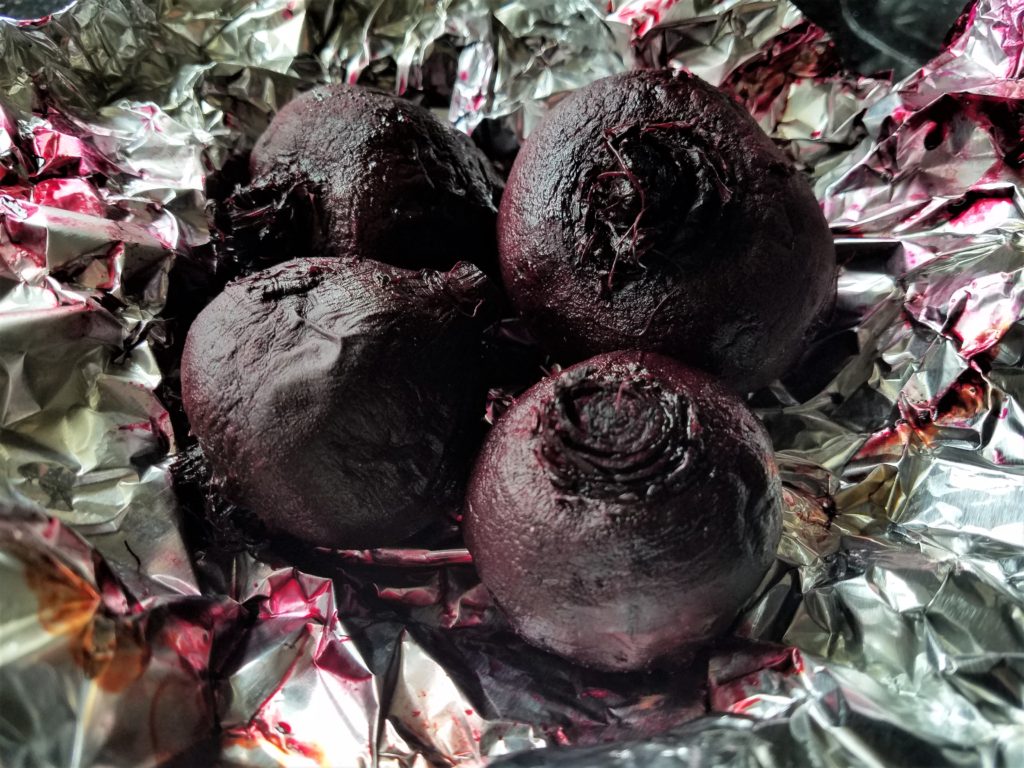
**how to roast the beets, preheat the oven to 400 degrees.
Heat oven to 400 degrees. Cut the beets off close to the stem. Set the leaves aside for another use. Scrub the beets well and wrap loosely in aluminum foil. Place the beet packets into a rimmed baking dish to roast in case any juices escape. Roast for close to an hour. Check them in 30 minutes and then every 15 minutes to see if a fork or sharp knife will slide through easily. Smaller beets will take less time to roast and may be done in 45 minutes. Larger ones will take closer to 60 minutes. Let them cool.

I wear gloves to take the skin off so not to stain my hands and I use aluminum foil as my base so I can throw all the skins and trimming away after. Cut the ends of the beets off, hold in a paper towel and use a portion of the towel to rub the skin off. It should peel off easily. For more beet roasting info check out this link from the kitchn.

***how to make oat flour Place 2 ½  cups of oatmeal in the food processor pulse a few times until you get a coarse flour it will yield a little over 1 cup. Set aside, this will be used as the binder at the end. My sister used almond flour in lieu of oat flour and said it was very successful. I think grinding walnuts would be really good as well.

ingredients for black bean and beet veggie burgers
ingredients for the black bean and beet veggie burger – very simple ingredients

If you don’t have a food processor use a potato masher or fork for the beans and beets (wear gloves), dice the prunes to a little smaller than pea size. For the chilies, you can use just adobo sauce the chilies are packed in or if you have a blender use that.

mini mozzarella caprese salad

When it comes to summer salads, I live fast and loose – especially when I don’t have a lot of time or ingredients. That’s when I throw something so utterly simple like this mini mozzarella caprese salad with tiny tomatoes and I think you’ll laugh at me if I post it so I often don’t. It’s a salad where I just throw things into a bowl and hope for the best.

Then I put it on the table and my husband says WOW what a great looking salad and asks if I’m going to put it on my website. That’s the game changer and dinner is delayed. The salad is swept off the table and onto my photo board ready for its close up.

This is one of the easiest and most impressive salads to put together so of course I have to share it with you. Five simple ingredients: my favorite sweet and juicy teardrop tomatoes, soft and creamy mini mozzarella balls (also called bocconcini), the addition of fresh crisp romaine, a sprinkle of pine nuts and a drizzle of sweet and tangy balsamic glaze. It’s what I like to call a 1-2-3 kind of salad because it takes about that long to assemble and has just about that many ingredients which I usually have on hand.

If you’ve never had balsamic glaze (also called a reduction) it’s a must. It’s sweet, tangy and great to have on hand to drizzle on everything from pizza and vegetables to salads, pasta, sandwiches, meats, cheese, fish, and even fruit. It just wakes things up and adds that extra something to take your dish over the top. You might become obsessed with it! You can make your own very easily (recipe at the end), but I always have a few different flavors on hand like classic, raspberry, and fig.

It serves two as a main, or four as a side dish that pairs perfectly with eggplant parmesan and pasta dishes. Some fun ways to shake it up a bit is by swapping in arugula instead of romaine, adding orzo, olives, artichokes, roasted red peppers, and sundried tomatoes for a whole new salad. The possibilities are endless – Enjoy!

ingredients
Two heads of romaine lettuce sliced into shreds (about 3 to 4 cups)
1 pint of teardrop tomatoes cut in half (or more if you like)
1 – 8 ounce container of mini mozzarella balls or mozzarella pearls
2 to 4 tablespoons toasted pine nuts (optional)
raspberry or fig balsamic glaze
1 tablespoon extra virgin olive oil (optional)
salt and pepper to taste
recipe for the balsamic glaze follows below

directions for salad
Wash romaine lettuce very well and dry very well. Cut into small shreds and place in a large bowl. Drain mozzarella leave whole or cut in half and add to the top of the salad. Wash and dry tomatoes, cut in half and add to the salad. Drizzle salad with extra virgin olive oil and balsamic glaze.

I prefer to serve the salad at room temperature so the cheese is soft and the tomatoes are sweet and juicy.

balsamic glaze recipe
2 cups balsamic yields ½ cup glaze
½ tablespoon maple syrup (optional)

directions for balsamic glaze
Pour vinegar and maple syrup into a small saucepan and bring to a boil over medium-high heat. Reduce to medium and simmer stirring occasionally for about 20 to 25 minutes. You’ll see after about 15 minutes the vinegar will look like it’s starting to thicken.

Cook until it’s reduced by about ½, coats the back of a spoon and looks like warm honey. The glaze will thicken a little more as it cools. It can be stored in an airtight container in the fridge for about 1 month (if it lasts that long!). I suggest storing it in a glass jar or a squeeze bottle.

Variations: you can use any fruit flavored balsamic or white balsamic. Some variations: add 1 tablespoon honey, date syrup or brown sugar

spinach and cheese pie

I have made over 300 spinach and cheese pies in my lifetime! This is just a rough estimate after some fast math. I wasn’t too surprised at that number, it’s a little more! It’s one of those recipes that’s not only a winner in my eyes, but also gets rave reviews from everyone who tries it – especially my family! If you have been to my house for brunch or Yom Kippur break-fast, chances are you’ve had it. If you invite me to brunch and ask me to bring something, this is what comes with me. It’s a lower calorie version of quiche but is rich and delicious with added cheesy goodness!. By using only egg whites it’s also lower in cholesterol, but you definitely don’t miss anything.

Spinach pie came into my life by way of my husband’s Aunt Cynthia. Whenever we would visit, the minute you stepped onto her porch you could smell it baking. It quickly became a favorite of mine and definitely a 10 with my family. With only 6 ingredients it comes together so quickly. I use store bought pie crust but if you want to bake yours from scratch, go for it. The pie is loaded with spinach or as Aunt Cynthia calls them, luscious greens, and that’s something I always have in my freezer. The only cooking is caramelizing the onions which takes about 35 to 40 minutes. Caramelized onions are my addition to the pie from the original recipe and they add a nice sweetness.

This recipe is a winner! It’s perfect for new cooks, super easy, a great vegetarian main dish, looks beautiful, freezes well and everyone loves it! Even the non-spinach fans enjoy it. It’s a family favorite any way you slice it – get it? Any way you slice it!!!!!! If you celebrate the Jewish holiday of Shavout* one of the customs is to eat dairy foods. My spinach and cheese pie will definitely be on my table tonight and I hope on yours! Enjoy!

pies before baking
if you don’t have pie shields (which I don’t) to protect the crust from burning,
cut thin strips of aluminum foil and crimp it around the pie.
delicious pies hot out of the oven

ingredients
2 pre-baked 9” pie shells
2 (16 ounce) bags of frozen chopped spinach defrosted
2 large onions finely diced and sautéed
1 tablespoons olive oil (to sauté onions)
16 ounces low fat cottage cheese
8 egg whites from extra-large eggs (if using large eggs, use 10 egg whites)
1 cup shredded low-fat Swiss cheese (or regular if you like)
1 cup shredded low-fat cheddar cheese (or regular if you like)
Salt and pepper to taste (I use approximately 1 tsp. salt and 1 tsp. pepper)

directions
Into a large pan on medium heat, add onions and sauté in olive oil with a pinch of salt until golden (not brown) and then let them cool a little. This should take about 35 to 40 minutes.

Bake the pie shells according to directions on the package.

Take the defrosted the spinach and squeeze out any water. Drain in a strainer and press as much liquid out as possible. A cheesecloth works really well for this step. If you don’t have cheesecloth, paper towel will work as well. Place it in a large 5 quart bowl and set aside.

To the spinach, add the onion mixture and cheeses. In a separate bowl, add the egg whites and beat with a fork to break them up then add to the spinach mixture and stir well. Add salt and pepper to taste. Mix thoroughly and divide evenly into the pre-baked pie shells.

Use aluminum foil to create a tent around the rim of the pie crust so it doesn’t burn. Bake at 350 degrees for 45 minutes or until the filling is set and firm in the center of the pie. 

*Shavout is more than a holiday we eat a lot of dairy foods! For more information about the holiday of Shavout check out one of my favorite websites My Jewish Learning

perfect pizza dough

This perfect pizza dough has been my go-to for years. I love everything about it: minimal ingredients, easy to make, tastes great, and yields a tender but crispy crust. It holds up to the toppings and start to finish you can have delicious homemade pizza in less than two hours. If you’ve never made pizza dough before, you won’t believe how easy it is and you’ll be hooked.

When we first moved to Columbus we missed our NY pizza so much, we started having make your own pizza parties almost every Sunday night. This was always followed by an ice cream sundae bar! It was my way of ending the weekend on a high note before the hectic school week began.

Now my boys are grown and we are empty nesters. Our pizza parties went by the wayside. A couple of months ago, I decided to bring the party back! So now when my husband and I want to do something really fun on a Saturday night, we make pizza!

I have adapted this recipe from Kathleen Daelemans’ easy pizza dough recipe. She was on the Food Network and made it look so easy I had to try it. 16 years later I’m still using her recipe. I’m glad it’s very forgiving because sometimes I use a mixer and sometimes I mix it by hand. I have used both all-purpose flour, and bread flour. The bread flour yields a bit more tender crust, but not significantly. I use a pizza stone but if you don’t have one, you can use a rimless sheet pan.

While the dough is rising I set up all of the toppings and then the extravaganza begins. I steam spinach, roast mushrooms and peppers, shred mozzarella cheese, cut up olives, and halve teardrop tomatoes. Any topping you like will work. Just make sure you don’t load up the pizza too much. I use 1/3 cup sauce for each pie, and about 1/2 cup vegetables, and 1/2 cup cheese.

The next time you’re looking for something really fun to do with your spouse, your kids, or your friends, this recipe is the one you should try. It makes four 10” to 12” inch pizzas or 2 – 14” pies. You can also use a sheet pan and stretch the dough to make one rectangular pizza. Whatever shape you go with Enjoy!

ingredients
3 1/2 cups unbleached, all-purpose flour
3 teaspoons fine kosher salt
2 teaspoon extra virgin olive oil plus a little for the bowl
½ teaspoon sugar
2 packages dry active yeast (4 teaspoons)
1 ½ cups lukewarm water
Extra flour, for the work surface

toppings
Use whatever sauce is your favorite. I like to use a good jarred sauce like Rao’s Pizza Sauce’s. You can top it with shredded or fresh mozzarella cheese or both, and vegetable toppings of your choice.

directions
Dissolve the yeast in 1 ½ cups warm water with ½ teaspoon sugar; after about 5 minutes it should look cloudy and have bubbles on the surface.

There are two ways to make this dough. Option 1: In a mixing bowl fitted with a dough hook, place in flour, and salt. While mixer is running, gradually add the yeast-water mixture and knead on low speed until dough is firm and smooth, about 5 minutes. Option 2: you can do this all by hand which is my preferred way to make this dough. It comes together so easily. Place the flour and salt in a bowl, make a well in the center, pour in the yeast water mixture in the middle, and the olive oil. Mix with a fork to combine, then use a spoon to mix it together. when it forms a ball, it’s ready to knead. Knead the dough for about 5 minutes.

When dough is ready, shape into a ball, pour a little oil down inside of bowl. Cover bowl with plastic wrap and let dough rise in warm spot until doubled in bulk, about 45 minutes to 1 hour.

After it has doubled, punch it down to get the air bubbles out and divide into 2 or 4 equal pieces depending on the size pizzas you want. Form the dough into balls and place on a lightly floured board covered with foil or parchment. At this point, if you don’t want to use them all right away, you can place the balls into individual bags and refrigerate for up to three days. Cover the dough balls with a damp paper towel. Let the dough rise again for an additional 30 minutes.

Preheat oven to 500 degrees F. set oven rack to the lowest position in the oven and place your pizza stone in if using. You want to put your pizza stone in the cold oven – never in a hot oven, it will crack. If you don’t have a stone, you can put the pizza onto a cookie sheet.

Working with one dough ball at a time, on a lightly floured work surface, (I like to do this directly on aluminum foil or parchment paper) gently form a disk, press down and keep stretching the dough first with your hands and then using a floured rolling pin, gently roll dough into a 10 to 12 inch circle until very thin. Don’t worry if your circle isn’t perfect or if you get a hole just pinch the edges back together.

If the dough feels a little sticky, sprinkle with flour. Add toppings keeping them 1/2 inch in from the edge. Using a pizza peel, or flat sheet pan, transfer the pizza onto the stone while still on the foil or parchment. Alternatively you can place the pizza on a cookie sheet and slide that onto the bottom rack of the oven.

After it’s been in the oven for about 2 minutes, slide the foil or parchment out from under the pizza. You have to do this quickly and carefully especially if using parchment. Alternatively you can use a little cornmeal under the dough and slide it onto the stone or sheet pan directly. I’m not successful at that and find this to be the easiest way for me. In the past flour and cornmeal got all over my oven.

Keep an eye on it when it bakes; it cooks really quickly.. Bake 8 to 10 minutes or until golden and the cheese is bubbling. Checking after 5 minutes.

quick & easy vegetable soup

A day like yesterday was perfect for my quick and easy vegetable soup with butter beans and Israeli couscous. A day that’s 40 degrees, cold, rainy, grey, and windy. A day where you want to stay in bed to watch old movies or binge watch something on Netflix. A day that would only be made better with a nice bowl of steamy hot soup. The kind of soup my mother would say that can warm your bones. This is that soup.

It seems I have soup simmering on my stove at least once a week – because I do, reason being I live in Ohio – the home of erratic weather, I can make it last minute and it’s hearty enough to be a complete meal. Keeping with the times, it’s filled with pantry and vegetable staples, and can be made start to finish in less than 45 minutes. I always have carrots (and if lucky like today rainbow colored carrots), celery, and onion on hand which is the best start for any vegetable soup. As for my pantry staples Israeli couscous (aka pearl couscous), butter beans (aka white lima beans) and a variety of lentils are always on hand.

A few months ago I bought a couple of cans of butter beans thanks to Vivian Howard and her show on PBS called A Chef’s Life. She uses them in a variety of ways, even making a veggie burger with them. I was so intrigued I just had to get them. What I didn’t realize is they are the same as the white lima beans which I grew up eating. Who knew? Vivian and my mom both used the dry beans and soaked them overnight. I love the convenience of the canned bean, especially for soup and when you don’t have time to plan ahead. The buttery and creamy white lima beans were a staple in my house growing up and my mom added them to various soups and stews. That could be why I like this soup so much.

http://www.splashofsherri.com/2020/04/29/israeli-salad-with-couscous/As for Israeli couscous, I always have that on hand because I just love it! They are nothing like their more well known couscous cousin which has a more sandy texture – fyi, they are not interchangeable. I use this little pearl shaped pasta it in a variety of side dishes and main dish salads like my Israeli couscous with root vegetables and my newest recipe for Israeli salad couscous. The addition to the soup adds a nice little surprise.

These two simple ingredients took my ordinary vegetable soup to a whole new level and I think you’ll love it! It’s so satisfying and nutritious, making it a perfect meal when you are seeking warmth, comfort and something delicious. This recipe makes 10 to 12 servings. Enjoy!

ingredients
1 large onion diced
6 carrots sliced into rounds – about a heaping 2 cups
6 stalks celery chopped – about a heaping 2 cups
2 containers of vegetable broth
1 – 26 ounce container Pomi chopped tomatoes (or other brand)
1 can of butter beans drained
½ cup dry red lentils (sorted and rinsed)
½ cup dry Israeli couscous
1 cup haricot vert or green beans cut into 1” pieces
1 cup fresh flat leaf parsley chopped fine (leaves only/yields approx.. 1/4 cup)
2 tablespoons olive oil
2 teaspoons Costco or other no-salt seasonings
2 teaspoons kosher salt or to taste
1 teaspoon pepper or to taste

directions
Heat an 8 quart pot on medium heat. Add 1 tablespoon of olive oil and onions. Sauté onion until translucent, about 10 minutes, and then add the celery and carrots. Cook for about 5 to 10 minutes stirring occasionally. Add the broth and tomatoes and bring to a light boil. Add the lentils and continue to cook for about 20 minutes. Then add the Israeli couscous and cook for 10 minutes. After 10 minutes add in the haricot vert or green beans. Drain and and add the beans, parsley and other seasonings to the soup. Cook for another 15 minutes or until the green beans are tender.  

substitutions:
I’ve become accustomed to adding in swap outs at this time so here goes…If you don’t have lima or butter beans add in a can of cannellini beans or chickpeas. No red lentils, add yellow or green. No vegetable broth, use chicken broth or water. No Israeli couscous you can sub orzo, acini de pepe, or even alphabet pasta. But do not sub regular couscous. You can sub 1 tablespoon of dried parsley for fresh.