chopped salad

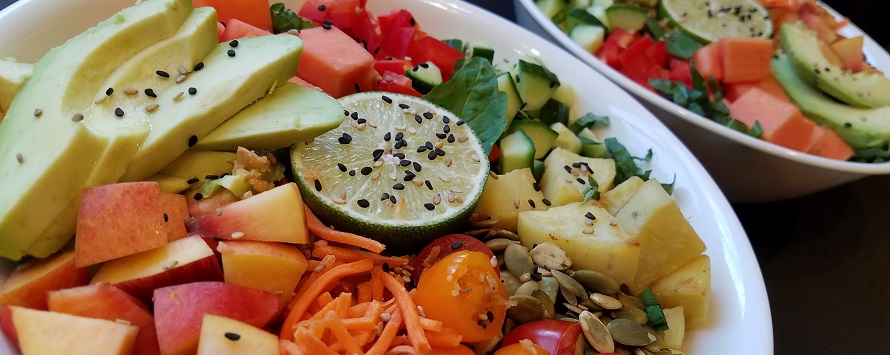
More than ever I need this beautiful chopped salad in my life. The weather in Ohio has been pretty gloomy the past couple of weeks. Even now, it’s raining as I type this, which sadly isn’t all that unusual. Don’t get me wrong, the sun has made an appearance, but like the rest of us, it seems to be social distancing – which it does often in Ohio!

It’s comforting to me at times of uncertainty and stress to cook and bake. That coupled with the grey and rainy days has me in the kitchen a lot. To take a break from making yet another banana bread, and make my life a little more colorful and definitely healthier, I made a big beautiful chopped salad. A really big salad, a layered chopped salad to help keep me on track and bring a smile to my face. A salad with big flavors that’s loaded with antioxidants, filled with vitamins and minerals, not to mention beautiful color and a variety of textures. The best part, you probably have many of these ingredients in your pantry and in the fridge. If you don’t, you can use what you have.

I like to think of this big beautiful chopped salad as “THE big salad” the one Elaine ordered from Tom’s diner. You know the one I mean right? The one from Seinfeld. I always loved that episode and like Elaine, you probably know by now how much I love a big salad! Remember the rainbow salad with citrus dressing of my dreams? This is a very different salad, but a rainbow nevertheless and everyone should eat the rainbow!

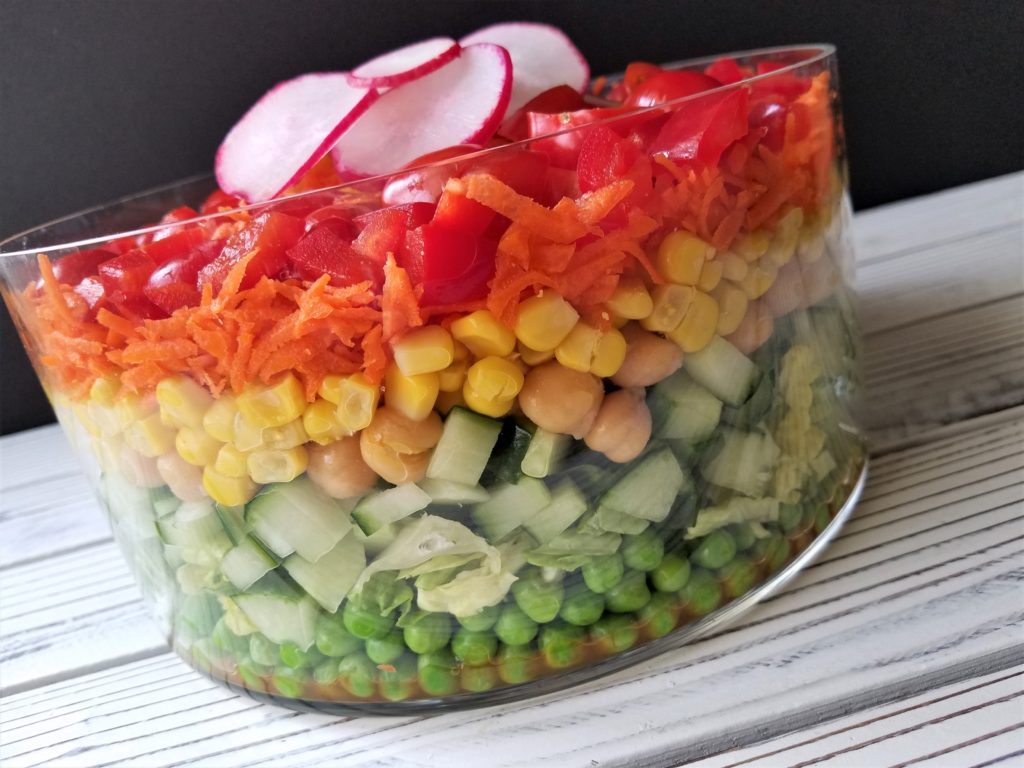
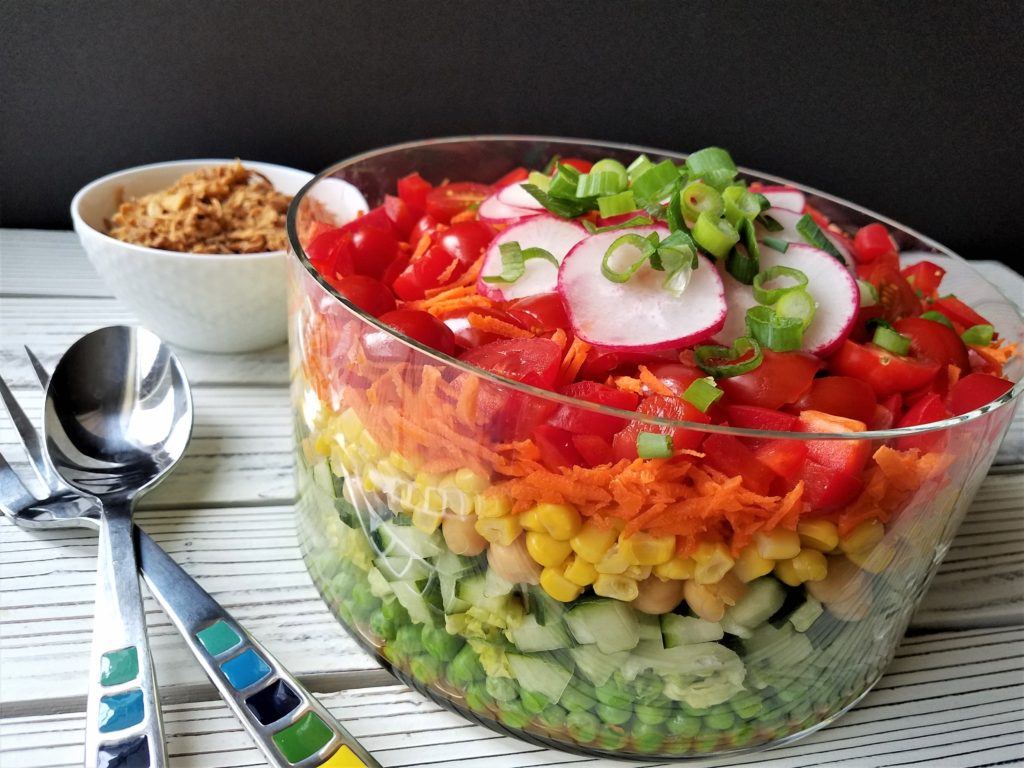
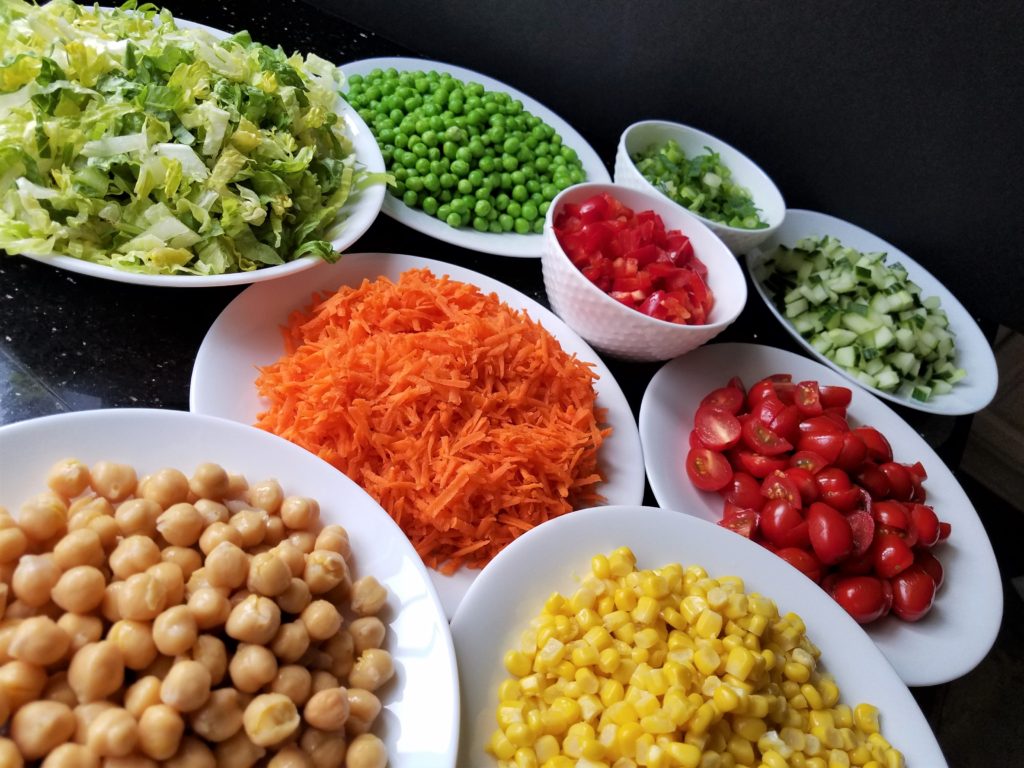
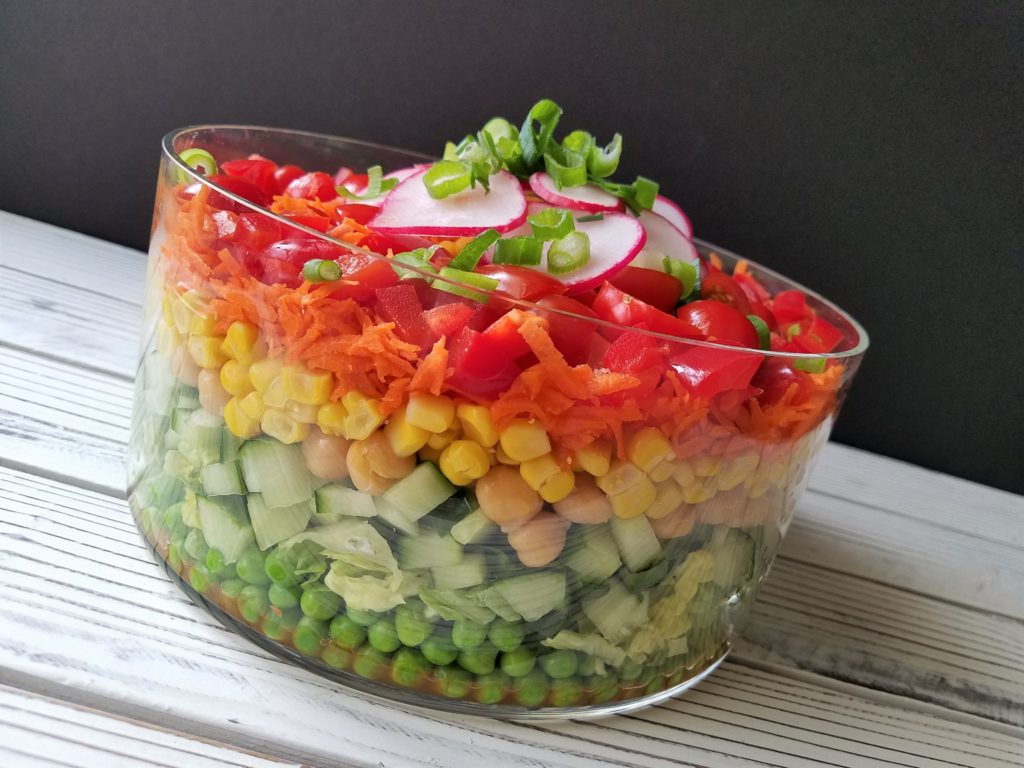
Is it a Jewish salad? No, not in the sense that my bubbie (jewish grandmother) made it, but I have adapted it from Susie Fishbein’s cookbook Kosher by Design. While this is pretty close to Susie’s original I changed it up using the things I like and had on hand, omitting those I don’t. I also used my favorite dressing. I don’t like cabbage so no purple in my salad. I’m not an iceberg fan so in goes the romaine. I love teardrop tomatoes so I used those but you can use whatever you like. No chickpeas, substitute another bean – no red pepper, use a jar of roasted. Just be mindful of your color combinations as you layer the ingredients into the bowl. Speaking of bowls, it looks really pretty in a trifle bowl or other straight glass bowl like I have used, but a regular glass bowl will work just fine.

I hope this salad brings a lot of color and joy to your table. It’s something you’ll want to share with family and friends – hopefully very soon. Until then, you can make 1/2 of it, or better yet, make the whole thing so you’ll have leftovers for lunch the next day, or two, or three! With everyone working from home, this is a nice thing to have in the fridge. Enjoy!

salad ingredients (makes 8 to 10 servings but can easily be cut in half)
1 head Romaine lettuce shredded
1 – 16 ounce bag petite frozen peas defrosted
1 English cucumber seeds removed and diced
1 – 15 ounce can chickpeas (or other bean)
1 – 15 ounce can of corn (I used no salt added)
2 large carrots shredded* (2 cups)
2 cups teardrop tomatoes
1 red pepper diced
1 bunch scallions
3 to 4 sliced radishes
optional but highly recommended: fried onions or toasted sunflower seeds
dressing
½ cup ketchup (I like Heinz)
1/3 cup Hellman’s mayonnaise (you could sub the light mayo)
¼ cup apple cider vinegar
1 tablespoon pure maple syrup (or honey)
1 teaspoon no salt seasoning

directions
First make the dressing. Mix together the mayo, ketchup, cider vinegar, maple syrup and seasonings. Place in a container and put into the fridge.

For the salad you can use a trifle bowl, or any other glass bowl so you can see the layers. Prep all of your ingredients first. Defrost the peas, Open the can of corn and drain in a strainer. Do the same with the chickpeas.

On the bottom of your glass bowl pour the peas in an even layer. Next add a layer of the romaine. Then add a layer of the cucumber, followed by the chickpeas, corn, then carrots, the tomatoes, the red peppers and top with the sliced radishes and sprinkle with 3 of the scallions. Reserve the rest to put on the side.

Serve toasted sunflower seeds, fried onions, and the reserved sliced scallions on the side.

*I prefer to hand grate the carrots but you could definitely use a bag of shredded carrots.

Brownie Biscotti

SONY DSC

My oldest son came home from college on Friday and I had anticipated baking for his arrival. I like everything to be fresh baked; I’m not a bake and freeze it kind of girl. Sometimes that doesn’t always work out in my favor. With baseball season still going on, I was very limited in time for baking so I ended up picking up some of his favorite ice cream to say welcome home! He didn’t mind and we planned to bake together over the weekend.

Last night I made a plan before I went to sleep so that this morning I could bake early and so that I would have time to exercise and then get on with the day. I woke up and baked 2 banana breads (check out that recipe on my site) which came out delicious, but then felt like I needed something chocolate. Originally I was going to make my mother’s mandel brodt (Jewish biscotti) recipe which he loves but I wanted to try something new. I came across this recipe a couple of weeks ago in Susie Fishbein’s cookbook Kosher by Design Teens and 20-Somethings. If you haven’t read any of her cookbooks, you must. Whether you keep kosher or not, they are absolutely beautiful and her recipes are easy, and always a crowd pleaser. I just ordered her book entitled Cooking Coach and can’t wait till it arrives! I have a girlfriend that cooks a lot of her recipes and I’m lucky enough to enjoy them when she does! Anyway, her title was chocolate chocolate chip sticks. She said they are a cross between a brownie and biscotti. My son described it by saying the outside was like a biscotti and the inside like a brownie, pretty much a win-win!. Since I changed some ingredients, I also changed the name.

SONY DSC

I renamed it (of course!) with what it tasted like to us and added my own splash to it with vanilla extract, espresso powder and by sprinkling it with coarse sanding sugar to give it a sparkle and crunch! I have to tell you, they are amazing. However, I wish I had used white chips and added walnuts or even almonds to it, I think they would have enhanced the cookie (if that’s even possible!). I needed two hands for this dough and couldn’t photograph the process. However, I will definitely make them again so will plan ahead for that and since my son is home recruit him as photographer.

I will say that shaping the logs was a little difficult but I came up with a good way to do it. In the book it says to use parchment paper but I found that didn’t work for me. When I make my mother’s mandel bread, I use plastic wrap to mold the dough into logs. That worked very well here too. It’s very crumbly, so heads up on that. But very much worth the effort so don’t let that stop you. Enjoy!

Preheat oven to 350 degrees. Line a cookie sheet with parchment paper and set aside.

1  1/2 cups all-purpose flour
3/4 cup Dutch processed cocoa*
1 teaspoon baking soda
1/2 teaspoon fine sea salt (I used pink Himalayan sea salt)
3/4 cup canola oil (I used light olive oil)
1/2 cup sugar
1/2 cup firmly packed light brown sugar (I used dark brown)
1 extra large egg
1 teaspoon vanilla extract
1 teaspoon instant coffee
1/2 cup white chocolate chips, or semi-sweet (or combination)
1/2 cup chopped walnuts (optional)

In a medium bowl, mix the first four ingredients with a whisk.

In a larger mixing bowl, mix the oil, sugars, instant coffee and egg very well. Add the vanilla extract and incorporate.

Mix the dry ingredients into the wet 1/2 at a time. Add the chocolate chips and or nuts. The dough was very crumbly. Susie Fishbein says to knead the dough at this point but I found it difficult to do. At this point I put on rubber gloves and started mixing it by hand. When I was able to get it to hold somewhat of a shape, I split it into two.

I put out plastic wrap on the counter and transferred half the dough on top. I formed a log about 2 to 3 inches wide by about 8 inches in length. I then transferred it to the cookie sheet by sliding it off the plastic wrap. Some of the pieces crumbled off so I pushed them back together. Leave at least 2 to 3 inches between the loaves as they spread.

Bake for 25 minutes. Remove from the oven and cool for 10 minutes. Using a serrated knife, cut into 3/4″ slices.

Yield about 24 cookies

*What’s the difference between Dutch processed cocoa and regular cocoa powder? I believe David Lebovitz explains it best. Check out his blog:

http://www.davidlebovitz.com/2010/02/cocoa-powder-faq-dutch-process-v/

SONY DSC

SONY DSC