Key lime pie for Pi day

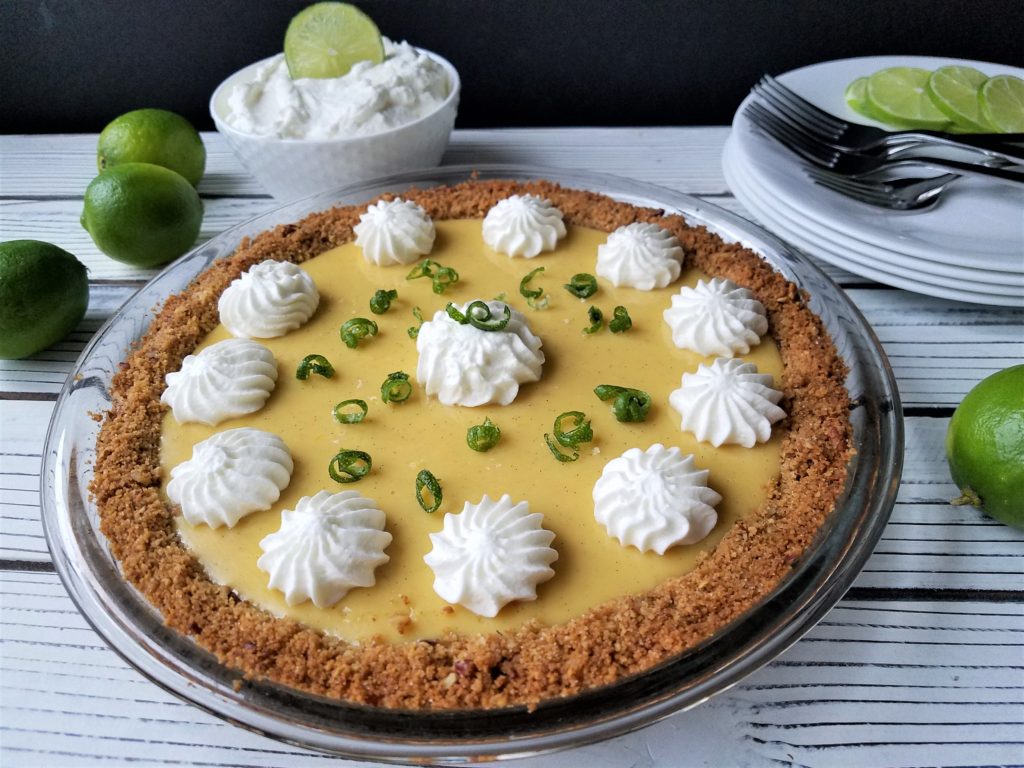
Today I made key lime pie for Pi Day! I felt like I needed a little Florida sunshine to brighten the very snowy day here in Ohio so I baked one of my favorites. It’s also one of the easiest with only 8 ingredients total and takes less than 1 hour start to finish plus time to chill in the fridge. The pie is tangy but sweet, simple but has complex flavor, and it’s smooth and creamy on the inside, but has a crunchy and nutty crust. This pie has it all!
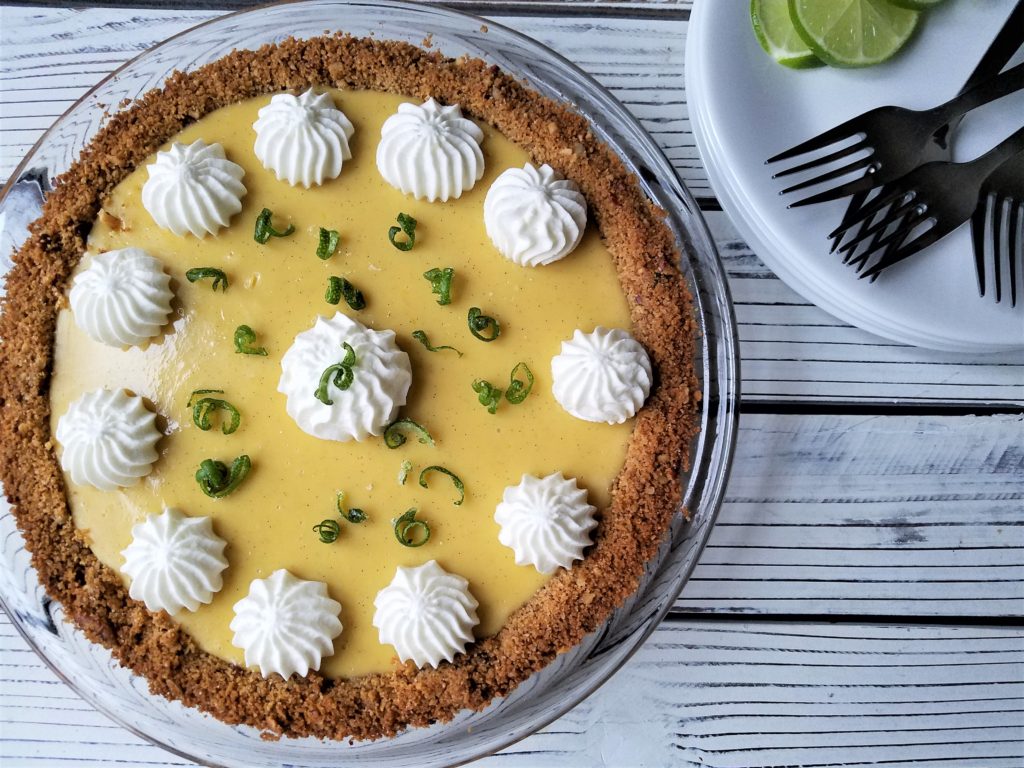
If you read my bio, you know I lived in Florida when I was a kid, so there was plenty of key lime pie! The first time I had it was on a trip to The Florida Keys http://www.thefloridakeys.com/ In the Keys (aka the Florida Keys, aka Key West) they take their key lime pie very seriously – almost as seriously as their rum runners! Every restaurant has their own version. Some have frozen key lime pie or key lime pie pops dipped in chocolate, key lime pie mousse, and of course traditional key lime pie which is piled high with meringue or topped with whipped cream. The debate of the topping is a whole different topic almost as much as the debate over where the pie originated https://www.southernliving.com/news/key-lime-pie-history  
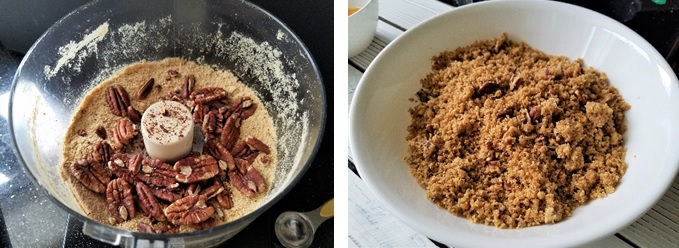
graham cracker pie crust

I have been making key lime pie ever since that trip. Even though key limes are pretty easy to find in most groceries in Florida, not everyone lives in Florida. I have always relied on the famous Nellie and Joe’s key lime juice, it’s terrific and easy to find in most groceries. If you can’t find it, you can use limes, but it won’t taste exactly the same. For many years, I made the recipe that’s on the back of the bottle, and it’s a really good recipe.
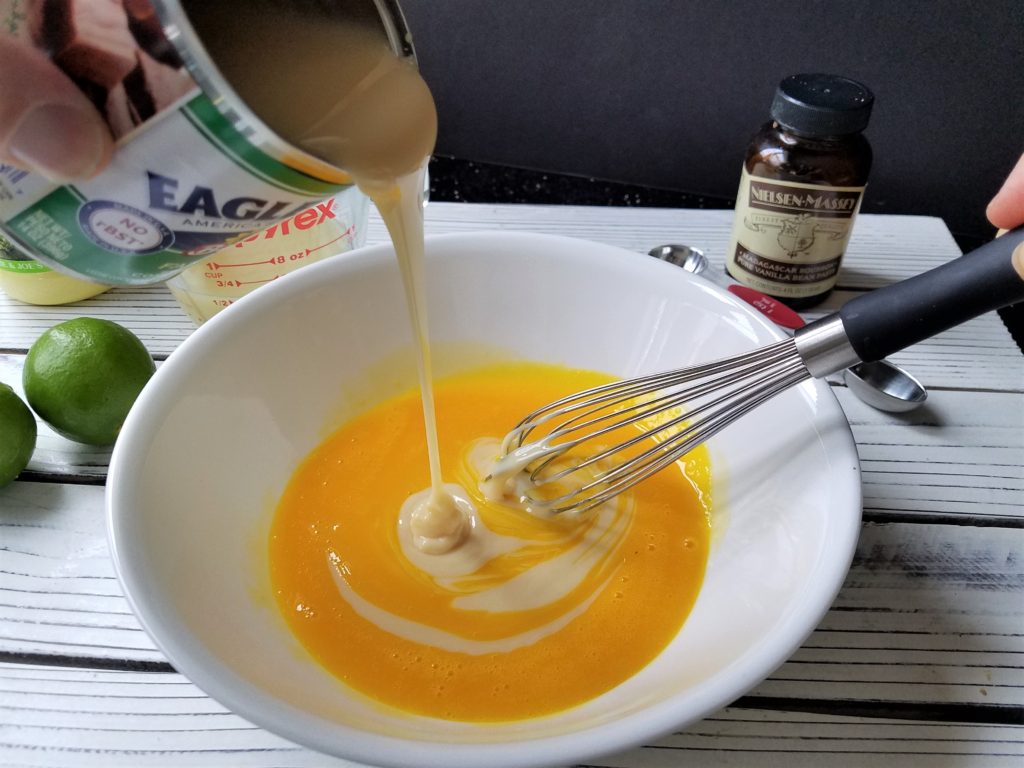
My new recipe is adapted from Nellie and Joe’s and not as traditional because of the nuts in the crust and vanilla in the filling. I wanted to lighten it up so I tried using low fat condensed milk. It worked great and you couldn’t tell a difference so why not cut the calories where you can? I also added a splash of vanilla paste which compliments the lime and mellows it a bit which I like a lot. Then I added roasted pecans to the crust and it was just what it needed. Finally I topped it with homemade creamy and delicious almond scented whipped cream. The result – perfection.
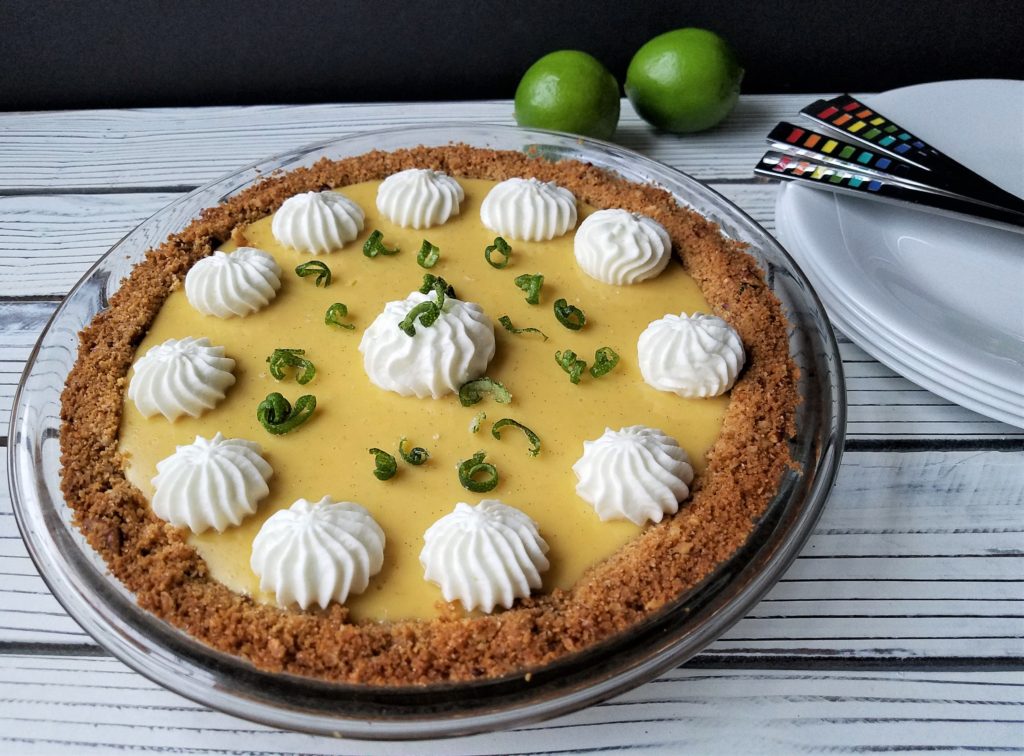
I have a real soft spot in my heart for this pie because while my husband and I were dating, instead of cake for his birthday I baked him this pie and that night he asked me to marry him! So all you single ladies out there, get baking, this pie (aka engagement pie, aka will you marry me pie) could just do the trick! Happy Pi Day everyone and as always… Enjoy!

filling
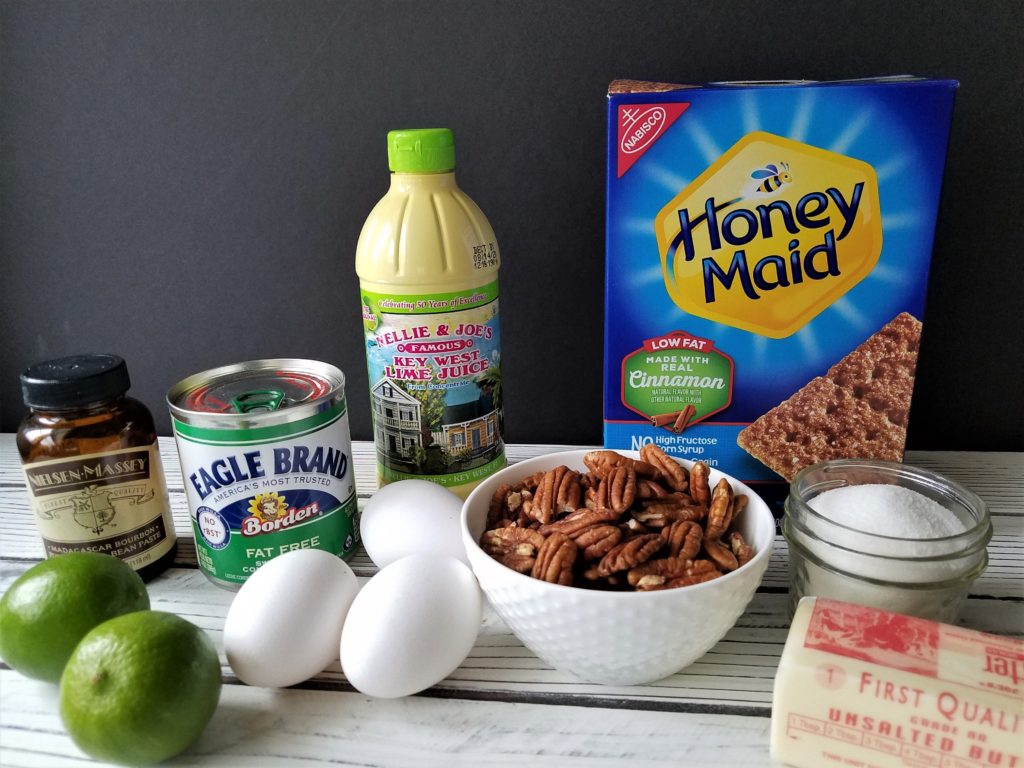
½ cup plus 2 tablespoons Nellie and Joe’s Key lime juice* (or juice from fresh key limes)
1 can low-fat sweetened condensed milk
4 egg yolks
1 teaspoon vanilla paste (or you can use extract)

crust
I package Graham crackers (approx. 8 or 9 full sheets)
1 cup roasted unsalted pecans
1/3 cup unsalted butter melted
2 tablespoons sugar

whipped cream
1 cup whipping cream
3 tablespoons confectioners’ sugar
1/2 teaspoon almond extract.

Position the oven rack into the center of the oven and preheat the oven to 350 degrees. Recipe makes 1 – 9″ pie and serves 8 to 10

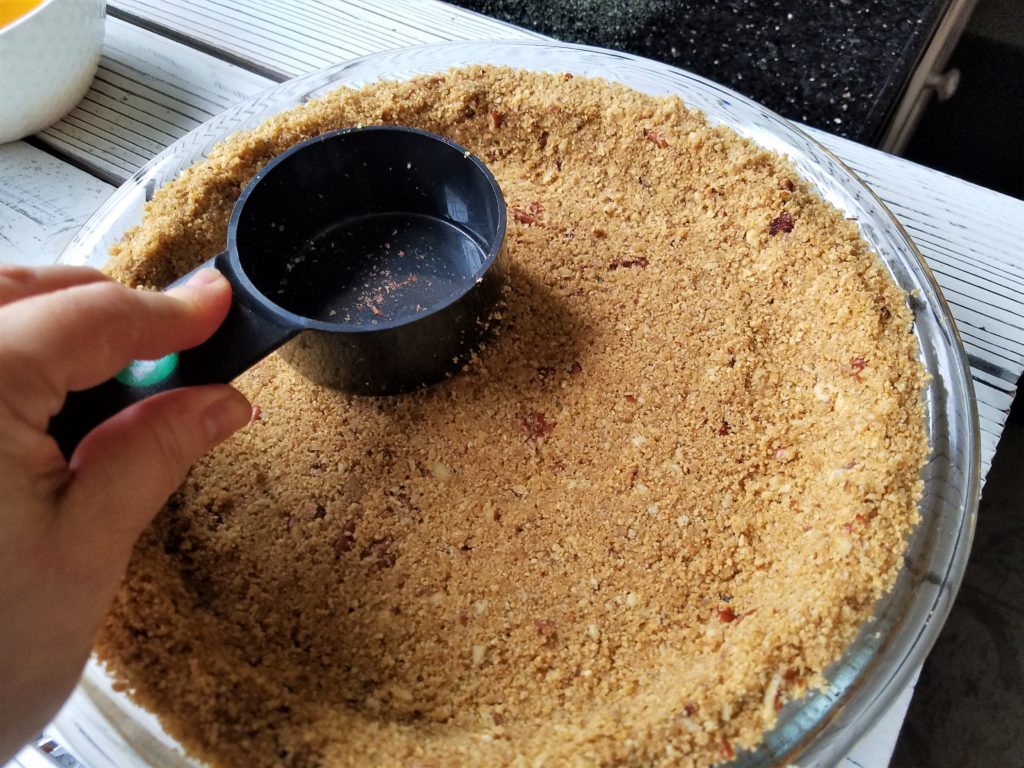
Start with the pie crust. In food processor pulse grahams until sandy in texture. If you don’t have a food processor, place cookies in a Ziploc bag and crush with a rolling pin. Add pecans, sugar and butter pulse just till blended. It’s okay to have pieces of pecan – that’s what we want. Press the mixture firmly into a 9″ pie pan and bake 10 minutes on 350 degrees.

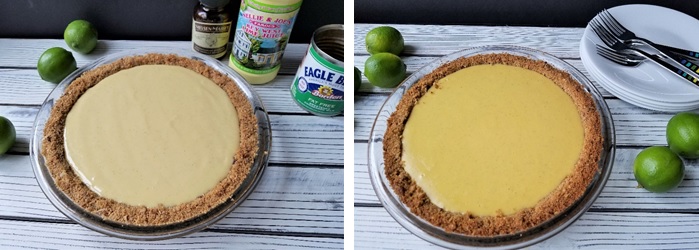
While that’s baking put together the filling. Whisk the egg yolks with condensed milk until smooth and incorporated. Add vanilla and key lime juice and whisk until smooth. Pour into the cooled baked crust. Place the pie in the oven and bake 15 minutes on 350. Let the pie cool about 30 minutes on the counter, then refrigerate at least 2 to 3 hours. Top with whipped cream.

To make the whipped cream: in a tall cold bowl add whipping cream, confectioners’ sugar and almond extract. Using a hand held mixer, whip until stiff peaks form. This happens very quickly so be careful not to over whip, you’ll have butter. You could also use a large whisk and do it by hand if you don’t have a mixer. Put the whipped cream on after it cools.

*if you can’t find key lime juice, go ahead and use limes. It won’t taste exactly the same, but will still be good.
triple chocolate hamantashen

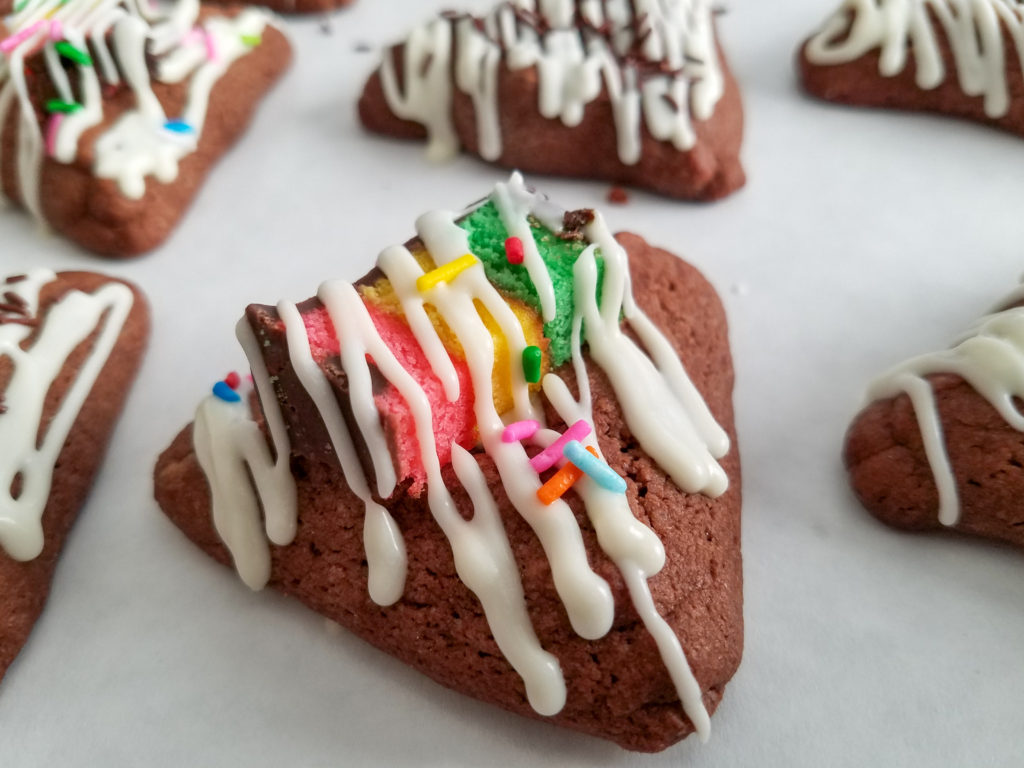
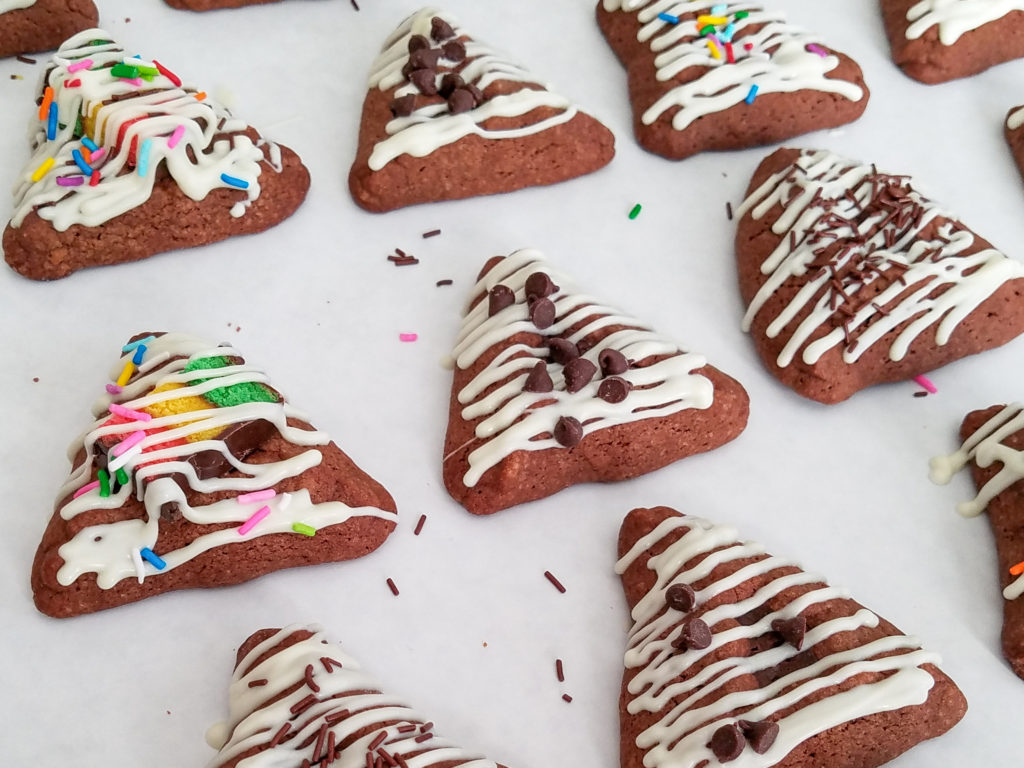
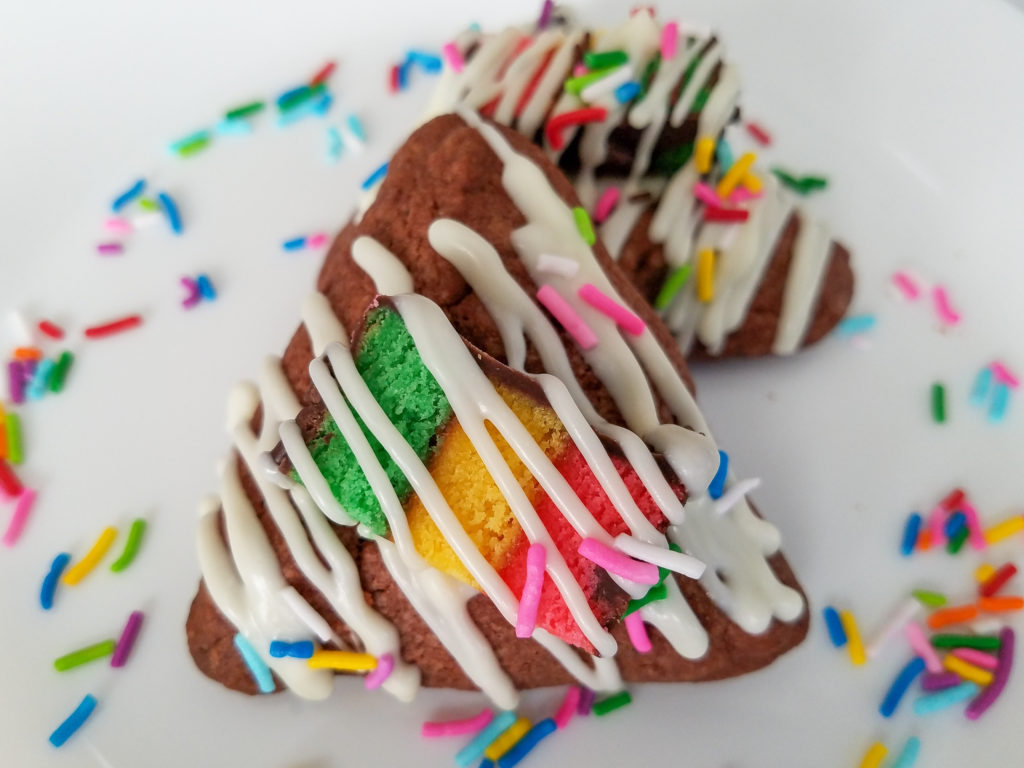
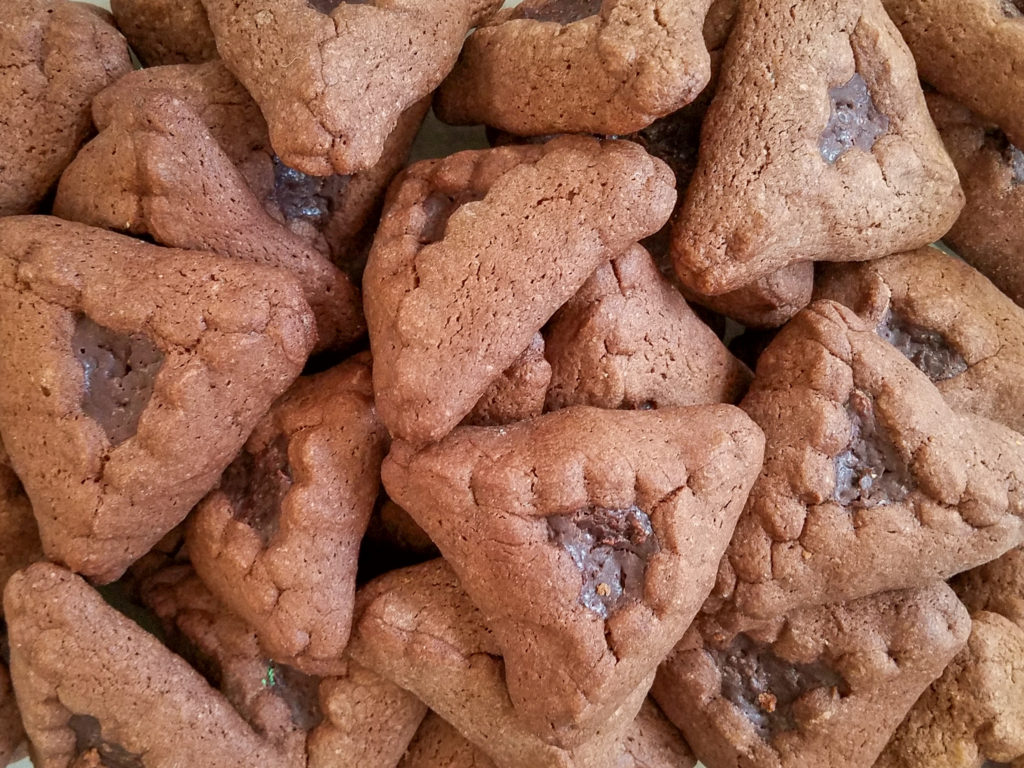
My triple chocolate hamantashen are all dressed up and ready for Purim! They are one of my most requested recipes and with good reason. It’s chocolate – on chocolate – on chocolate!!!!!!!!!! The chocolate dough is rolled out and filled with a rich chocolate ganache and then as if there’s not enough chocolate, I give them a drizzle of white chocolate which puts them over the top!

Usually when I decorate them I scatter mini chocolate chips and colorful sprinkles over the white chocolate. This year I tried something outrageous and topped a few of them with a piece of a rainbow cookie and then I drizzled them with white chocolate. They turned out AMAZING and are definitely ready for the Purim party!

They are so rich and chocolatey, super easy, and I like that it makes a small batch of 2 dozen – however, they are so good, I always end up doubling it! I have adapted the recipe from one I found on My Jewish Learning’s website and it was created by Victoria Sutton. For more Purim info go to https://www.myjewishlearning.com/article/purim-2020/ The ganache recipe is my tired and true from Ina Garten. – that’s quick, easy, and never fails.

I think I’ve kvelled (gushed over) these hamantashen enough. Now it’s time to get right to the recipe and start baking! I hope you love them as much as I do. Happy Purim & Enjoy!

ingredients
1 1/3 cups all-purpose flour
1/3 cup cocoa (I use Hershey’s Cocoa)
1 teaspoon baking powder
4 oz. unsalted butter, softened
3/4 cup granulated sugar
1 extra-large egg
1/2 teaspoon kosher salt
2-3 Tablespoons heavy cream
1 teaspoon almond extract (optional)
water to close the hamantashen

ganache filling (make ahead of time)
8 ounces good quality semisweet chocolate chips (I use Ghirardelli)
½ cup of heavy cream (half and half** will work too)
pinch of salt

toppings
white chocolate melting wafers, sprinkles, mini chocolate chips, and if you want to get crazy like me add sliced rainbow cookies, mini m&m’s or other candies

ganache
To make the ganache, place the chocolate chips, heavy cream and pinch of salt in a heat-proof bowl over a pot of simmering water. Melt the chocolate until it’s just melted and stir it until it’s smooth. Put it in a container, let it cool on the counter about 15 minutes, then cover and put in the fridge. This should be made at least 2 to 4 hours before you plan to bake so it can harden. It can also be done a day ahead of time. If you are rushed for time, pour it into a shallow dish, it will set quicker.

dough
Prepare two cookie sheets with parchment paper and set aside until ready to bake. Sift together flour, cocoa powder, baking powder, and salt and set aside. Don’t skip the sifting. With a spoon, cream together butter, sugar, and almond extract until light and fluffy. Add the egg and mix until incorporated. Add flour mixture to butter mixture in two stages, alternating with the heavy cream. More or less cream might be needed depending on the consistency of the dough. You don’t want it to be too sticky, and you don’t want it to be too dry. Divide the dough in 2 pieces and turn out onto plastic wrap, and form a flattened disc. Wrap tight and chill couple of hours or overnight.

To form hamantashen: lightly flour your baking surface, roll chilled dough ¼” thick. Using a round cutter or glass rim dipped in flour, cut circles about 3 inches in diameter. Add a little less than a teaspoon of ganache in the center of the circles.

Brush water around the edge of the circle and pinch the dough in three corners to seal and make the hamantashen triangle shape. Some people like to fold in the edges to form a triangular shape, if that’s your style, go with it!

If the dough seems a little soft, place the cookie sheet in the fridge for about 10 minutes to firm up then bake. This will ensure they stay closed.

Bake hamantashen at 350 F for about 12 – 14 minutes turning the cookie sheet half way through baking. They will be a little soft but will firm up a little after it comes out of the oven. Ganache will liquefy during baking, but will set as it cools.

*I usually have half and half in my fridge so I use that and it comes out perfectly.

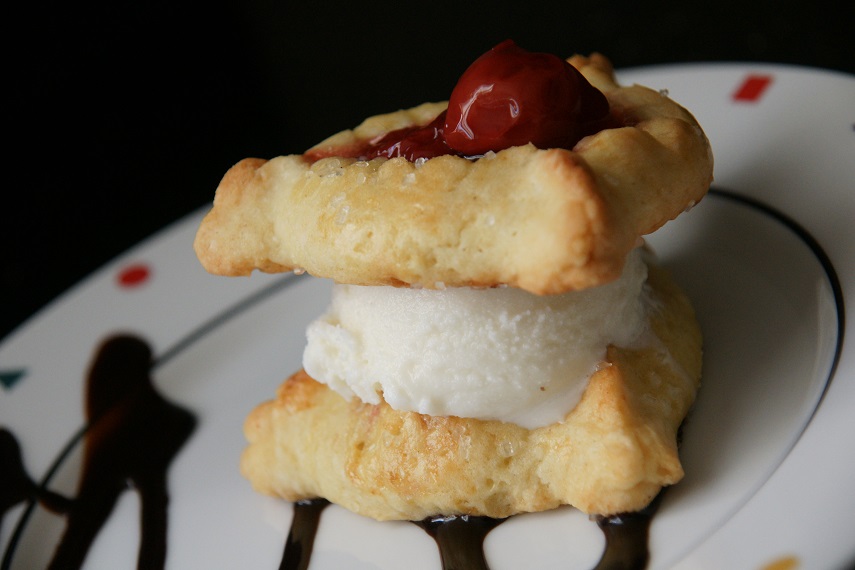
hamantashen ice cream sandwich… it’s a match!

******************THROWBACK THURSDAY***************

To when I made a hamantashen ice cream sandwich!

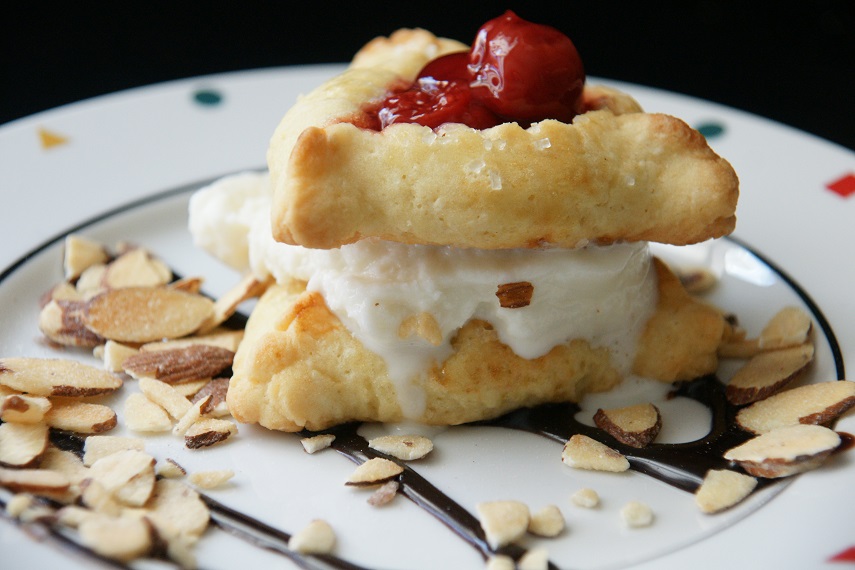
Hamantashen + Ice Cream = The most delicious Hamantashen Ice Cream Sandwich… IT’S A MATCH! Everyone calm down, I’m not a real matchmaker; I’m more of a food matchmaker. I guess I could start with a corny joke like a hamantashen and a scoop of ice cream walk into a bar, yada – yada – yada… ba dum bump! But I can feel my family start to twinge, so I’ll put my comedic career on hold for a little while.

Yes, you heard me right and oh yes I put ice cream in the middle of my hamantashen! I hear you all out there judging me, with your “Oh no you didn’t.” But, oh YES I did. I know hamantashen can be a rich cookie with it’s pie filling, and chocolate but when you stop and think about it for a minute, it really sounds good doesn’t it? We put ice cream on pie. Isn’t hamantashen just a triangular little pie? Plus, didn’t 2016 bring us the babka ice cream sandwich from Russ and Daughters? And, what about the black and white cookie ice cream sandwich I recently saw on Instagram? If you ask me, hamantashen was just waiting for its turn to be asked to the dance. Hamantashen and ice cream, let’s tango!

How did I decide to make an ice cream sandwich using hamantashen? This happy union came about after trying a new hamantashen recipe this year. On Tuesday, the hamantashen softened up a bit because of the cherry pie filling. When I ate one, something just screamed out “HEY, HOW ABOUT A LITTLE ICE CREAM WITH THAT?” See what I did there with the caps? Obviously the trick is to have the right dough and filling for it. If you read yesterday’s post, you know I have tried quite a few different recipes in my time so you can trust me on this. For example, I make a cream cheese dough which tastes similar to rugalach, ice cream would not be a good match for that.

This recipe is adapted from the 2nd Avenue Deli Cookbook. It’s a hamantashen that definitely stands alone. When it is first baked, it is crisp on the outside and tender on the inside and is absolutely delicious. On the second day, it softened a bit and in my opinion making it even better! The addition of ice cream puts it over the edge and turns it into an elegant dessert that’s so much fun for Purim. Plus, I don’t know about you  but I absolutely love anything with almonds in it, and this has a double dose. I hope you will try this with your favorite ice cream and let me know what you think!  Happy Purim everyone! Enjoy!hamantashen ice cream sandwich
The recipe makes 4 dozen cookies using a 3” round cookie cutter, or 24 ice cream sandwiches

Ingredients
3 cups all-purpose flour
2 teaspoons baking powder
1 teaspoon kosher salt
1 cup finely ground almond flour* (I used Bob’s Red Mill)
3 extra large eggs
1 cup sugar
1 stick softened unsalted butter (or margarine)
1 teaspoon vanilla extract
1 teaspoon pure almond extract
sanding sugar
egg wash**
Cherry pie filling (or other pie filling of your choice)

Good quality ice cream
Sliced almonds (I used honey toasted almonds from Trader Joes)
Chocolate or caramel sauce (optional)
Whipped cream (optional)

Directions
In a large blow, sift flour, baking powder and salt. Add the almond flour and mix well then set aside.

In another large bowl, cream sugar and butter with mixer until blended. Add eggs, vanilla, and almond extract and mix well. Add the almond and flour mixture to the wet ingredients and mix just until the dough forms a ball and pulls away from the sides. If the dough is sticky, turn it out onto a lightly floured surface and knead the dough until it no longer sticks to your fingers. I did not do this step; I found the dough fine and then wrapped it in plastic wrap and put it in the fridge overnight. The original recipe says you can bake it without refrigerating first.

When you are ready to bake, position the racks to the upper and lower 1/3 of the oven. Preheat the oven to 375 degrees. Line cookie sheets with parchment paper and set aside.

Roll the dough to a thickness of about 3/16”. My trick is to use paint sticks you get at the hardware store. I cover them with plastic wrap and use them as guides. I like that better than the rings you can put on your rolling pin. Using a 3” round cookie cutter, cut circles of dough and place them on the cookie sheets.

When all of the dough has been cut place about 1 ½ teaspoon of filling in the center of the circle. Brush the perimeter with the egg wash or a little water. Now you can either use the pinch method as I do and pinch 3 corners together, or use the folding method where you flap one side, then the next two till you form a triangle.

Brush the tops of the cookies with the egg wash. I sprinkled mine with some sanding sugar for that extra sparkle and crunch. Bake the hamantashen for 18 to 20 minutes (checking after 15) or until the cookies are golden brown. To ensure even browning, rotate the pans top to bottom and front to back. When done, remove from the oven and let them rest for 2 to 3 minutes on the cookie sheet then remove to a wire rack.

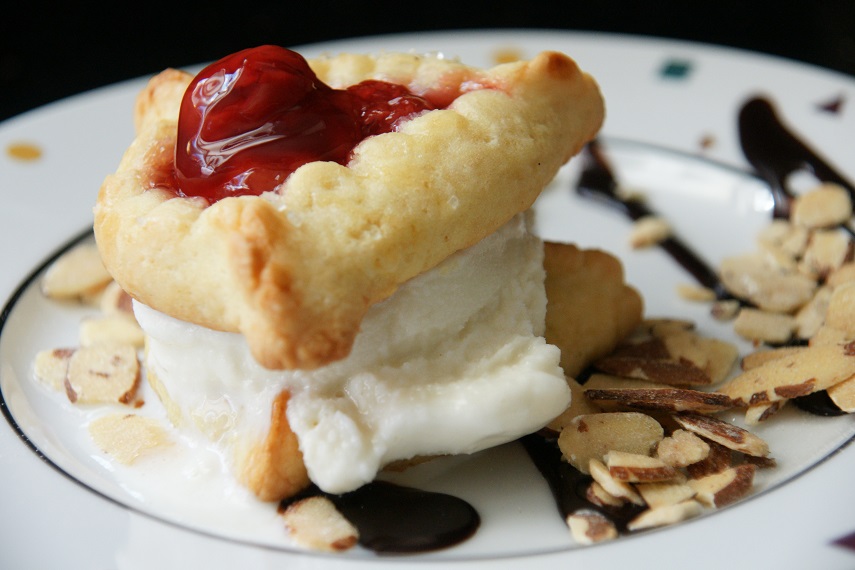
Now to make the match… Place one hamantashen bottom side down, add a scoop of ice cream of your choice, top with another hamantashen top side up so you can see the beautiful topping and eat it carefully. Of course you can place it bottom side up as well – make it your own. It’s so yummy it won’t last long! If you want to plate it, dress up the plate with some chocolate sauce, maybe some whipped cream, and almonds. However you choose to eat it, it’s a match made in heaven!

* I used Bob’s Red Mill Almond Flour which I found in my local grocery. King Arthur makes a great one as well which you can purchase online. You can also make almond flour in a food processor, here is a how to link.

**For the egg wash I use the whole egg and put in a pinch of salt, a pinch of sugar, and a splash of water.

sweet potato challah – vegan, delicious, and super easy!

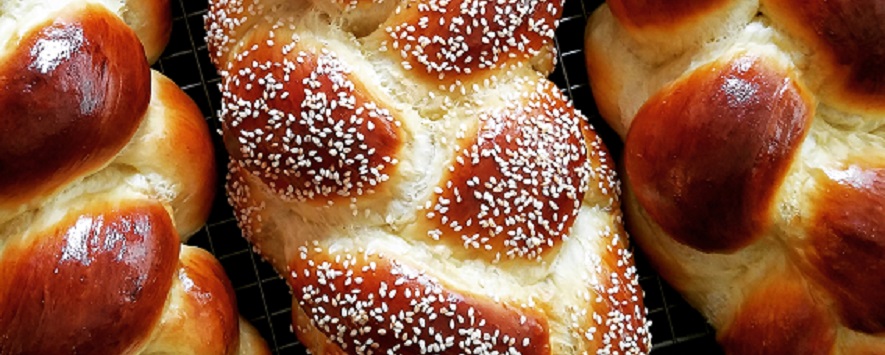
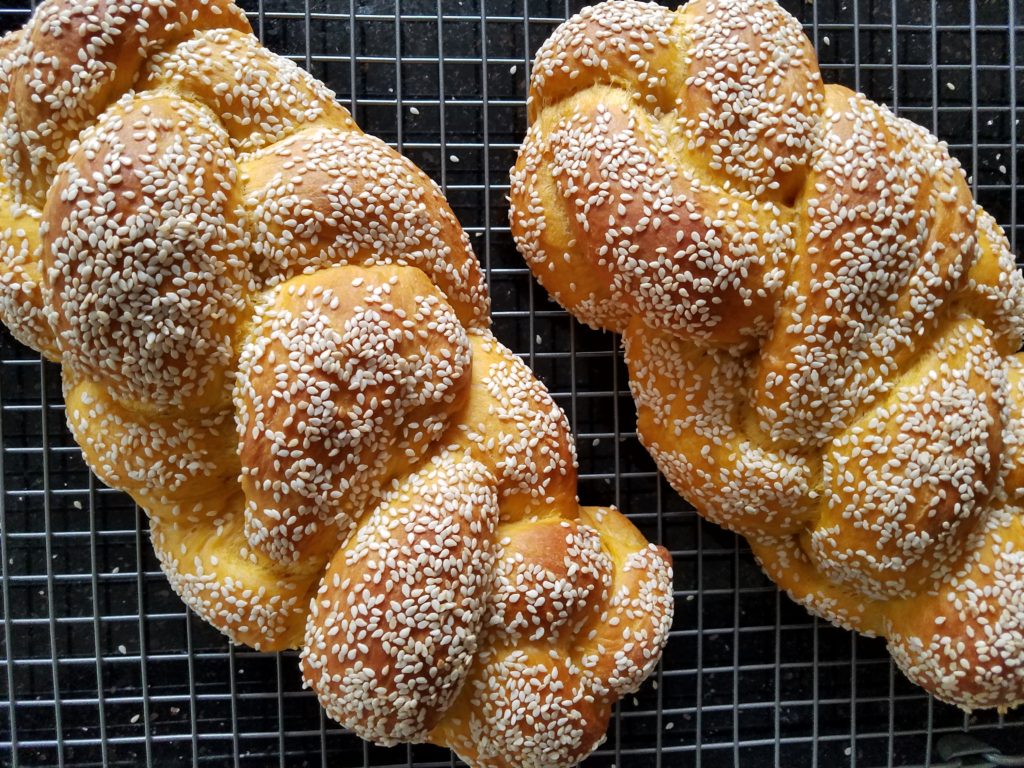
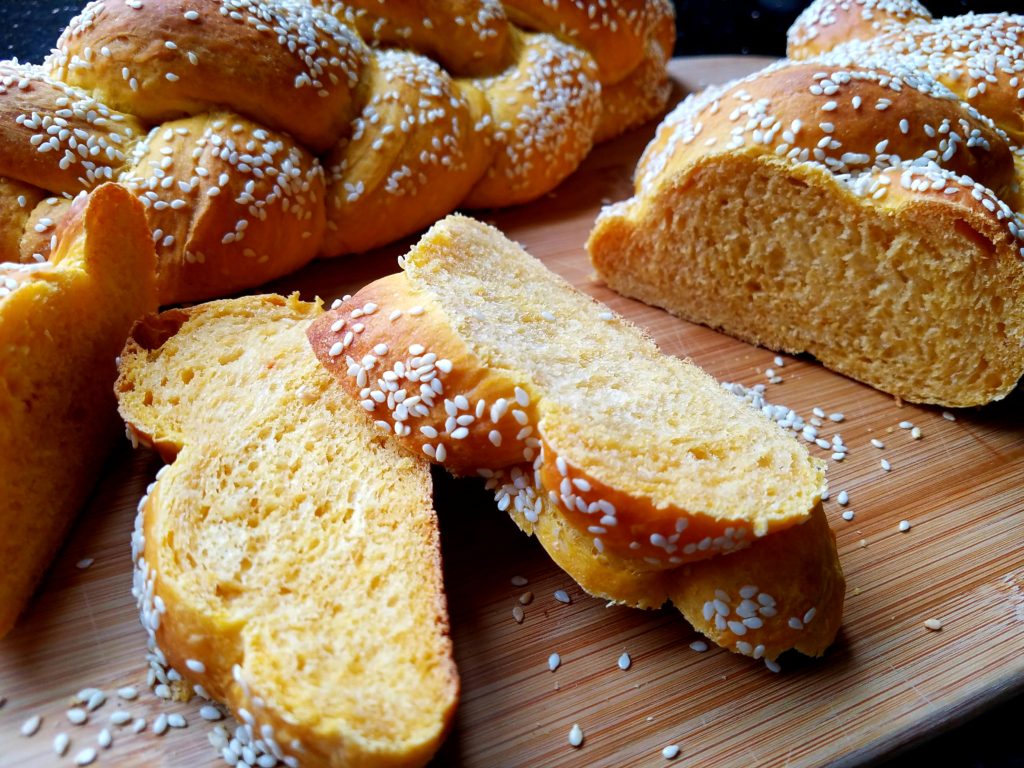
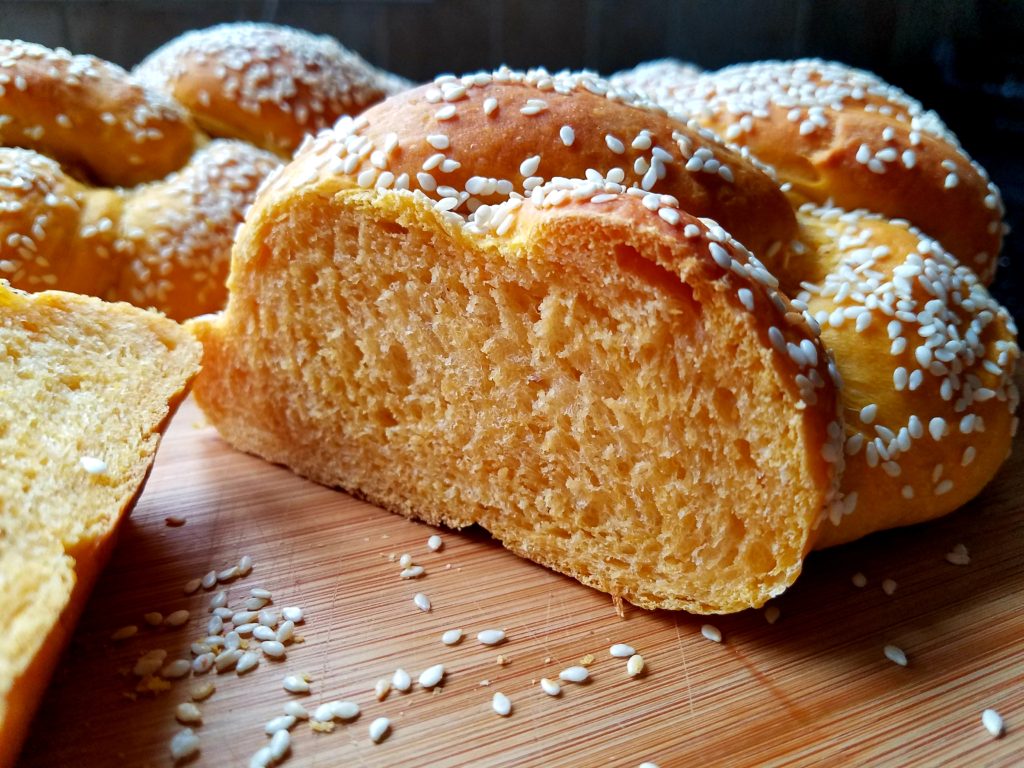
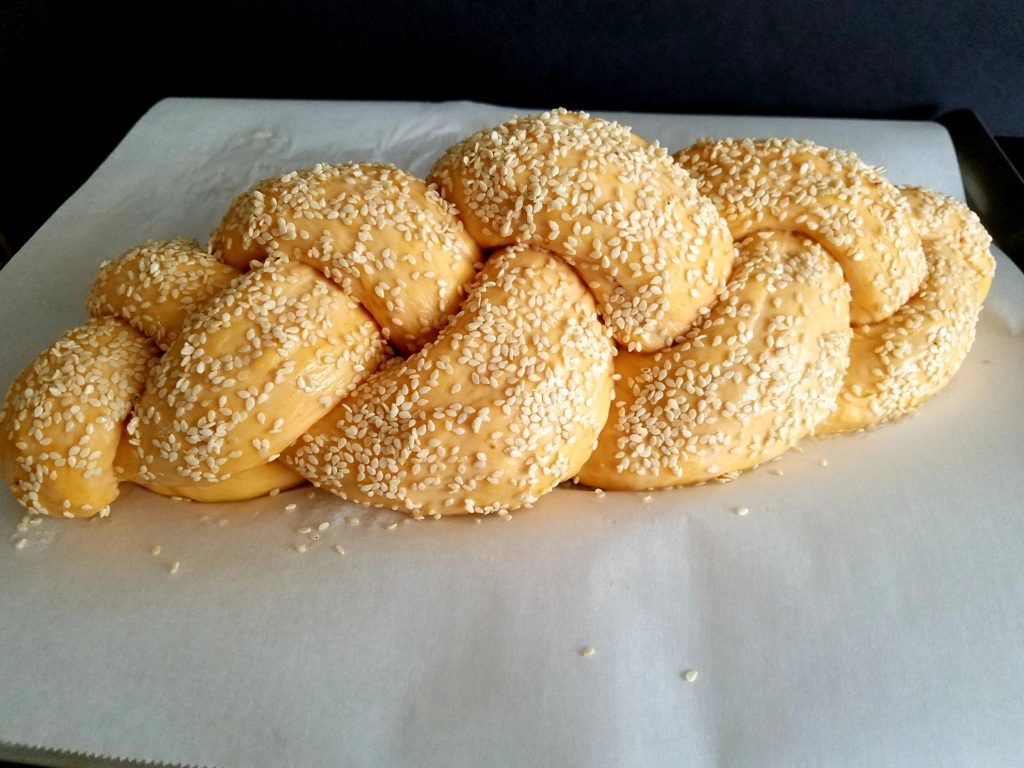
A couple of weeks ago I made a sweet potato challah that’s vegan, delicious and super easy! It came out totally amazing – not to mention pretty to look at! By now, you must know how much I love to bake, photograph, and of course eat challah – it’s my own personal trifecta. It came out so good, I couldn’t wait to make two more the very next day. The reason I made a vegan sweet potato challah to begin with was for a friend who just had a baby. She is a vegetarian and also doesn’t eat white sugar, her husband is vegan (so no eggs or honey for him). No sugar, no eggs, no honey – challenge accepted!

There are a few vegan challah recipes out there, but none seemed right to me. Plus, I knew I didn’t want it to taste or look like white bread. I really wanted it to have a good challah flavor, good chew, and a nice color. I remembered making a vegan sweet potato challah when I was in Israel with a wonderful baker named Rina, https://www.rinabarina.com/. It was a lovely golden color, a little sweet, had nice body, and was really delicious.

I tried using her recipe but I got all tangled up converting grams to ounces and was afraid if I didn’t do it right it would be a total loss. Instead I used a recipe I created last year for a local challah bake. It’s a simple and easy dough so starting with it made sense. I’ll have to share that one too another time. After a couple of tries, it was perfect!

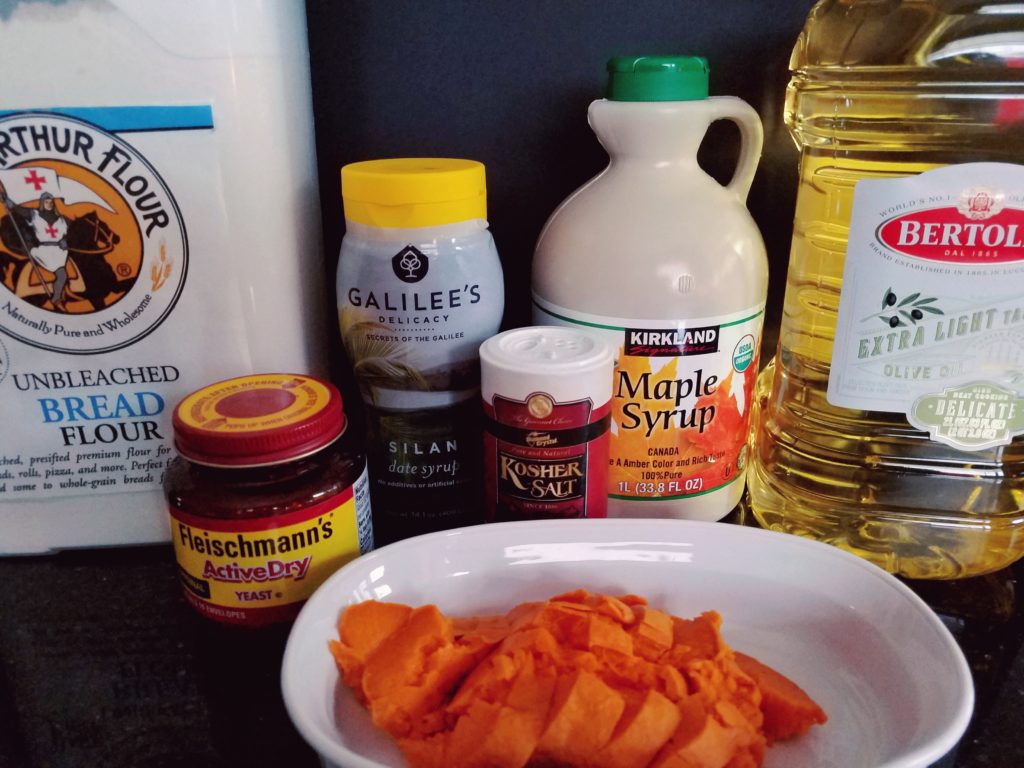
Since I had to replace the sugar, I decided to use a combination of date syrup which is also known as silan and maple syrup for additional sweetness. Silan is made from dates and is rich and thick like molasses. It has a deep caramel and brown sugar flavor. On a side note, it is delicious mixed in coffee and drizzled over ice cream! It’s also loaded with so much natural goodness it deserves its own post and I will definitely get to work on that for a later date (get it? Later DATE!).

The flavor of the sweet potato is subtle but definitely a bonus. Not only does it add a beautiful golden color, it also adds some sweetness, and great nutrients. You’ll be surprised to find you don’t miss the eggs, sugar, or honey at all. What I’ve created is a really easy challah recipe with quick rise times. It’s nice to change things up a little on Friday night every now and then so try my vegan sweet potato challah and you’ll thank me! Oooh, I wonder how it would taste as French toast the next day, which I know is the opposite of vegan but a girl can dream! Enjoy!

ingredients
3 ½ to 4 cups bread flour (I use King Arthur)
2 ½ teaspoons salt
¾ cup cooked and pureed sweet potato (roasted ahead/instructions below)
1 cup warm water
1 tablespoon active dry yeast
¼ cup extra light olive oil
¼ cup Silan* (date syrup)
1/8 cup real maple syrup plus ½ teaspoon to add to yeast
sesame seeds (optional)

vegan “egg wash” for the top of the bread
2 tablespoons nondairy milk (I used almond milk)
1 teaspoon maple syrup
½ teaspoon olive oil
Pinch of salt

a couple of quick tips
Before measuring the date and maple syrup, spray the measuring cup with oil, the syrup will slide right out. This recipe makes one 2 pound challah or two 1 pound challahs. If you can, use a scale to weigh the dough so the strands are all about the same size. This is more a secret than a tip,0 but I like to take a little dough off as a baker’s treat and make a little challah roll for myself!

how to roast a sweet potato
Roast your sweet potato the day before, or a couple hours before you decide to make the challah so it has plenty of time to cool. Preheat oven to 425 degrees (a toaster oven works well too). Line a baking tray with aluminum foil. Wash and scrub the potato, poke it with a few holes and wrap in foil. Place on the tray and bake for 1 to 1 ½ hours depending on the size. It’s done when a fork pierces through easily. While you’re at it, roast a couple extra and save for a delicious snack or side dish. They keep well in the fridge for at least 3 to 4 days.

and now for the challah
In a 2 cup measuring cup (or bowl) add 1 cup warm water, yeast plus a ½ teaspoon of maple syrup and stir. Wait about 5 minutes or until the yeast starts to bloom (this is when it foams up).

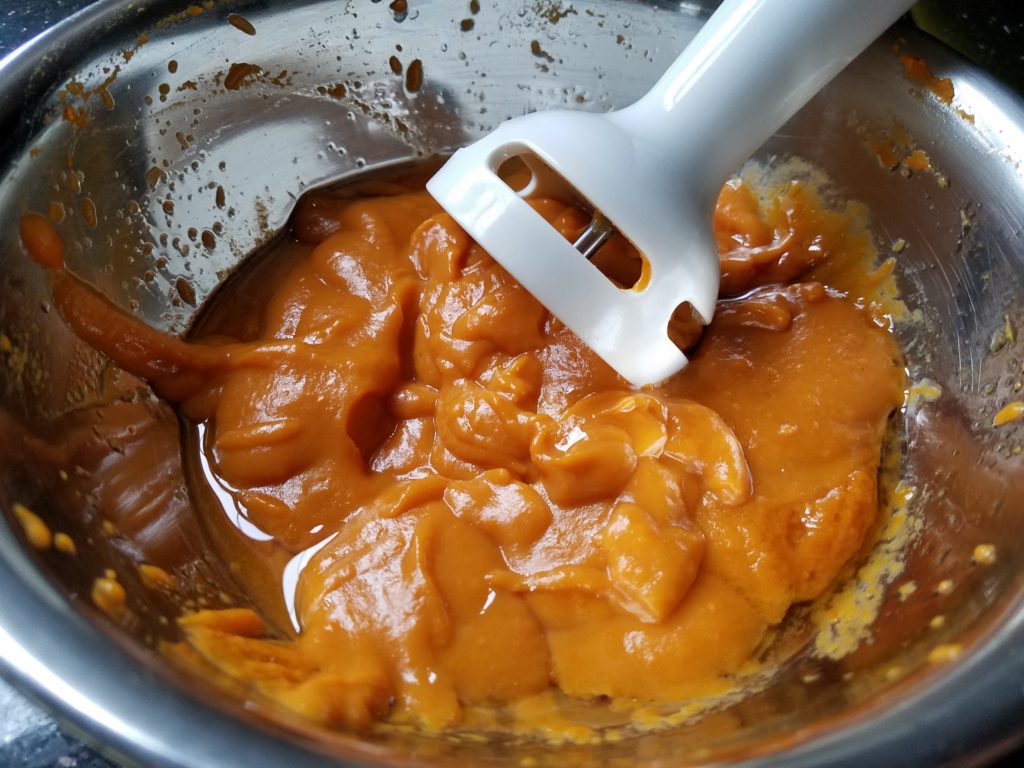
In a large 5 quart bowl add 3 ½ cups flour and salt and whisk together. In a medium size bowl stir together the pureed sweet potato, oil, date syrup and maple syrup. Once the yeast has bloomed, add it to the sweet potato mixture.

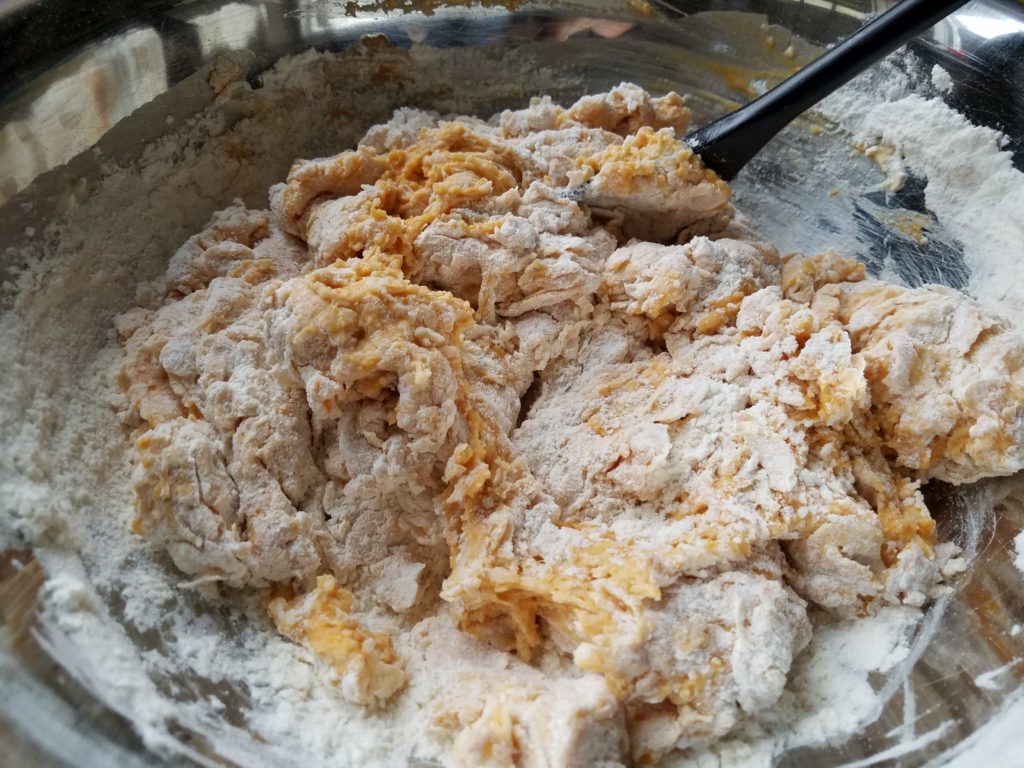
Make a well in the center of the flour and pour in the wet ingredients. You can use a mixer with a dough hook but I like to mix it by hand. Mix together with a spoon when it becomes too difficult to mix, use your hands and then start to knead the dough.

I knead it right in the bowl, or you can turn it out onto a lightly floured counter. Knead for about 5 minutes until the dough comes together and pulls away from the sides. If the dough is too wet, add more flour a tablespoon at a time until it comes together into a smooth ball. It should be soft but not sticky.

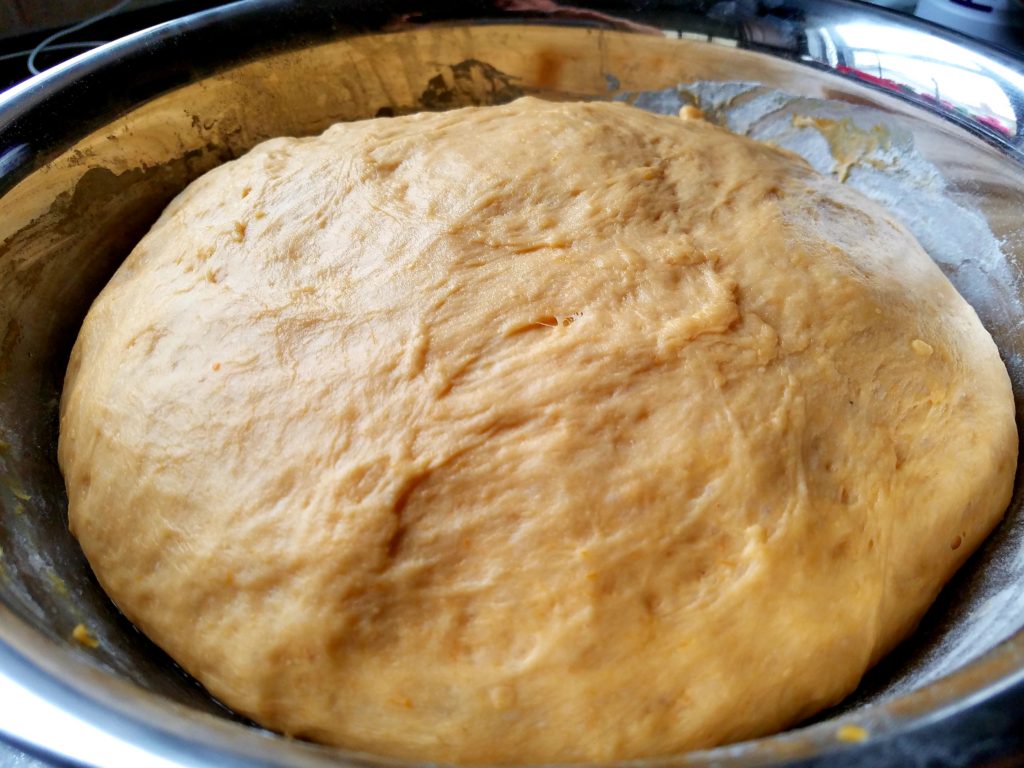
Add a little oil around the sides of the bowl and roll the dough ball around in it, cover with plastic wrap, and let the dough rise for at least one hour or until doubled in size.

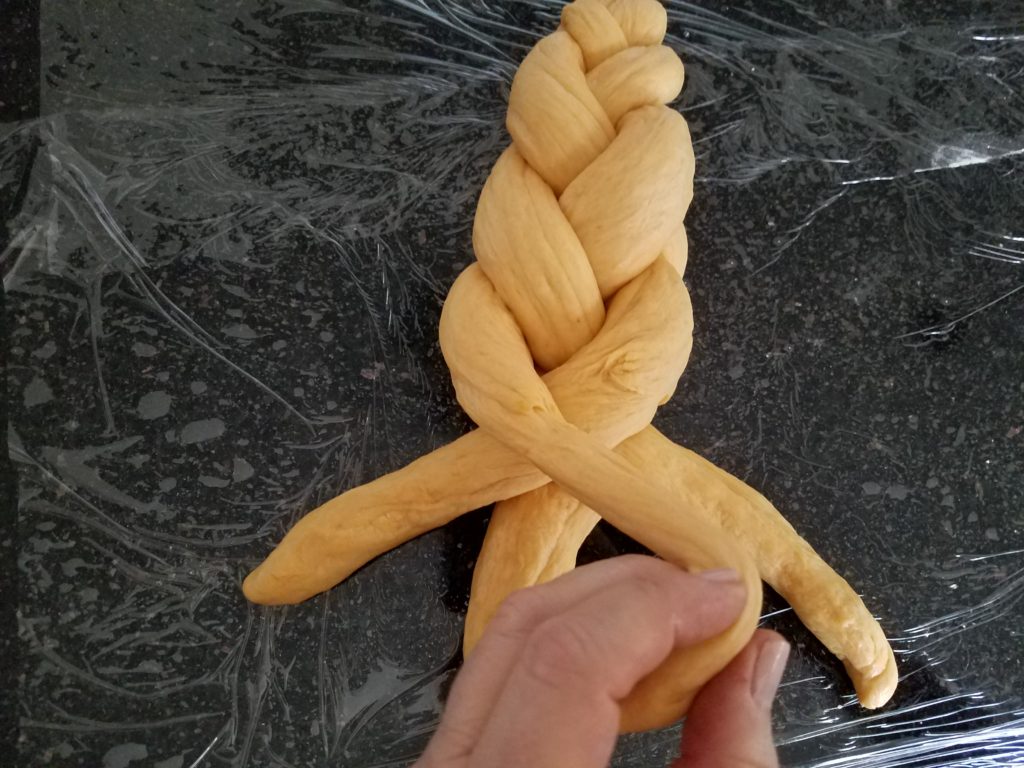
A trick for keeping your counter clean when rolling out the dough is to place plastic wrap directly onto your countertop. Sprinkle a little flour and turn the dough out onto the counter. Press the air out to deflate the dough.

From here you can make a 3 or 4 strand challah. The 3 strand is the most common braid but I’ve been going with the 4 strand for a while.

3 strand single challah: divide the dough into 3 equal pieces. Roll each out into snake about 16” long. For 2 challahs divide the dough into 6 equal pieces. Roll each out into snake about 12” long. Or make a 4 strand single challah: divide the dough into 4 equal pieces. Roll each out into a snake about 14” long. For 2 challahs divide the dough into 8 equal pieces and roll out into a 10’ snake.

For each challah, line them up and pinch them together at the top then braid. Place the braided challahs onto a parchment lined cookie sheet and brush with the vegan egg wash. Let rise for 30 to 40 minutes. After it’s rising for about 15 minutes preheat your oven to 350 degrees

Before going into the oven, glaze challahs again and sprinkle with sesame seeds if desired. Bake for 25 to 30 minutes until golden brown on top. Time will vary according to challah size. It is done when a cake tester or toothpick comes out clean or, the underside is slightly brown and sounds hollow when tapped

* You can find date syrup in health food stores, most kosher groceries, international markets and of course on Amazon. If you can’t find date syrup aka Silan, replace it with additional maple syrup.

Have you ever Heard of a Schlissel Challah?


Have you ever Heard of a Schlissel Challah? Me either! Let me give you the 4-1-1…

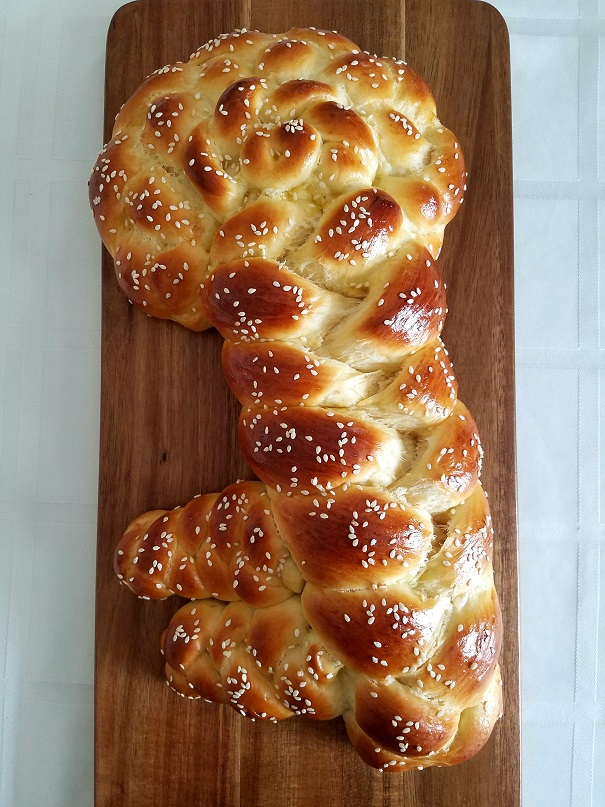
Last year I had the good fortune to meet a new friend named Yael and she introduced me to this unique challah. She is quite an amazing baker. I believe we met sometime around Passover and I started to follow her on Instagram, drooling at each and every photo of bread she created – every one of them a masterpiece. Check her out on https://www.babysbread.com/ and her Instagram @babys_bread and you’ll see what I mean. She was telling me about a key shaped challah she was making and even though it is a tradition dating back hundreds of years, I had never heard about it and was so intrigued.

Before I get to the recipe, here is some information I found online… The week after Passover it is customary to bake a key shaped challah also known as Schlissel Challah. The word schlissel means key in Yiddish and the significance is to bring “segulah for parnassah” or a blessing to your home. Some say the shape will bring financial blessing as well. I’m all in for that! There are a few people who still wrap a real key in aluminum foil and bake it right into the bread. When I asked my friend if she does this, she reminded me that’s a great way to break your teeth! There is so much more information online if you are interested, I have included a couple of places you may find interesting: http://kitchen-tested.com/2012/04/20/shlissel-challah-key-challah/ and  https://www.kosher.com/lifestyle/shlissel-challahs-why-how-102
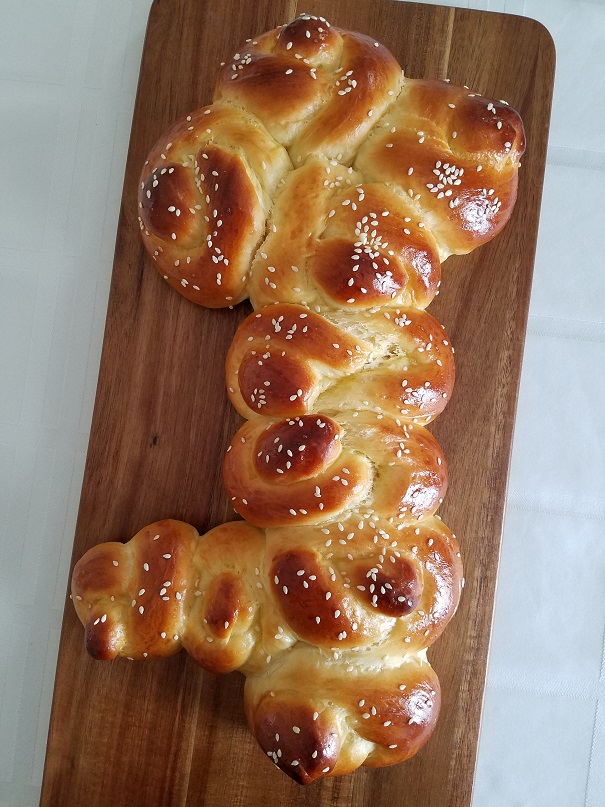
Today I made my first attempt and I have to say, I’m very proud of the results!  Of course you can use your favorite challah dough recipe, but I have included one here which is very easy to handle, especially for the beginner.

It makes three 1 pound challahs or two larger ones. Tonight, one bread is for my Shabbos table, one is for a friend who could really use some good fortune and the other to a new friend I met last night. When you bake this challah, may your key open the doors to bring you and your family good fortune and many blessings.  Enjoy!

Ingredients
1 ¼ cups lukewarm water
1 ½ tablespoon active dry yeast
1 teaspoon sugar
4 ½ to 5 ½ cups bread flour (I use King Arthur or Bob’s Red Mill)
2 whole eggs (I use extra-large but large will be fine too)
1 egg yolk
1 tablespoon kosher salt
2/3 cup sugar
¼ cup extra light olive oil (or other vegetable oil)
Sesame seeds (optional)

Egg wash
1 egg
1 pinch salt
1 pinch of sugar
dash water

Directions
The temperature of the water used to bloom yeast should be warm like a baby’s bath. Add the yeast and 1 teaspoon sugar to the warm water. Mix it and set it aside for 5 or 10 minutes or until if foams up.

Into a large bowl, add 4 cups of bread flour and set aside.

I find it easier to use a large glass measuring cup for the wet ingredients so that I can pour it into the flour a little at a time. Add the eggs, sugar, salt, and oil and mix together well. Add the foamed yeast mixture and just stir once or twice. This helps to get the sugar off the bottom.

Make a well in the center of the flour and pour some of the egg mixture mixing slowly. Keep adding the wet ingredients into the flour until it’s all incorporated.  This will make a doughy slurry. Now add ½ cup flour at a time until you have dough that pulls away from the sides of the bowl and holds its shape. At some point it will be easier to mix with your hands.

I like to knead the dough directly in the bowl but you can turn it out onto the counter if you like. Once it feels like nice plump dough, you are done. Pour a little oil in the bowl and put the dough back in.

Cover the bowl tightly with plastic wrap and put it in a warm place to rise for 1 ½ to 2 hours, or until it has doubled in size. After it has doubled, punch the dough down and divide into 2 or 3 pieces depending on how many breads you want to make. This recipe makes approximately 3 one pound challahs.

Line a sheet pan with parchment paper and set aside. Into a small bowl add the egg, salt, sugar and water and beat well. This is the egg wash.

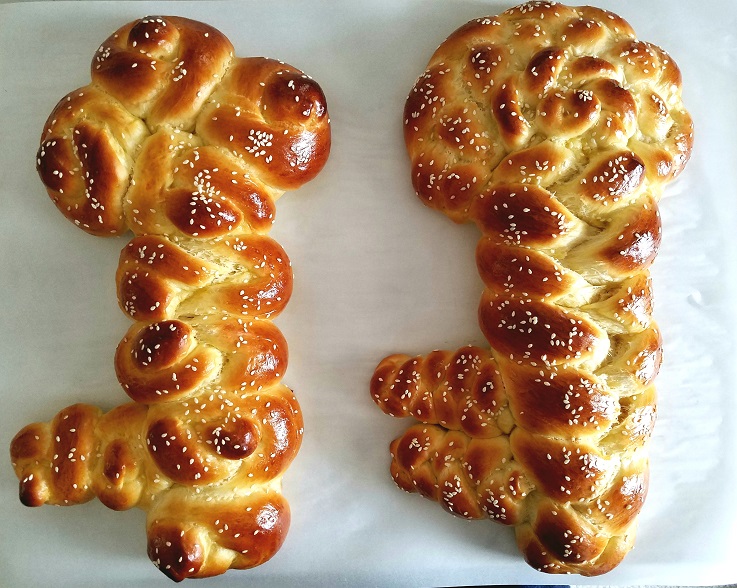
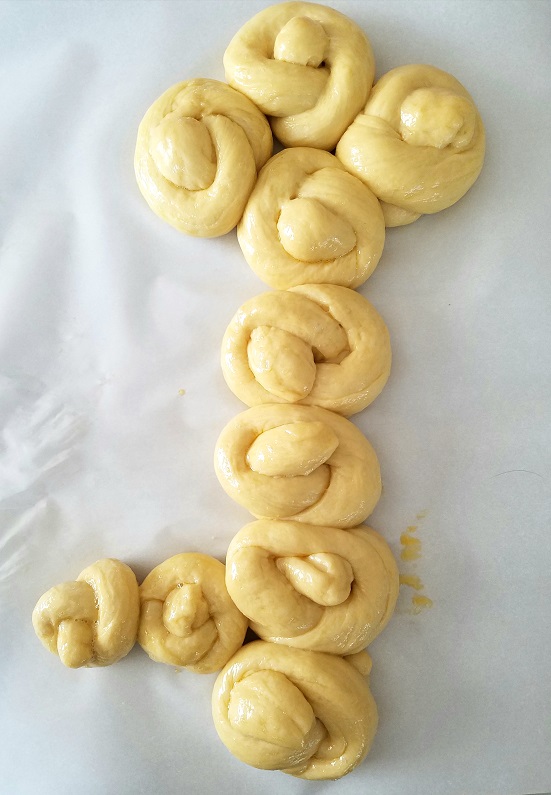
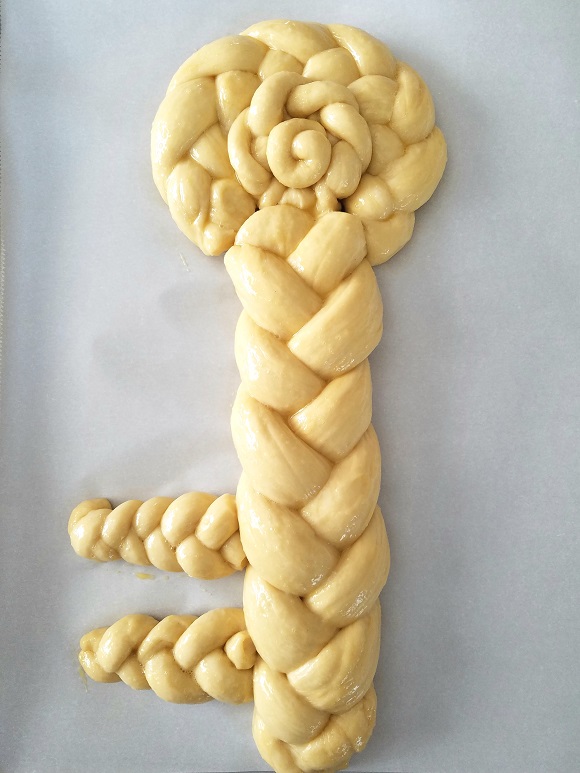
I made two different key shapes. One with basic braids and the other with rolls. There are many tutorials online if you need help. Here is how I did it…

For the rolls: Depending on how big you want your challah, will determine how many rolls you use. For mine I made 8 larger 1 ¾ to 2 ounce challah rolls plus two 1 ounce rolls (for the teeth of the key). To make the rolls, take your small dough ball and roll it into a snake about ½” thick by 5” long, tie it into a little knot. Place them as shown below
  
For the braided key: I used 9 ounces of dough for the shaft of the key, 6 ounces of dough for the head of the key, and 2 ounces for the teeth. These are estimates for the breads I made. You can make them larger or smaller as you like. Then I added a smaller braid to the center, but you can leave it an open key if you like as well.

Brush with a little of the egg wash and set it aside for the second rising -about 45 minutes.

Heat oven to 350 degrees with your rack in the center of the oven. Before they go into the oven, brush the challahs with egg wash one more time. Sprinkle with sesame seeds at this time if you like.

Place in the oven and bake for 25 to 30 minutes or until the loaves are golden brown. I like to set my timer for 15 minutes then turn the baking sheet and set it for another 10 minutes. You can use a cake tester or toothpick to make sure they are dry in the middle.

Enjoy!