Mushroom Barley Soup with Flanken… Just the way my mom always made it!


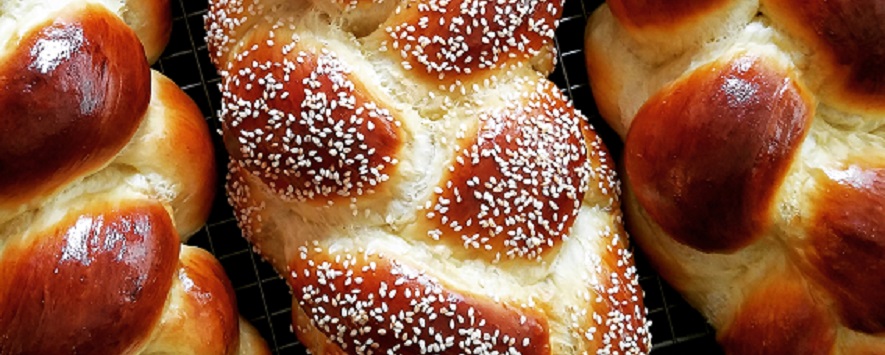
Mushroom Barley Soup with Flanken… Just the way my mom always made it! Walk into any Jewish deli and you will find Mushroom barley soup on the menu. If you are lucky, it will have flanken (short ribs for the unfamiliar). That’s the way my mom always made it. If you don’t live near a Jewish Deli (like me here in the Midwest – miles and miles, and miles away) don’t worry, I’ve got you covered! Even though the sun is shining today, and even though Passover is just a couple of weeks away and you are trying to rid your house of breads and grains, I am going to share my mother’s recipe with you! It’s super easy, tastes great and is so satisfying; it’s a meal all on its own. With this never-ending winter I think I have made this soup at least a dozen times and once you try it, you will too. Why have I made it so much?

In Ohio, we can get every type of weather all in one day – I kid you not. Last Thursday for example, I woke up and the sun was shining. It was quickly replaced by clouds, a mist of rain and then fog set in. As I drove to an appointment, it was hailing so badly I wondered if it would ruin my car. The worst of it was the white out of snow! Really?! By the time I got home, all I wanted to do was get in my pajamas, get under my covers and warm up (preferably with a steaming hot bowl of soup and an old movie on television). It was a Meshugah (me-shu-ga) day for sure! FYI… meshugah is Yiddish for crazy or nuts!

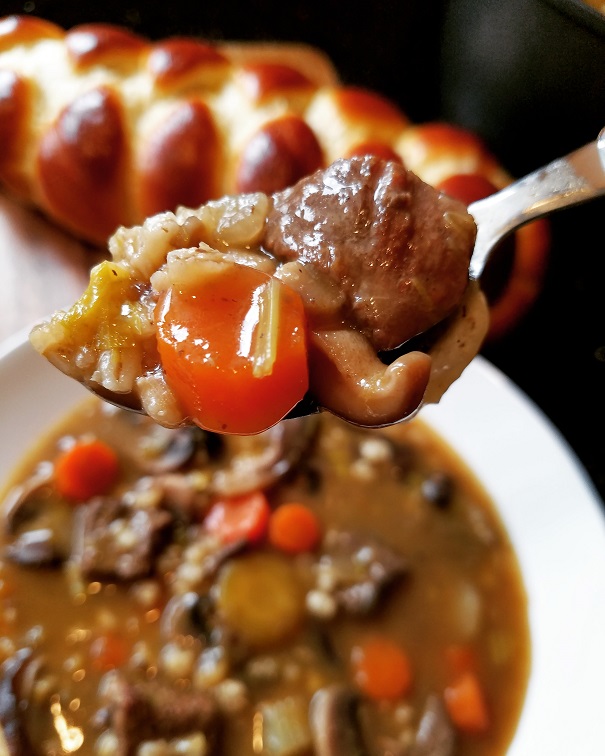
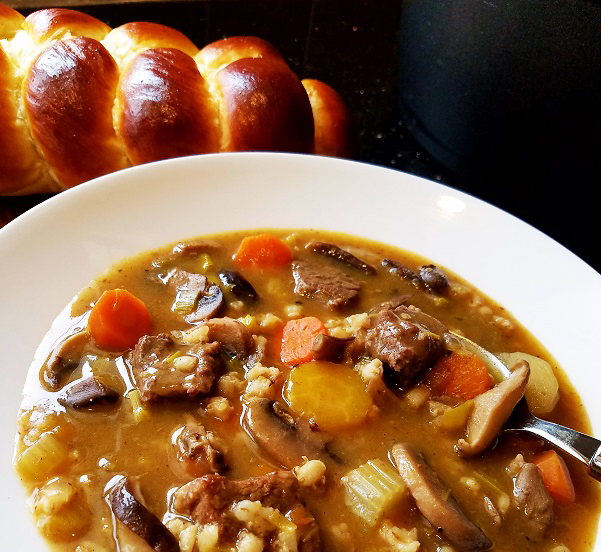
The only thing keeping me going was the thought of the mushroom barley soup with flanken I had waiting for me at home. It’s hearty like a stew, satisfying, and not too heavy. It’s the kind of soup which my mother would say will warm your bones. And while it does warm my bones, it also warms my heart thinking about how my mom would spend the day in the kitchen cooking for us.

If you can’t find flanken, brisket or stew meat will work equally well. It’s an easy soup that just simmers away without much babysitting needed. This soup can be made without the meat as well with much less cooking time and all in one pot. I’ll include the directions at the bottom of the recipe. If you go vegetarian, omit the wine. BTW… the wine is my splash on my mother’s recipe and I use Manischewitz because it’s always on hand and I love to cook with it. Feel free to use another cooking wine if you like. Lastly, you can also adjust the amount and type of mushrooms you add. While this recipe makes a large quantity, a half recipe can easily be made and it freezes very well. So while the sun may be shining today, and you are busy cleaning, you can enjoy a bowl while prepping your house for the holiday (insert smiley emoji here)! Let me know how it comes out! Enjoy! p.s. it’s still freezing cold here in Ohio!

This soup makes about 10 to 12 servings and can easily be cut in half

2 – 3 tablespoons olive oil
8 cups chicken or vegetable broth (I like Imagine brand low sodium no-chicken broth)
4 cups of water
3 pounds of flanken (brisket or stew meat would work well also)
1 large onion diced (2 cups)
3 cups of carrots sliced into 1/2” rounds
2 cups celery sliced
1 cup pearled barley
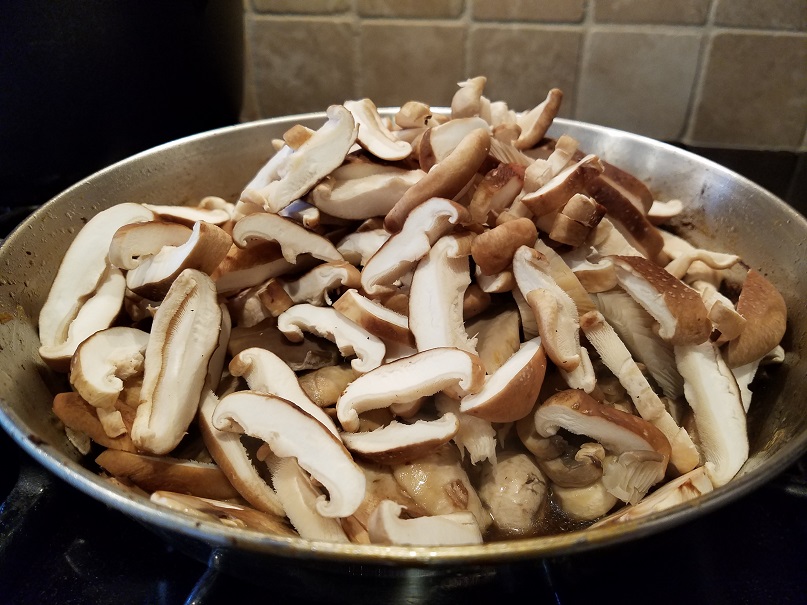
16 to 20 ounces baby bella mushrooms cleaned well and sliced
4 ounces shitake mushrooms cleaned well and sliced
4 ounces oyster mushrooms cleaned well and sliced
½ cup Manischewitz wine (any flavor – I use whatever is on hand)
4 cloves of garlic minced (about 1 tablespoon)
3 bay leaves
small bunch of fresh dill (about ½ cup) tied with string
2 teaspoons freshly ground pepper
salt to taste

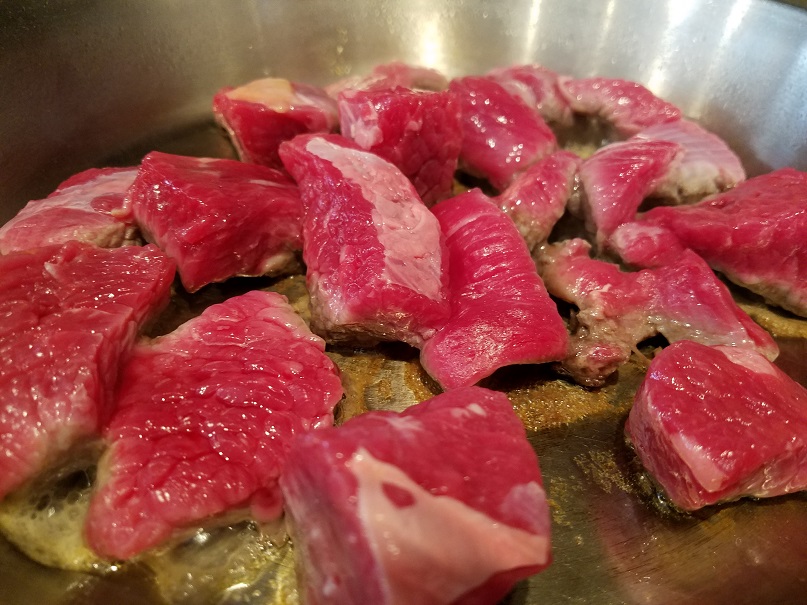
Heat 1 tablespoon of olive oil in a large frying pan. Add the flanken and cook over medium-high heat. If you leave the slices whole, brown them on each side. If you use brisket, cut the meat into 1 or 1½“cubes. I had the butcher cut the flanken off the bone and I browned it on all sides in batches. My mother always left it whole and then fished out the bones. That’s not for me but feel free to make it this way if you like.

In a large stockpot, add the broth and water and bring it to a boil. As each batch of meat is browned, add it to the stockpot. Bring it to a boil then when all of the meat is in the pot, lower the heat and simmer covered for at least 2 hours or until the flanken starts to become tender. While that is cooking prep the rest of your ingredients.

Once the meat comes out of the pan, add ½ cup of wine and deglaze the pan (click on this link to learn more about deglazing) making sure to scrape up all of the crispy bits on the bottom. Pour this off into a cup and set aside.

Into the same frying pan, add ½ tablespoon of oil into the pan and stir in the onion. Lower the heat to medium and cook stirring occasionally until the onion is translucent– about 10 minutes. Then add the celery, garlic and carrots and cook for another 5 minutes. Place the vegetables into a bowl and set aside.

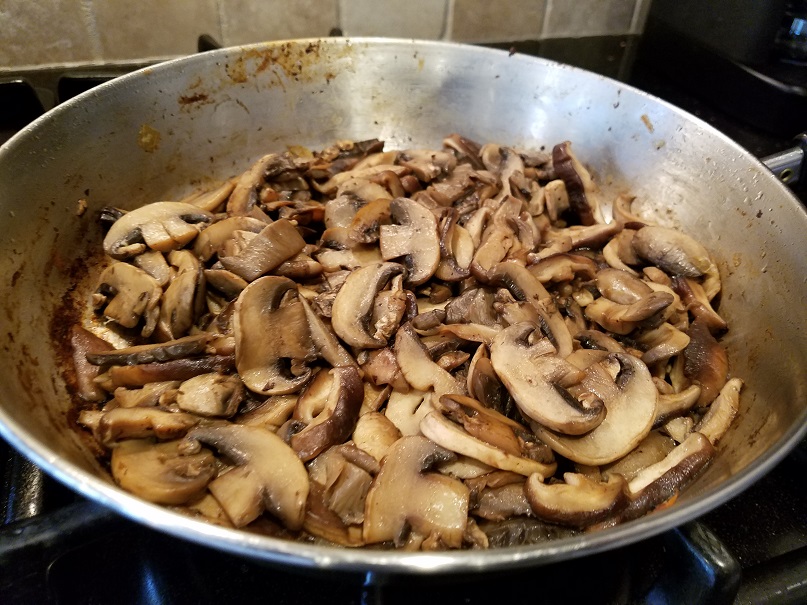
Add another ½ tablespoon of oil into the pan and add the sliced mushrooms. Sauté until they have reduced by half also about 10 minutes. Turn off the heat and leave the mushrooms in the pan.

After the meat has cooked for two hours, add the barley, vegetables, mushrooms, bay leaf, dill, salt and pepper. Simmer an additional hour or until the meat is very tender. Add the wine and cook another 10 minutes then all that’s left to do is Enjoy!
  

For the vegetarian version:
In a large stockpot (about 8 quart) add 1 tablespoon of oil into the pot and stir in the onion. Lower the heat to medium and cook stirring occasionally until the onion is translucent– about 10 minutes. Then add the celery, garlic and carrots and cook for another 5 to 10 minutes stirring occasionally.

Heat a 10 or 12” frying pan on medium heat, add 1 tablespoon of oil and add the sliced mushrooms. Sauté until they have reduced by half about 10 minutes.

Add the mushrooms, broth, water, barley, bay leaf, dill, and pepper to the stockpot. Bring the soup to a boil then cover and lower the heat and simmer for about 45 minutes to 1 hour or until the barley is tender. Taste for seasoning and adjust accordingly.


A Crazy Hamantashen Milkshake


I hear you loud and clear… “Hey Sherri, Purim is over and I’m out buying matzo, what’s with you and the hamantashen already?” My answer… I still have about 10 pounds of hamantashen crumbs to reinvent! So why not make a crazy hamantashen milkshake? Last year was the hamantashen ice cream sandwich so this isn’t so crazy – right?

Now to answer the burning question, why all the crumbs, I first need to give you a little backstory. I’m a member of a Jewish culinary group called the P2G Culinary Connection. Over the past several weeks, we had been putting together Shaloch Manos baskets (gifts of food given during Purim) for holocaust survivors in our area. Of course hamantashen are the star of any basket, but with everyone’s busy schedules we didn’t have time to all get together and bake so it was my job to find a way to buy them.

I reached out to Lilly’s Baking Company in Brooklyn, NY. I have ordered from them in the past and know their baked goods are absolutely delicious. Living in Columbus, we often need a black and white or rainbow cookie fix and if you’re not a baker, Lilly’s is the perfect place to order from. They have been my go to since we moved here because everything they make is reminiscent of our favorite bakeries in New York. Needing a very large quantity, I was hoping they would be able to give us a big discount. I emailed them our intentions, and the amount we needed (around 460). What happened next was unexpected. One of the CEO’s wanted to support our mission by donating the product and the cost of shipping! I almost started to cry; the generosity was overwhelming.

Sadly, the shipping company didn’t do such a great job getting them to us. All 3 cases were severely damaged and while we were able to salvage about 80 of them, the balance was all broken. What Lilly’s did next was even more generous, they shipped out more the very next day overnight air. The new ones arrived perfectly intact; we placed them gingerly on top of each basket.

Now the question was what to do with all of the crumbs? I couldn’t just throw them away. Any good Jewish mother would never let something like that go to waste! Ideas were spinning through my head: strawberry shortcakes, magic bars, dirt cups, yogurt parfaits, a trifle, mini cheesecakes, the world was my oyster (or in this case – my hamantashen)! If you follow me on Instagram, you know I made amazing yogurt parfaits and cookie pops. Then it hit me – a hamantashen milkshake.

To quote my son, “Mom, only you would think of making a hamantashen cookie milkshake – it’s amazing and I can’t believe it tastes like hamantashen ice cream!” This was the grand finale of my week and was so amazingly good; I suggest you drink it until you can’t tell the difference between Mordechai and Haman! That’s what we did. With these words I say drink and Enjoy! This recipe makes 2 servings.

First make the chocolate ganache:
½ bag of semisweet chocolate chips (6 ounces)
3/8 cup of cream or half and half
pinch of kosher salt
dash of vanilla extract

Add the chocolate chips to a narrow bowl and set aside. In a small saucepan, heat the cream until it just comes to a simmer. Pour over the chocolate and let it sit for about 3 minutes then whisk it together until smooth and shiny. Instead of making ganache (which I highly recommend) you can use a good quality hot fudge.

While the cream is heating, get all of your add-ins together. For me it was mini M&M’s, sprinkles, chocolate candies, KitKat bars, whipped cream of course, and one of my mini birthday cake hamantashen. Plus the crowning glory, a perfect Lilly’s hamantashen. You could also add pretzels, licorice, or other favorites you might have.

To assemble the glasses: take two tablespoons of the ganache and spread it inside the glass. Then, dip the rim into the ganache about 1” deep. Holding the glass over a cookie sheet or bowl to catch the overage, sprinkle with whatever adornments you want until it looks just right. If you want to stick things to the glass such as larger candies, you have to paint the candy with the ganache and hold it in place for a bit until it firms up.

Now for the shake: (this recipe makes 2 servings)
2 cups good quality vanilla ice cream plus an additional 2 scoops to float on top (one for each glass)
¾ cup of milk (any kind will work, I used 2%)
1 ½ cups hamantashen crumbs (including the filling pieces)

Blend together until well combined and pour into the glasses. Depending on the ice cream you use, and how thick you like your shakes, you may need more or less milk. Top each glass with one scoop of ice cream, add whipped cream, sprinkles and whatever treats you want to add. Then finish it off by topping it with a hamantashen. WARNING: These are addicting! Hamantashen lovers, BEWARE!


Sabich is My New Favorite Breakfast Sandwich!


Who am I trying to kid with that title? Sabich is my new favorite breakfast sandwich. It’s also my favorite lunch AND dinner sandwich – could I be as bold as to say a snack as well? I wouldn’t say I’m addicted, but today I started to feel like I might have a little problem. When searching on Google, I realized, I’m not alone. Words used to describe this sandwich are obsessed, devoted, hooked, can’t live without, and the best sandwich I ever ate! So don’t say I didn’t warn you.

Until a couple of weeks ago I had never heard of it and then I watched the show Brunch at Bobby’s. His show was all about celebrating the breakfast sandwich. In addition to the usual eggs on a biscuit, he made a Sabich. As he listed the ingredients, I couldn’t figure out how this consortium of ingredients could possible go well together. Then I tried it, and after eating it three days in a row, I was sold!

What is it you ask? It’s a Middle Eastern pita sandwich filled with fried eggplant, hard boiled eggs, hummus, Israeli salad, tahini, amba sauce (which is a pickled mango sauce), sometimes potatoes and pickles. If you like eggplant, this is for you. Actually, even if you don’t like eggplant, you’ll love this!
In all the recipes I found, the eggplant is fried, but Bobby roasted it instead and that sounded perfect to me. I think you get the same great taste without all the extra oil. He also used a mango hot sauce; I couldn’t find that or amba sauce with is traditionally used, so I subbed regular hot sauce and it was delicious. Reading that amba is similar to chutney (which is like a spicier savory cousin to jam), I bought Major Grey’s and ultimately ended up making a mock amba sauce which by the way, my husband really liked. If you like mango this is the way to go, if you are allergic like me – skip it!

I know it seems like a lot of ingredients, but if you plan correctly, the whole thing should only take about 30 to 40 minutes (less if make the components ahead of time). Here’s a quick snapshot… first put your eggplant in the oven. While that’s roasting, put the eggs in water to boil. Then while they are both cooking away, make the Israeli salad. To make things a little easier, I purchased ready-made hummus and tahini (total time saver).

I promise it is so worth it. This sandwich is creamy from the eggplant and hummus, it’s crunchy from the Israeli salad, the eggs put it over the top with richness, the amba or hot sauce gives it a little tangy kick, and the warm pita just brings it all together. If you find like me you are in need of a sabich support group, just reach out… I’m here for you! Enjoy!

Ingredients
1 to 2 eggplants, peeled and sliced into ½ inch thick rounds (about 1 ¾ – 2 lbs.)*
2 tablespoons extra-virgin olive oil or olive oil spray (my fav is from Trader Joes)
4 large or extra-large hard-boiled eggs
Israeli salad, recipe follows
1 cup hummus
1 cup finely shredded red cabbage (I used romaine and radicchio)**
Tahini
My recipe for mock amba sauce or hot sauce or (optional)
if you can find true amba, go for it!
4 pita either white or whole wheat, warmed
salt and pepper

Israeli Salad
1 cup finely chopped tomato (approximately 2 tomatoes)
1 cup finely diced English cucumber
2 tablespoons freshly chopped parsley
2 tablespoons lemon juice
1/2 tablespoon extra-virgin olive oil
½ teaspoon Kosher salt
freshly ground pepper to taste

Mock Amba Sauce
2 tablespoons of Major Grey’s Chutney
1 tablespoon cider vinegar
A few dashes of hot sauce

Preparing the eggplant:
Preheat the oven to 425 degrees f.  Place the eggplant slices on a sheet pan lined with parchment paper. Brush or spray the eggplant slices with olive oil and season with salt and pepper on both sides. Roast until golden brown and soft, about 30 minutes, turning after 15 minutes.

Preparing the eggs:
Put the eggs in a saucepan and cover with cold water by an inch. Bring to a boil and lower the heat to a simmer for 3 minutes. Turn the heat off, cover the pot and let it sit for 9 minutes. Drain immediately and cover with cold water and ice. Let it sit for a few minutes. Peel and thinly slice the eggs.

Israeli Salad:
Toss the diced tomatoes, cucumber, parsley, lemon juice, olive oil, salt and pepper in a medium bowl. Make sure to save the juice from the tomato and add that as well. Mix to combine.

Mock Amba Sauce:
I used 2 tablespoons of Major Grey’s Chutney. I mashed it with a fork to break up the larger mango pieces then added added 1 tablespoon of cider vinegar and a couple dashes of hot sauce (to your personal taste). You could also put it in a mini food processor.

To Assemble the Sabich:
Use the freshest pita you can find, it really makes a difference. Cut an opening at one end of the pita bread to make a pocket. Spread some of the hummus on the bottom of the pita (and the top if you like). Add the ingredients in layers. First, add a few slices of eggplant, then a couple tablespoons of the Israeli salad, on top of that the sliced eggs, some cabbage or lettuce, a few dashes of hot sauce or amba sauce, tahini and then open wide!

*When choosing eggplants, look for firm, smooth and uniform in color. If there are any brown or soft spots, you don’t want it! I like to buy thinner eggplants that are light in weight. The lighter the weight, the less seeds and the seeds are what makes them bitter.
** Bobby added cabbage which doesn’t really like me very much, I used romaine and radicchio instead. While they are not interchangeable, it gave the sandwich a beautiful color contrast and peppery bite to it. I thought it was a perfect substitution. Feel free to use shredded cabbage.

Dear Marcy Goldman, Thank you for the most Delicious Majestic and Moist Honey Cake Recipe! xoxo Sherri


Dear Marcy Goldman, Thank you for the most Delicious Moist and Majestic Honey Cake! Thank you for sharing your recipe with us. I have always loved your cookbooks and any recipes I have tried.  xoxo, Sherri

Have you ever had a honey cake that was anything but dry and heavy? They are usually like hockey pucks. Not this one, it’s exactly what the name says it is and more. You’ll have to take my word on this, because I never liked honey cake, hated it actually. Last week I found myself somewhat like Elaine in the Seinfeld episode where she ate the $29,000 piece of cake and was dancing around as she ate it. If there was surveillance video of me in my kitchen last week, it would have showed the same. Of course she was missing her sugar fix in the afternoon, I was tasting a little of it every day, to see how long it could actually stay moist. I figured at some point, it had to get dry and heavy, but it never did. Maybe I’ll have to video tape myself and share that with you. If I get enough people requesting it, I just might! To put a number on it, if 25 people subscribe to my blog and comment on this post, I’ll do it!

So let’s rewind… why did I even make a honey cake when I don’t like it? Short answer, It’s Rosh Hashanah, it’s tradition, you can’t buy them in Columbus, Ohio and my husband loves them!

Long Sherri answer… I love family traditions especially around the holidays. Since moving to Columbus one of my favorite family traditions has been at Rosh Hashanah. I always set the holiday table with my sons’ shofars which they made as young children, beautiful flowers, my mother’s candle sticks, apples and mini honey jars. Even my wine bottle gets a little outfit! The excitement of the holiday prompts me to set the table well in advance just so I could have a few extra days to marvel at the table setting. It always makes me so happy. It’s also the time of year when my in-laws would visit for the holiday and stay for a few days.

My in-laws always arrived the day of Erev Rosh Hashanah right after lunchtime. As my father-in-law walked into the house, he would give me a big bear hug and comment how he could smell my cooking in the street as they pulled up. Year after year it was the same scene in my kitchen. The chicken soup was simmering away on the stove, the counter was filled with challahs fresh out of the oven, apple cake and mandel bread (my mother’s delicious recipe). Everything lined up like little soldiers.

The initial excitement of their arrival is one I looked forward to every year. It was even more special because I was the only one home to receive them and had them all to myself for a couple of hours. They came with suitcases and bags of gifts, but more importantly, the honey cakes! I seem to remember one year when my mother-in-law Joan brought five or six of them! I wish I could remember why she said she brought so many, but assume it was because her son loved them so much. Our first holiday without her, I still expected to see her walk through the door arms filled with honey cakes saying “I brought you some honey cakes, it didn’t come out too dry this year!”

It was something I never made (probably because I don’t like them) but more importantly it was her specialty. I’m a good daughter-in-law and would never have stepped on her toes. Last year, I decided to make my husband a honey cake – he does love them afterall. I didn’t have her recipe so what is a girl to do? Look through every Jewish cookbook and Google until she finds one that looks good. When a recipe has the words moist and majestic in it, especially for a honey cake, you look no further.

So thank you Marcy Goldman for bringing us all this most delicious cake! Just for the record, I made it last year as is but this year tweaked it just a little to accommodate my taste. I can now say I’m a honey cake lover, hence my Elaine dance in the kitchen! Remember, if you want to see my honey cake happy dance, make a comment on this post!

The tradition and excitement of years past fills my heart. My mother’s mandel bread fills my soul, alongside it sits this majestic and moist honey cake which I think my mother-in-law would have just loved. Shana Tova… Enjoy!
Majestic and Moist Honey Cake
adapted from Marcy Goldman’s Treasure of Jewish Holiday Baking. Here is what I changed… I omitted the cloves (I don’t like them), I used pineapple juice instead of orange juice because I always have cans of pineapple juice on hand, and never have orange juice! I cut down the sugar to see if I would miss it – I didn’t! Finally, I don’t care for the taste of whiskey and even in the cake it was a bit strong. My friend Susie and I baked honey cakes together last week and she suggested I try brandy. She uses it in a sweet potato dish she makes and said it adds a nice flavor. She was right; the brandy was a perfect choice, not as strong as the whiskey and when you eat the cake you wonder, what is that. FYI… I think my brandy is a little bit majestic as well. I started with ¼ of a bottle, have made 14 honey cakes this year and haven’t run out of brandy yet!

Ingredients
3 1/2 cups all-purpose flour
1 tablespoon baking powder
1 teaspoon baking soda
1/2 teaspoon kosher salt
4 teaspoons ground cinnamon
1/2 teaspoon ground cloves (I omitted this)
1/2 teaspoon ground allspice
1 cup extra light olive oil
1 cup honey
1 cup granulated sugar
1/2 cup brown sugar
3 extra large eggs at room temperature
1 teaspoon vanilla extract
1 cup warm coffee
1/2 cup pineapple juice
1/4 cup brandy
1/2 cup slivered or sliced almonds (optional)

Directions
I made mine in a variety of ways. My favorite, was the mini loaf pans (5 ¾ x 3 ¼) which yielded 8 and are great to give as gifts. I have also made this recipe in three 8 x 4 ½” loaf pans. The 9” or 10” angel food pan makes for a very pretty presentation and Marcy Goldman’s favorite choice. Finally you can use a 9×13” sheet pan. This is pretty versatile if you ask me.

Preheat oven to 350°F. Generously grease pan(s) with non-stick cooking spray. For tube or angel food pans, line the bottom with lightly greased parchment paper, cut to fit.

In a large bowl, whisk together the flour, baking powder, baking soda, salt, cinnamon, cloves and allspice. In a separate bowl, mix the warm coffee with the brown sugar. This helps the clumps you can sometimes get. Then add all of the wet ingredients plus the sugar and mix together. Make a well in the center of the flour mixture and add the wet ingredients. (If you measure your oil before the honey, it will be easier to get all of the honey out.)

Using a strong wire whisk or in an electric mixer on slow speed, stir together well to make a thick, well-blended batter, making sure that no ingredients are stuck to the bottom.

Spoon the batter into prepared pan(s). Sprinkle top of cake(s) evenly with almonds, if using. Place cake pan(s) on two baking sheets, stacked together (this will ensure the cakes bake properly with the bottom baking faster than the cake interior and top). Hmmm… I somehow missed this step, but they came out perfectly when I baked them on one cookie sheet, or directly on the oven rack.

Bake until cake tests done, that is, it springs back when you gently touch the cake center. For angel and tube cake pans, this will take 60 to 75 minutes, loaf cakes, about 45 to 55 minutes. For sheet style cakes, baking time is 40 to 45 minutes. The minis only took 30 minutes. If you are using throw away aluminum tins, the bake time will be a little less for all of the above.

Let cake stand fifteen minutes before removing from pan and enjoy!

How about an Everything Bagel Salad to get you through the week?


For days when you are missing your weekend bagel, how about an everything bagel salad to get you through the week? It’s getting close to the weekend and you’re craving an everything bagel with cream cheese. What’s a girl to do? Turn it into a salad of course! Why an everything bagel salad? There are a few reasons: I love everything bagels, I love salads filled with everything but the kitchen sink, it gets me ready for the weekend without all the guilt of a bagel on a weekday and I happen to have a jar of everything bagel seasoning in my house impatiently waiting to be sprinkled on EVERYTHING!

Here is how it all started… I was in Trader Joe’s a couple of weeks ago scanning their new food section for a great new find. If you are a Trader Joe’s junkie like me, you totally get this. There on the shelf was a jar of Everything but the Bagel Sesame Seasoning Blend (try to say that 5 times fast!). First of all, the label was adorable and really caught my eye. Second, I don’t know why I got so excited, but I did; ideas were flooding through my head on what to use it on. I bought 2 jars and posted a photo on Instagram immediately proclaiming my excitement for this new and wonderful treasure I found. Since then, I have topped challah rolls with it, used it on salmon before grilling, sprinkled it on green beans and of course my husband added it as a booster to his already everything bagel with lox and cream cheese! Ooh, I just thought of how great it would be on avocado toast – I’m so going to have to try that!


Not familiar with the everything bagel (click here to find out more)? The only thing you need to know about an everything bagel is it is the quintessential NY bagel. Sesame seeds, poppy seeds, minced onion, minced garlic and coarse kosher salt – that’s it. Five simple ingredients become a game changer to the average bagel; in this case the average salad. There must be a lot of fans out there for type of bagel since it has its own jar of seasoning mix on the shelf. I found it at Trader Joe’s, but King Arthur also has a great mix you can buy online. I’ll also share my recipe at the end so you can make your own at home. Every now and then you will come across an everything bagel with caraway seeds – I’m not a fan and think it should stay in rye bread where it belongs!

Here’s my favorite way to eat a bagel… Unless it’s fresh and hot out of the oven (which only happens in NY) I lightly toast it and then scoop it so there is less bread and you can add more toppings. Then of course there is the cream cheese, but not just any kind of cream cheese, for me it has to be vegetable cream cheese (follow this link for my recipe). Lox is a perfect addition and a couple of thick slices of a crisp tomato. Is your mouth watering yet?


Now for the salad… I love a really good salad and I’m hooked on making salads fun and interesting. For me, a salad is at its best when there are a lot of goodies in them other than an overwhelming amount of lettuce. I like to think of the lettuce as the bread or bagel in this case, which holds a sandwich together. The lettuce will be the anchor here.

When I first set out to make the salad I thought of all the components from toppings to the base.  I knew the calories and carbs would be a fraction of what you get from a bagel, plus I wanted to keep all of the satisfaction. The fun of it is you can customize it to what you like on your bagel i.e. salad! If you love whitefish, buy smoked whitefish or smoked trout and top your salad with that. If you like capers, hard-boiled eggs, and onions, throw them in too.


For this salad, I deconstructed the vegetable cream cheese and made the ingredients the toppings: radishes, carrots, and scallions. Of course, I had to include salmon in some way but didn’t think lox was the way to go, but if you try it, let me know how it is. I’m more of a baked smoked salmon girl anyway, which is difficult to find in Columbus. I decided on a piece of fresh salmon. I topped it with everything seasoning then seared it in a pan. Hard-boiled eggs also make an appearance in my salad for a few reasons: I love them, they are perfect on a bagel, and they go great in a salad!

It’s a very quick salad to put together as well. As the salmon was cooking, I assembled the other ingredients. I shredded some romaine lettuce, crushed up some everything bagel chips, added some goat cheese for that cream cheese texture and really good flavor. It was all coming together and I couldn’t be happier.

There you have it, a salad to get you ready for the weekend and for you diehards, a salad you can bring to work on Monday. Enjoy!

Ingredients for one salad
1 ½ cups shredded romaine lettuce
8 cherry tomatoes cut in half
1 carrot grated (½ cup)
1 to 2 perfect hard-boiled eggs cut into quarters
2 to 3 radishes sliced very thin
2 scallions sliced into thin rounds
1 ounce goat cheese
8 everything bagel chips broken into pieces
Dill (optional)
4 ounce salmon filet
everything bagel seasoning

Lowfat ranch dressing of your choice

Directions
In a medium bowl, combine the shredded romaine and next 8 ingredients. Arrange it nicely in the bowl by layering it, or placing the vegetables together.

For the salmon, rub it with about a teaspoon of olive oil, sprinkle the everything seasoning on both side then place it in a hot pan on medium heat. Cook about 4 to 5 minutes per side or until your desired doneness. Then add the cooked salmon on top of the salad.

For the salad dressing, I used a package of Concord Foods Ranch dip (which I find in the produce area of my grocery) mixed with a container of Breakstone’s reduced fat sour cream (nonfat plain Greek yogurt would work as well) plus one tablespoon of Hellman’s mayonnaise. Then I add water until is pour-able but not too thin. I am always on the lookout for a good ranch dressing in a bottle, but they all have msg in them. I like this brand because it does not contain monosodium glutamate (msg) and I can use a very low fat base. And yes, I do know this is a lot of dressing for one salad, but I think you’ll be making it again and again, so you might as well have dressing on hand! Of course, you can buy any kind of creamy dressing you like for this. Pour dressing over the salad and serve immediately.

How to make your own everything bagel seasoning (feel free to play around with this ratio)
1 tablespoon white sesame seeds
1 tablespoon black sesame seeds*
2 tablespoon poppy seeds
1 tablespoon minced dried onion
1 tablespoon minced dried garlic
1 to 2 teaspoons coarse kosher salt (this is optional if you don’t like salt, omit)

Mix it all together and store in a small jar until you are ready to use it.

*Use 2 tablespoons of white sesame seeds   if you can’t find, or don’t want to use the black.