Cheesecake Swirl Brownies a.k.a – Four Batches of Brownies and only one Photograph!

Today is national brownie day so Happy National Brownie Day everyone! I have a few things in mind for this post. First off I have a cute story about brownies, then a great recipe for the most delicious cheesecake brownies, and in a follow-up post a fun video which will get everyone in the mood to make brownies. So here goes…

You know the t-shirt that reads: My aunt, mother, grandfather, (cousin once removed!), went on vacation and all they brought me was this shirt? Well that’s how I feel about my week baking brownies. In preparation for one of the farmer’s markets I attend, I baked a variety of brownies to test different recipes. I baked brownies with cocoa powder (both dutch and regular), then I baked brownies with melted chocolate, I added Oreo cookies to one batch, and chocolate chips to another. While I’d like to tell you it is all documented with luscious looking photos for my blog, sadly it is not! Photographically, this is all I have to show for the week.

SONY DSC

However, my scale documented the week a whole different way! Hence why I sit here in workout clothes drinking herbal tea as I type this post! I was so busy trying to create the best brownie, I didn’t take the time to photograph them. At the end of the day, they were all good but very different. My first batch was made with Dutch cocoa and were so rich and chocolatey it didn’t appeal to me. However, my husband loved them so much he took them to work the next day to share with coworkers. They got rave reviews and in this little brownie’s defense tasted much better the next day. The end result, brownies made with cocoa should be undercooked a little and get better with age.

The next recipe was perfect in flavor, the texture was like fudge but lacked nuts for texture. (I’ll be posting this recipe at a later date when I have photos to go along with them!) Another batch was good but not great, and one recipe was a lot of work to prepare so I didn’t even attempt it. I made sample plates and brought them to friends to serve as my focus groups. The results were as varied as the types of brownies I had made. So what is the conclusion? Everyone likes brownies and everyone likes different kinds of brownies!

Whether you like them fudgy or cakey, with nuts or without, with chips or without, there is a brownie out there for you! The one brownie I think everyone will agree on is my cheesecake swirl brownie. They passed the test by 20 eighteen year old girls at a birthday celebration recently – and that’s a rave review! Of course I cheated a little and doubled the cheesecake swirl! (the recipe below is the doubled version) Once you take a bite of the sweet creamy cheesecake and intense rich chocolate of the brownie, it’s a win win! I think I’m going to print up a t-shirt that reads… If you go on vacation to Columbus, Ohio all I wanted is a cheesecake swirl brownie from Splash of Sherri… Bakes! Enjoy!

Brownie Batter
1 ½ sticks unsalted butter
2 cups sugar
2 tablespoons dark brown sugar
1 ¼ cups Hershey’s cocoa powder
1 cup all-purpose flour (I use King Arthur or Bob’s Red Mill)*
3 extra-large eggs
1 1/2 teaspoons kosher salt
1 teaspoon baking powder
1 teaspoon instant espresso or coffee
1 ½ cups chocolate chips
(I used a combination of dark and semi-sweet mini chips)

Cheesecake Swirl
2 – 8 ounce packages of reduced fat cream cheese, at room temperature (Philadelphia Brand)
¾ cup sugar
2 extra-large eggs
½ cup reduced fat sour cream (Breakstone)
1 tablespoon good vanilla extract
1/8 teaspoon salt

Preheat the oven to 350 degrees. Prepare a 9 x 13 x 2″ pan with parchment paper and spray lightly.

Start with the cheesecake swirl batter first…
In a medium size bowl, beat the cream cheese on medium speed until there are no lumps. Add the sour cream and eggs then add the sugar, vanilla, and salt. Mix until smooth and everything is well combined. Set aside,

Now to make the brownie batter…
In a medium size saucepan add the butter and place on a low heat just until melted. Once the butter is melted, stir in the white and brown sugars. Cook until the mixture is smooth for approximately 3 to 5 minutes. Mix in the instant coffee, then take it off the heat to cool.

In a separate bowl whisk together the dry ingredients: flour, cocoa, salt, baking powder, and salt.

In a large mixing bowl, add the eggs and beat until broken. Then add the vanilla extract and the butter and sugar mixture in 3 additions. Once it is blended together, add the flour mixture a little at a time and blend on low until just incorporated. Fold the chocolate chips into the batter.

Spoon a little more than half of the brownie batter into the prepared pan. It’s a little thick so do the best you can to spread it evenly in the bottom of the pan. Then top it with the cream cheese batter. Finally dot the top with the remaining brownie batter and using a sharp knife or bamboo stick, swirl the two together. Don’t worry too much how it looks, it will be fine once it bakes.

Bake for 45 minutes to an hour or until a toothpick inserted into the center comes out clean. These are tricky brownies. Make sure to keep an eye on them. You want to make sure the cheesecake is completely cooked.

Remove from the oven and let rest in the pan for 5 minutes. Then, carefully lift the parchment paper out, and move to a cooling rack. Once cool, place back in the pan and into the refrigerator. After about an hour, you can slice them into 2″ squares. Enjoy!

*FYI … I include specific brand names of products where needed as using different brands will alter the outcome. Once I have success in a recipe, I don’t alter the brand. That’s not to say it won’t come out good, however, it will not be the same as what I have written and can’t guarantee the results.

Check out my next post on holiday brownies with Martha Stewart!


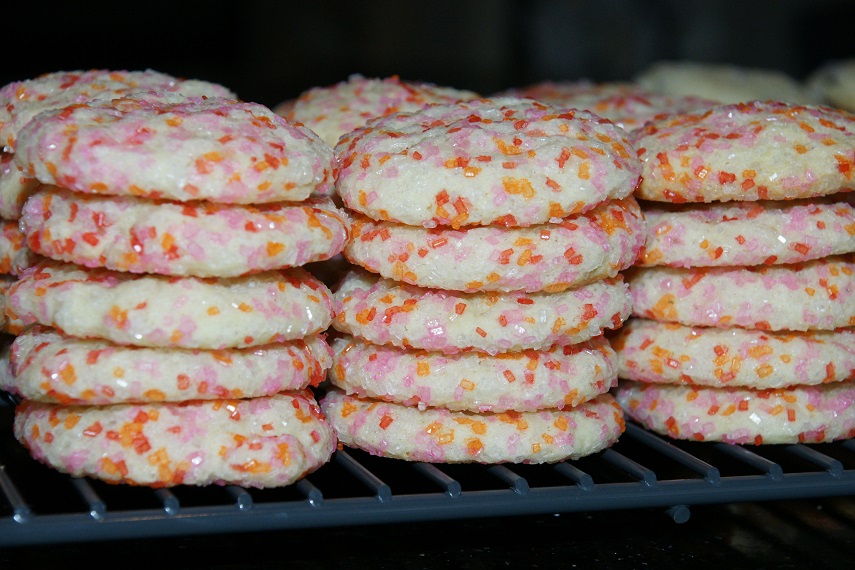
1st Place Melt in your Mouth Soft Sugar Cookies

SONY DSC

Hello my name is Sherri and I am crazy about cookies! I tape every episode of Unique Sweets on the Cooking Channel in hopes it will be a special episode on cookies and I will find some new kind of cookie to try. I have cookbooks about great cookies, drop cookies, rolled cookies, history of the chocolate chip cookie, the art of the cookie, fancy cookies, you name it. Every Valentine’s Day, I ship heart shape cookies all over the country to family and friends. I inherited over 100 cookie-cutters from my mother but that’s a story for another day and recipe (picture included)! I am always up for the cookie challenges my niece Brette gives me. Once she called and said what do you think about a chocolate chip cookie but instead of chips you put brownie chunks in it? My answer arrived to her in the mail 2 days later!

Now that my secret is out, back to the sugar cookies… I was watching a cooking show 10 years ago on the Food Network. I only know this because that’s the date stamped on the printout of the recipe –  September 4, 2004! It was for some kind of cookie bake-off as far as I can tell and the recipe came in 2nd place. What I wrote on the recipe all those years ago was… I should make these a 1st place cookie, really easy sugar cookie recipe, make sure to cream butter and sugar until fluffy, and show says only 2 to 3 tablespoons of buttermilk, but recipe says 3 to 4… hmm. Well I made them not too long ago exactly as written. They were good and devoured in minutes, but I felt something was missing. I have made quite a few changes to them and in my opinion they are now a 1st place cookie! Enjoy!

SONY DSC

Here is my version with much less sugar among other things. Let me know how yours turn out, Enjoy!

Yield 4 dozen 2″ to 3″ cookies

2  3/4 cups all-purpose unbleached flour
1 teaspoon baking soda
1/2 teaspoon baking powder
1 teaspoon fine pink sea salt (or fine kosher salt)
1 cup (2 sticks) softened unsalted butter
1 cup sugar
1 extra large egg (large would be fine here also)
2 teaspoons vanilla extract
2 to 3 tablespoons low fat buttermilk

Sprinkles, or colored sanding sugar for decorating

SONY DSC
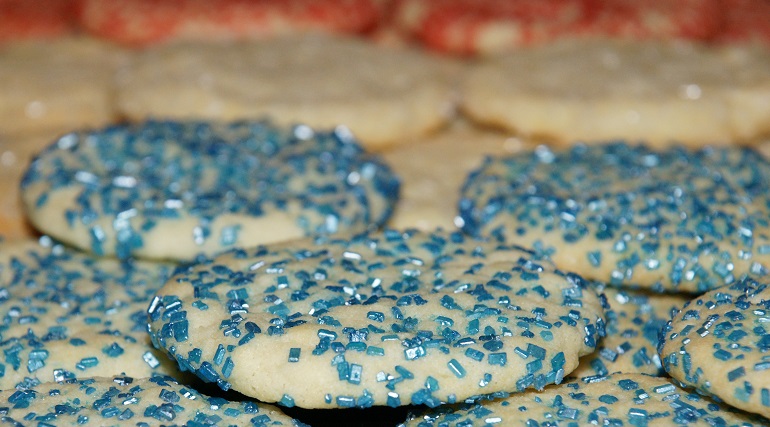
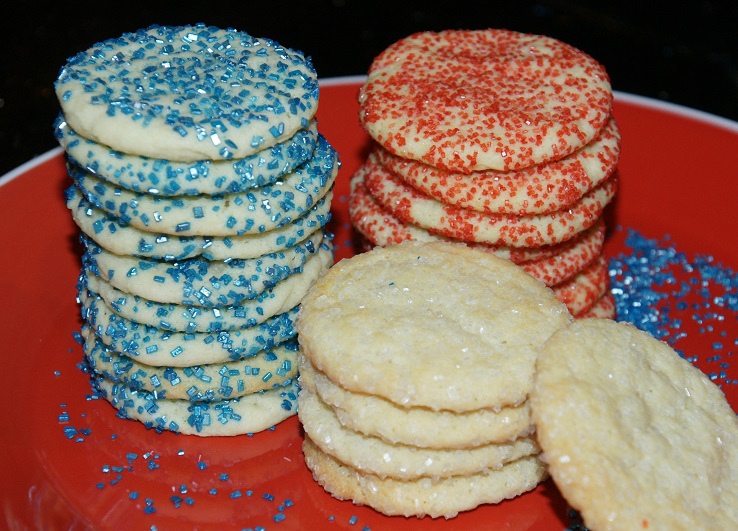
I made them in red, white and blue for my friend’s daughter who is going to college next year. You guessed it, she’s going to American in D.C.!

Preheat oven to 375 degrees. Prepare a cookie sheet with parchment paper and set aside.

In a small bowl, sift together flour, baking soda, baking powder and salt and set aside.

In a larger bowl, cream together butter and sugar until light and fluffy. Add the egg and vanilla and mix just until combined. Scrape down the sides and then add the dry ingredients in two batches. Add the buttermilk one tablespoon at a time just enough to moisten the dough to make it soft, not wet.

I use a small 1 1/2″ cookie scoop for these but you could use a teaspoon to scoop a portion of the dough. Roll by the teaspoon into a ball and place on cookie sheet leaving 2″ between cookies (they spread quite a bit). Flatten with your hand slightly and then sprinkle with regular white or colored sugar on top.

Bake for 8 to 10 minutes or until just getting golden. Let stand on cookie sheet for 2 minutes before removing to a wire rack.

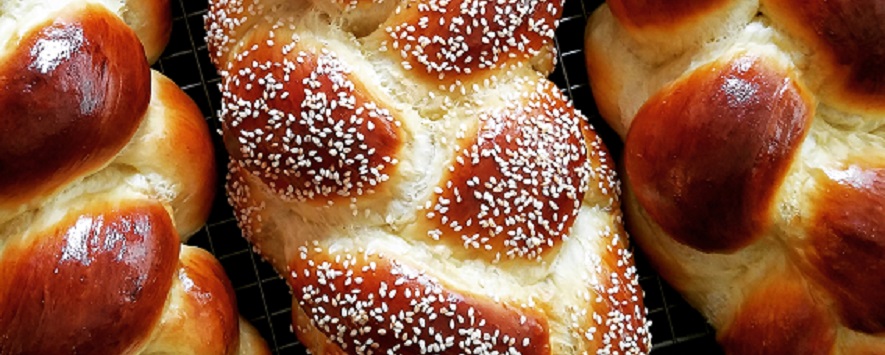
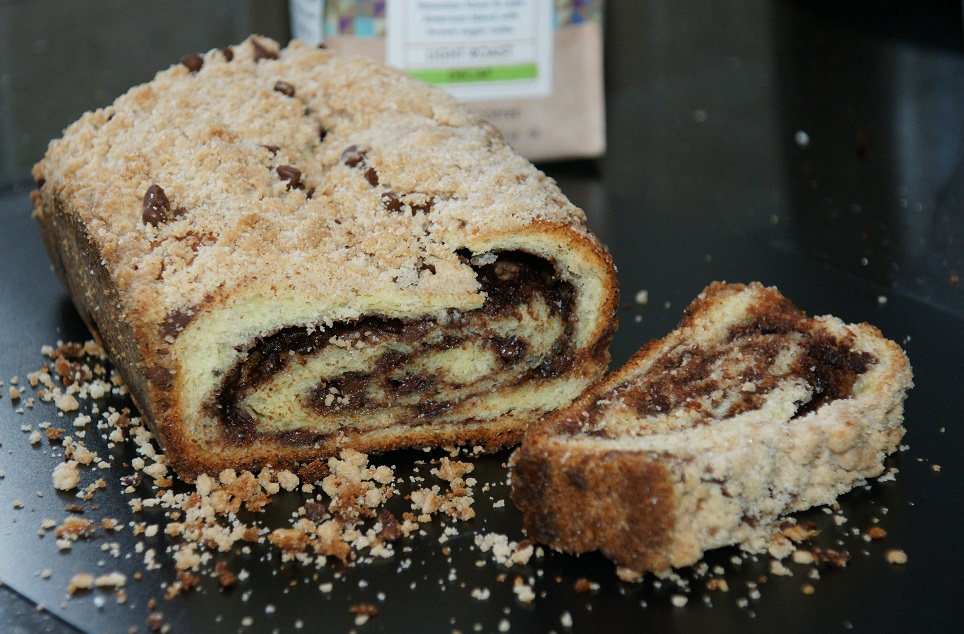
Mother’s Day 2.0 – Baking Chocolate Babka!

SONY DSC

My mother wasn’t big on what she called Hallmark holidays. She believed that everyday should be mother’s day, just as much as she believed everyday should be children’s day and father’s day for that matter. If you think about it, she was right. Why celebrate someone you love only one day a year? Aren’t they special everyday? Do we need a card company to remind us to be nice to our mothers? I’m not suggesting bringing your mother flowers everyday, or making her breakfast in bed in every spare moment, and having dinners out every Sunday, but when you really think about it, it’s not that difficult just to do something nice for those we love.

What does this have to do with babka? Well, everything. I don’t like gifts on “mother’s day” – flowers yes, gifts not so much. I like spending time with my family; that’s my gift. This past Sunday, not the “official mother’s day” was my mother’s day. My son Ethan titled it Mother’s Day 2.0 – an upgraded version so to speak! We didn’t all sit down to breakfast together, I wasn’t served breakfast in bed, and yes, I did the dishes! What made it my day was that everyone did something with me and planned a day for us to be together. This started with making babka with my older son Jarred. I’m pretty sure he will be the one to carry on the family recipes and for that I’m extremely glad.

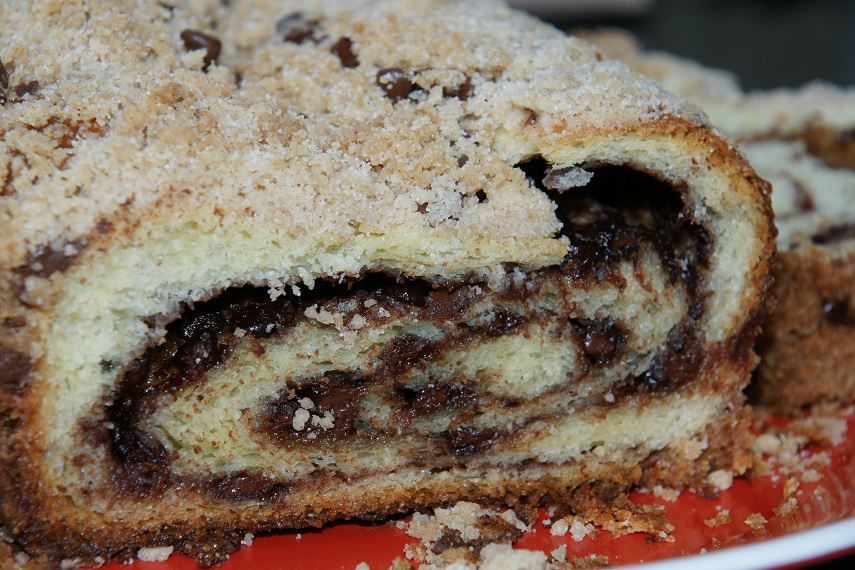
Babka is an Eastern European sweet yeast bread that is classified as a coffee cake. If you live in the northeast or you’re a Seinfeld fan you know there are 2 kinds of babka – a chocolate babka and a cinnamon babka. Check out this clip from Seinfeld with Jerry and Elaine, it’s truly a classic! Chocolate babka is the more popular of the two. In the show, they describe the cinnamon babka as the lesser babka, which in all honesty I don’t necessarily agree with. Chocolate is my favorite so we decided to try that one first. I have always thought it was difficult to make – turns out, the toughest part is waiting for the dough to rise! My friend Marcy makes babka all the time and now I know why! So here’s the recipe and be patient; enjoy a nice cup of coffee while you’re waiting.

SONY DSC

Recipe for the Yeast Dough (makes two 8″ loaves)

1/4 cup warm water plus 1 teaspoon sugar (around 110 degrees)
1  1/2 tablespoons active dry yeast (or 2 packages)
1/4 cup sugar
2  1/2 cups all-purpose flour
3/4 teaspoon salt (I used pink sea salt)
1 stick butter melted
2 extra large eggs (at room temperature)*
1 teaspoon pure vanilla extract
1 large egg for the egg wash (this will be brushed on before the streusel is added)

*eggs should always be room temperature when baking. You can put them in warm water for about 5 minutes if you forget to take them out ahead of time. Doing this will help the eggs blend well with the room temperature butter.

In a measuring cup add 1/4 warm water and 1 teaspoon sugar. Sprinkle in the yeast and stir. Set aside for about 5 minutes until the yeast has bubbled and created a foam on top.

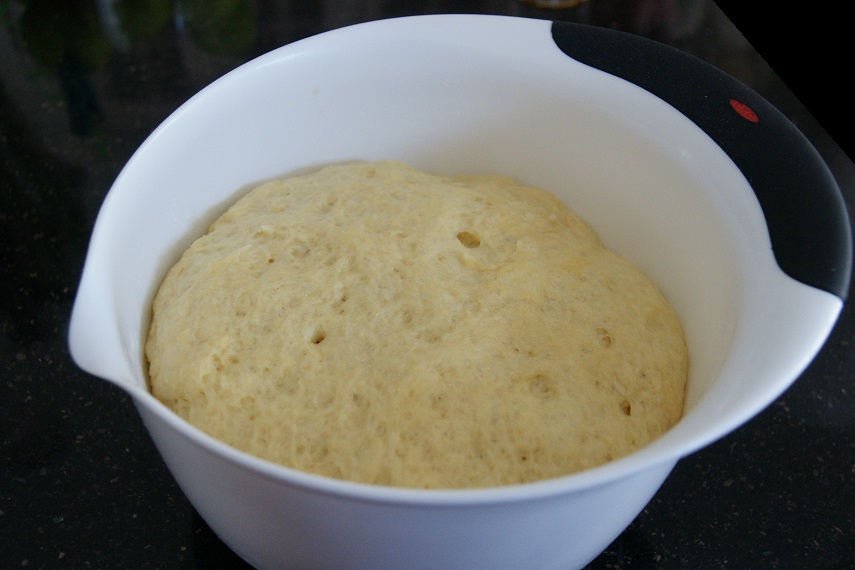
While the yeast is blooming you can put the dough together. In a medium size mixing bowl add all the dry ingredients and stir with a fork to combine. In a separate bowl mix the eggs, butter and vanilla. Add the wet ingredients to the dry including the yeast. I kneaded the dough in the bowl for just a couple of minutes to combine. Cover the bowl with plastic wrap and place it in a warm spot to rise until double in size (about 1 hour or maybe a little more).

While the dough is rising, put together the filling and streusel topping below.

SONY DSC

Chocolate Filling

1 stick butter softened (not melted)
1/4 cup cocoa powder
1/2 cup sugar
pinch of salt

2/3 cup good quality mini chocolate chips

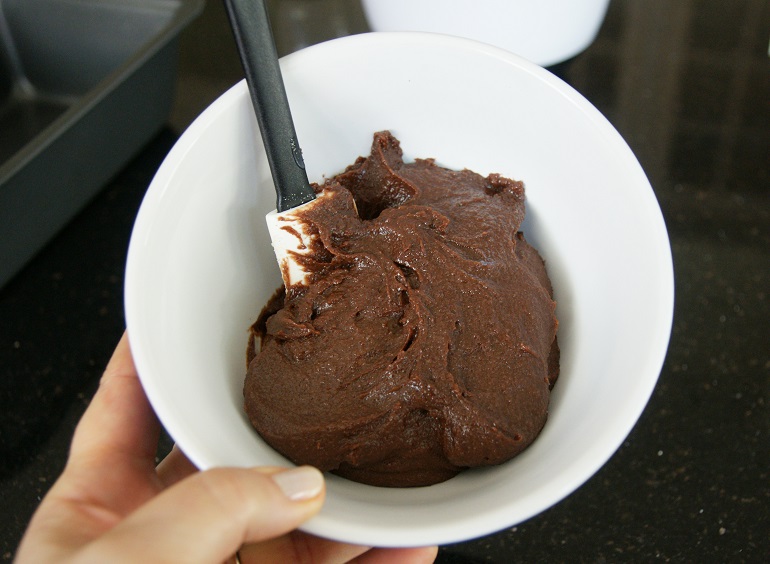
In a small bowl, sift the cocoa into the sugar and salt. Mix in the butter until well blended, cover and set aside. The chips will be sprinkled on top of the filling. Please note: If the mixture is too soft, put it in the fridge to firm up. It should be the consistency of easy to spread peanut butter.

SONY DSC

Streusel Topping

1/3 cup butter melted
1/2 cup all-purpose flour
1/3 cup sugar
1/2 teaspoon cinnamon
1/2 teaspoon pure vanilla extract (or almond extract)
1/4 teaspoon baking powder
1/4 teaspoon salt

In a small bowl, sift all the dry ingredients together. Add the melted butter and extract, stir with a fork until combined and crumbs form. Cover with plastic wrap and set aside.

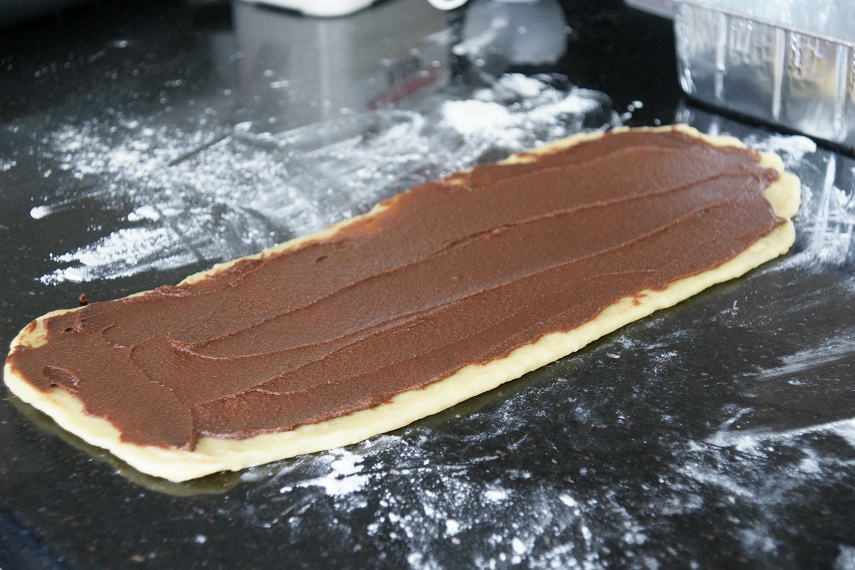
Once the dough is doubled in size, punch it down, take it out of the bowl and place on a well floured surface. Split the dough into two pieces using a knife or dough scraper. Make sure you have enough flour on the board so that when you roll out the dough it doesn’t stick. Roll out one piece of dough into an 8″ x 12″ rectangle, it should be about 1/8″ thick.

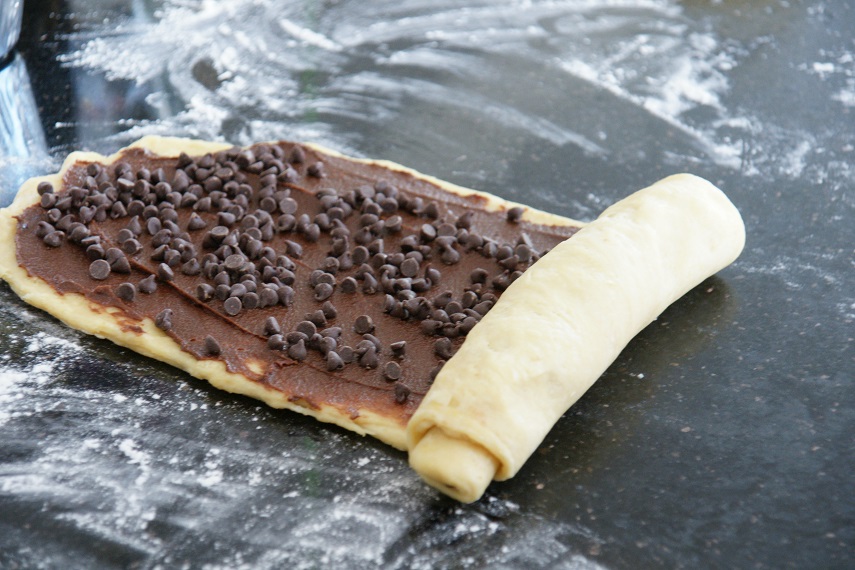
With a spatula, spread 1/2 the chocolate filling mixture and then sprinkle 1/3 of the miniature chips on top.

SONY DSC

SONY DSC

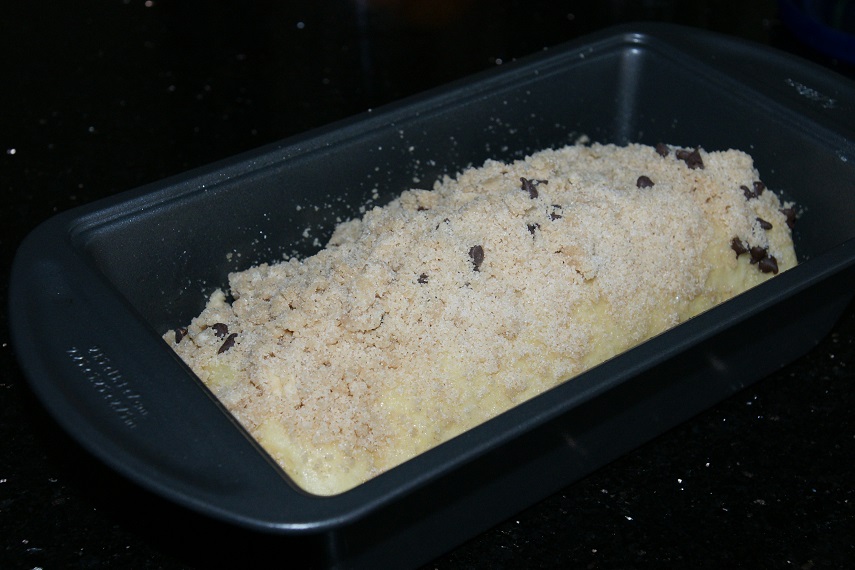
Starting at the bottom edge, roll the dough into a tight log. There are many ways to form a babka, you can fold the log in half and twist it, you can cut it into pieces and place them on top of each other, or even make it like monkey bread. For my first time out, I thought simple was best and kept it in a log. Place the log into an 8″ x 4″ aluminum loaf pan that has been buttered generously or sprayed with canola oil. Repeat this process with the second piece of dough. Now they are ready for their second rising. Place plastic wrap on top and place in a warm place for another hour or more.

SONY DSC

Preheat your oven to 350 degrees with your baking rack in the center of the oven. After the second rising it should be almost double in size. Now it’s ready to brush with egg wash, do this very lightly as you don’t want them to deflate. Sprinkle each with 1/2 the streusel mixture and place in preheated oven. Bake for 30 to 35 minutes or until lightly brown on top. If they are browning too much, place a piece of foil on top.

SONY DSC


Popovers with Strawberry Butter

SONY DSC

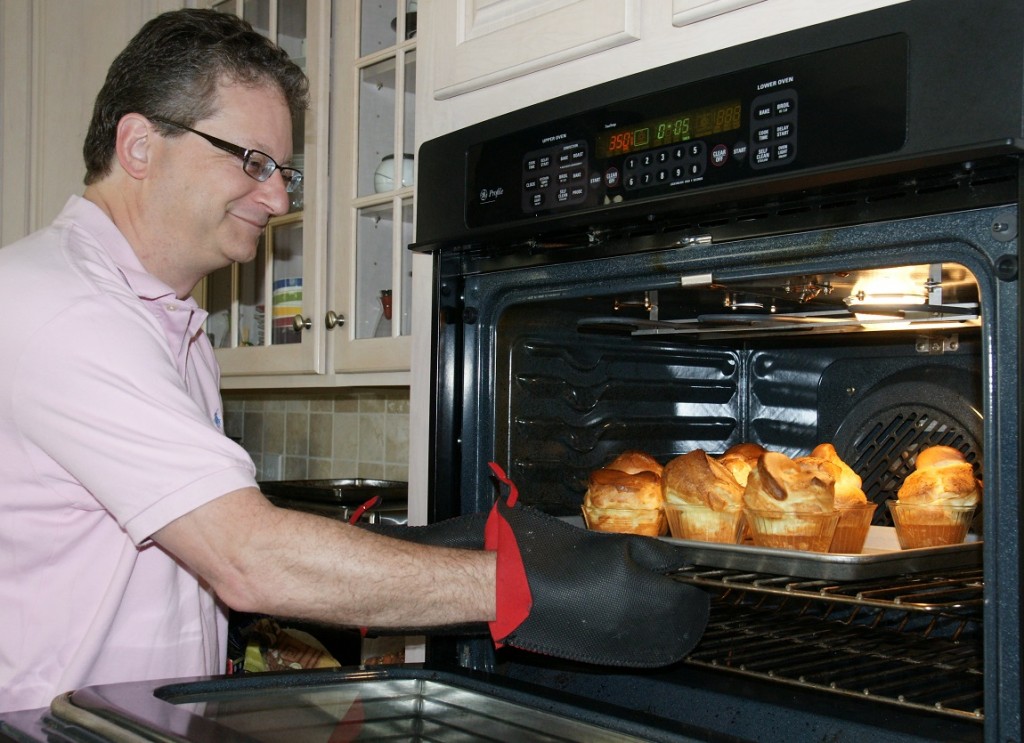
How lucky can a girl get when her husband and son wake up early on Mother’s day to make delicious popovers? Pretty lucky, especially since I love popovers. I wouldn’t say they are my favorite breakfast, but they’re right up there with the best of them. Growing up, my mother would take my sister and I to Neiman Marcus department store for lunch. That’s where I ate my first popover. They were served with softened butter and warm jam, it was such a treat to go there for a ladies lunch and have them. When my sister Rochelle came to visit us in Florida we always went there for lunch, she loved it. For days after my mother would talk about their delicious popovers; they’re so crusty yet soft inside, how do they get that way, they must be difficult to make. Then one day we decided to make them. I was taking home economics in high school and there was a recipe for popovers in the cookbook I had. Imagine, a plain old Betty Crocker cookbook could have such a fantastic recipe. It was only 5 ingredients and we thought how easy is that, let’s try it? Turns out, they were easy and so delicious. They became our special occasion breakfast. For my birthday this past summer, my son’s Jarred and Ethan made them for me on my birthday for breakfast. I’m glad they remembered to make them for me today as well. As my mother always said, everyday is mother’s day so enjoy yours with this special treat!

2 large or extra-large eggs*
1 cup all-purpose flour
1 cup milk at room temperature 
1 tablespoon butter melted (plus extra to grease the muffin tins)
½ teaspoon salt

Preheat oven to 450 degrees.

Generously butter 6 muffin tins or six 5 ounce custard cups and set aside on a cookie sheet.

In a blender or with a mixer blend the eggs, milk, butter and salt. Blend just until mixed. Add the flour and blend on low just until smooth. Do not over beat.

Fill muffin tins ¾ full or if using custard cups about ½ full and bake for 20  minutes then lower the temperature to 400 degrees and bake about 10 to 15 minutes longer or until a deep golden brown. Keep an eye on them. If they get too brown on top, cover lightly with foil. Immediately remove from cups and serve.

You can serve them with butter or your favorite jam. Another delicious way to enjoy them is by making your own strawberry butter. There are a few recipes out there that add confectioner sugar to the butter and jam mixture. I find that too sweet and make it the way a restaurant in NYC taught me (coincidentally it was my first mother’s day). We went to a restaurant called Coconut Grill on the upper east side of Manhattan. Jarred was only about one month old and we were so tired we couldn’t even remember when we ate last. They put a basket of Irish soda bread on the table with a little cup of strawberry butter. It was the most delicious thing I ever tasted. The waiter was so nice he gave us the recipe.

1/2 pound (1 stick) of unsalted butter at room temperature
1/2 cup strawberry jam (or your favorite jam, berry jams work the best)

With a hand mixer whip the butter until smooth. Add the jam and incorporate just till mixed lightly. It’s okay if the butter has streaks of jam. It couldn’t be any easier then that!

SONY DSC

I took a bunch of photos of my son while mixing the batter but found out I didn’t have a chip in my camera!  How ridiculous is that? UGH!  So here is the beautiful finished product. Crisp and golden on the outside and soft and moist on the inside. So yummy!

*I always bake with extra-large eggs. Subbing large will work fine too.

Passover French Toast

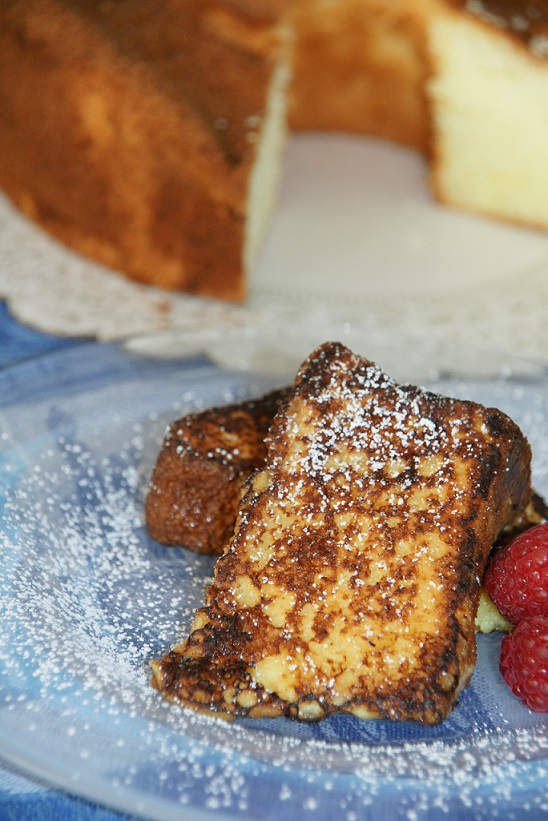
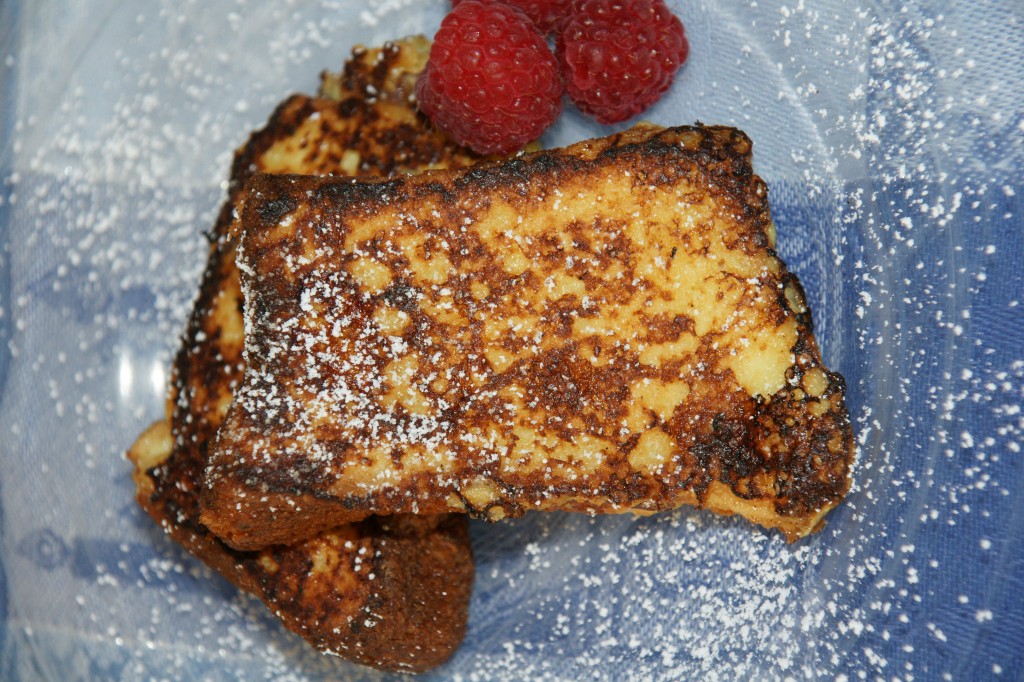
SONY DSC

After day 4 or 5 of Passover, the novelty of having matzoh for breakfast starts to wear off. My boys have had their fill of Tam Tam crackers with cream cheese, cream cheese and jelly on matzoh, matzoh pizza, matzoh rolls, and matzoh brei. Sometimes we have cheese blintzes for breakfast or even left over farfel mac and cheese to take a break. While I love matzoh, it doesn’t really love me so I’m a fruit and eggs girl in the mornings. If you keep Passover, you know what I’m talking about. The first couple of days, you can’t get enough because it’s so good. But then, you start to miss whatever your usual breakfast is.

A few years ago I had a lot of sponge cake in my house. My sister bought me 2 loaves and I bought 2 loaves so there was an abundance in my house. During the holiday I use the sponge cake as if it were bread for sandwiches and wondered how it would hold up as French toast. So I tried it and it held up great! It’s a little bit more delicate then using regular bread, it is cake after all so handle it carefully. Here you have it, Passover French toast… Enjoy! I’d love it if you would let me know how it turned out.

This recipe is for 2 servings

4 slices of sponge cake cut into 1″ slices
2/3 cup fat free milk
1 extra large egg
1 teaspoon kosher for Passover vanilla or almond extract
butter for the pan
Put a medium size frying pan on the stove. Set the heat to medium/high and place about 2 teaspoons of butter in the pan. Slice the sponge cake and set aside.

While the pan is heating up, whisk the egg, milk and extract in a medium size bowl. Dip the slices of sponge cake into the egg mixture. Don’t let it soak, just dip one side, then flip to the other and place in the pan. The sponge cake (hence it’s name) is like a sponge and will soak up the mixture pretty quickly. It’s much more delicate then a regular slice of bread so handle it gingerly. Cover the frying pan and cook for about 3 -5 minutes on each side. When a little darker then golden brown, flip it to the other side.

Serve with fruit, cinnamon sugar or eat it plain. It’s so good!

SONY DSC