banana bread waffles

I’m about to turn your breakfast world upside down with my creation of banana bread waffles! You read that right Banana bread WAFFLES! It’s no secret banana bread was the official baked good during Covid-19 and hand up – I’m guilty and have baked dozens. At one point, when my son saw me about to bake yet another banana bread, I think he went pale! After splashing a little water on his face I asked “what am I going to do with all of these bananas?” Of course I freeze a lot for smoothies, but at the rate I have been buying them I still had plenty left over.

banana bread waffle

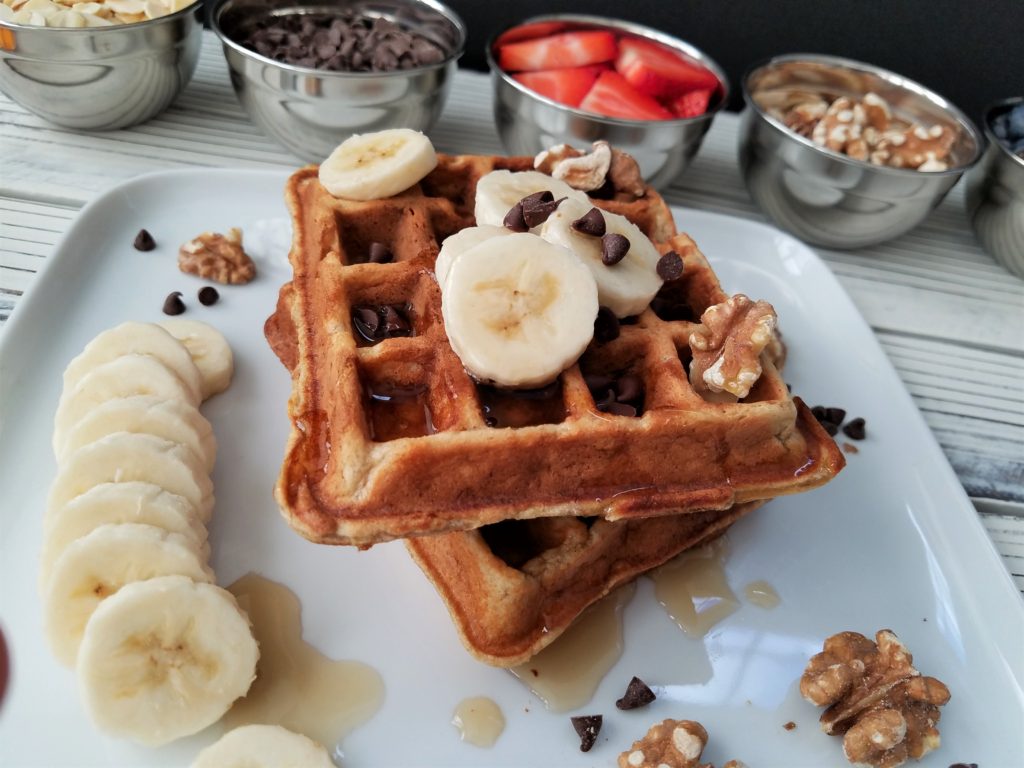
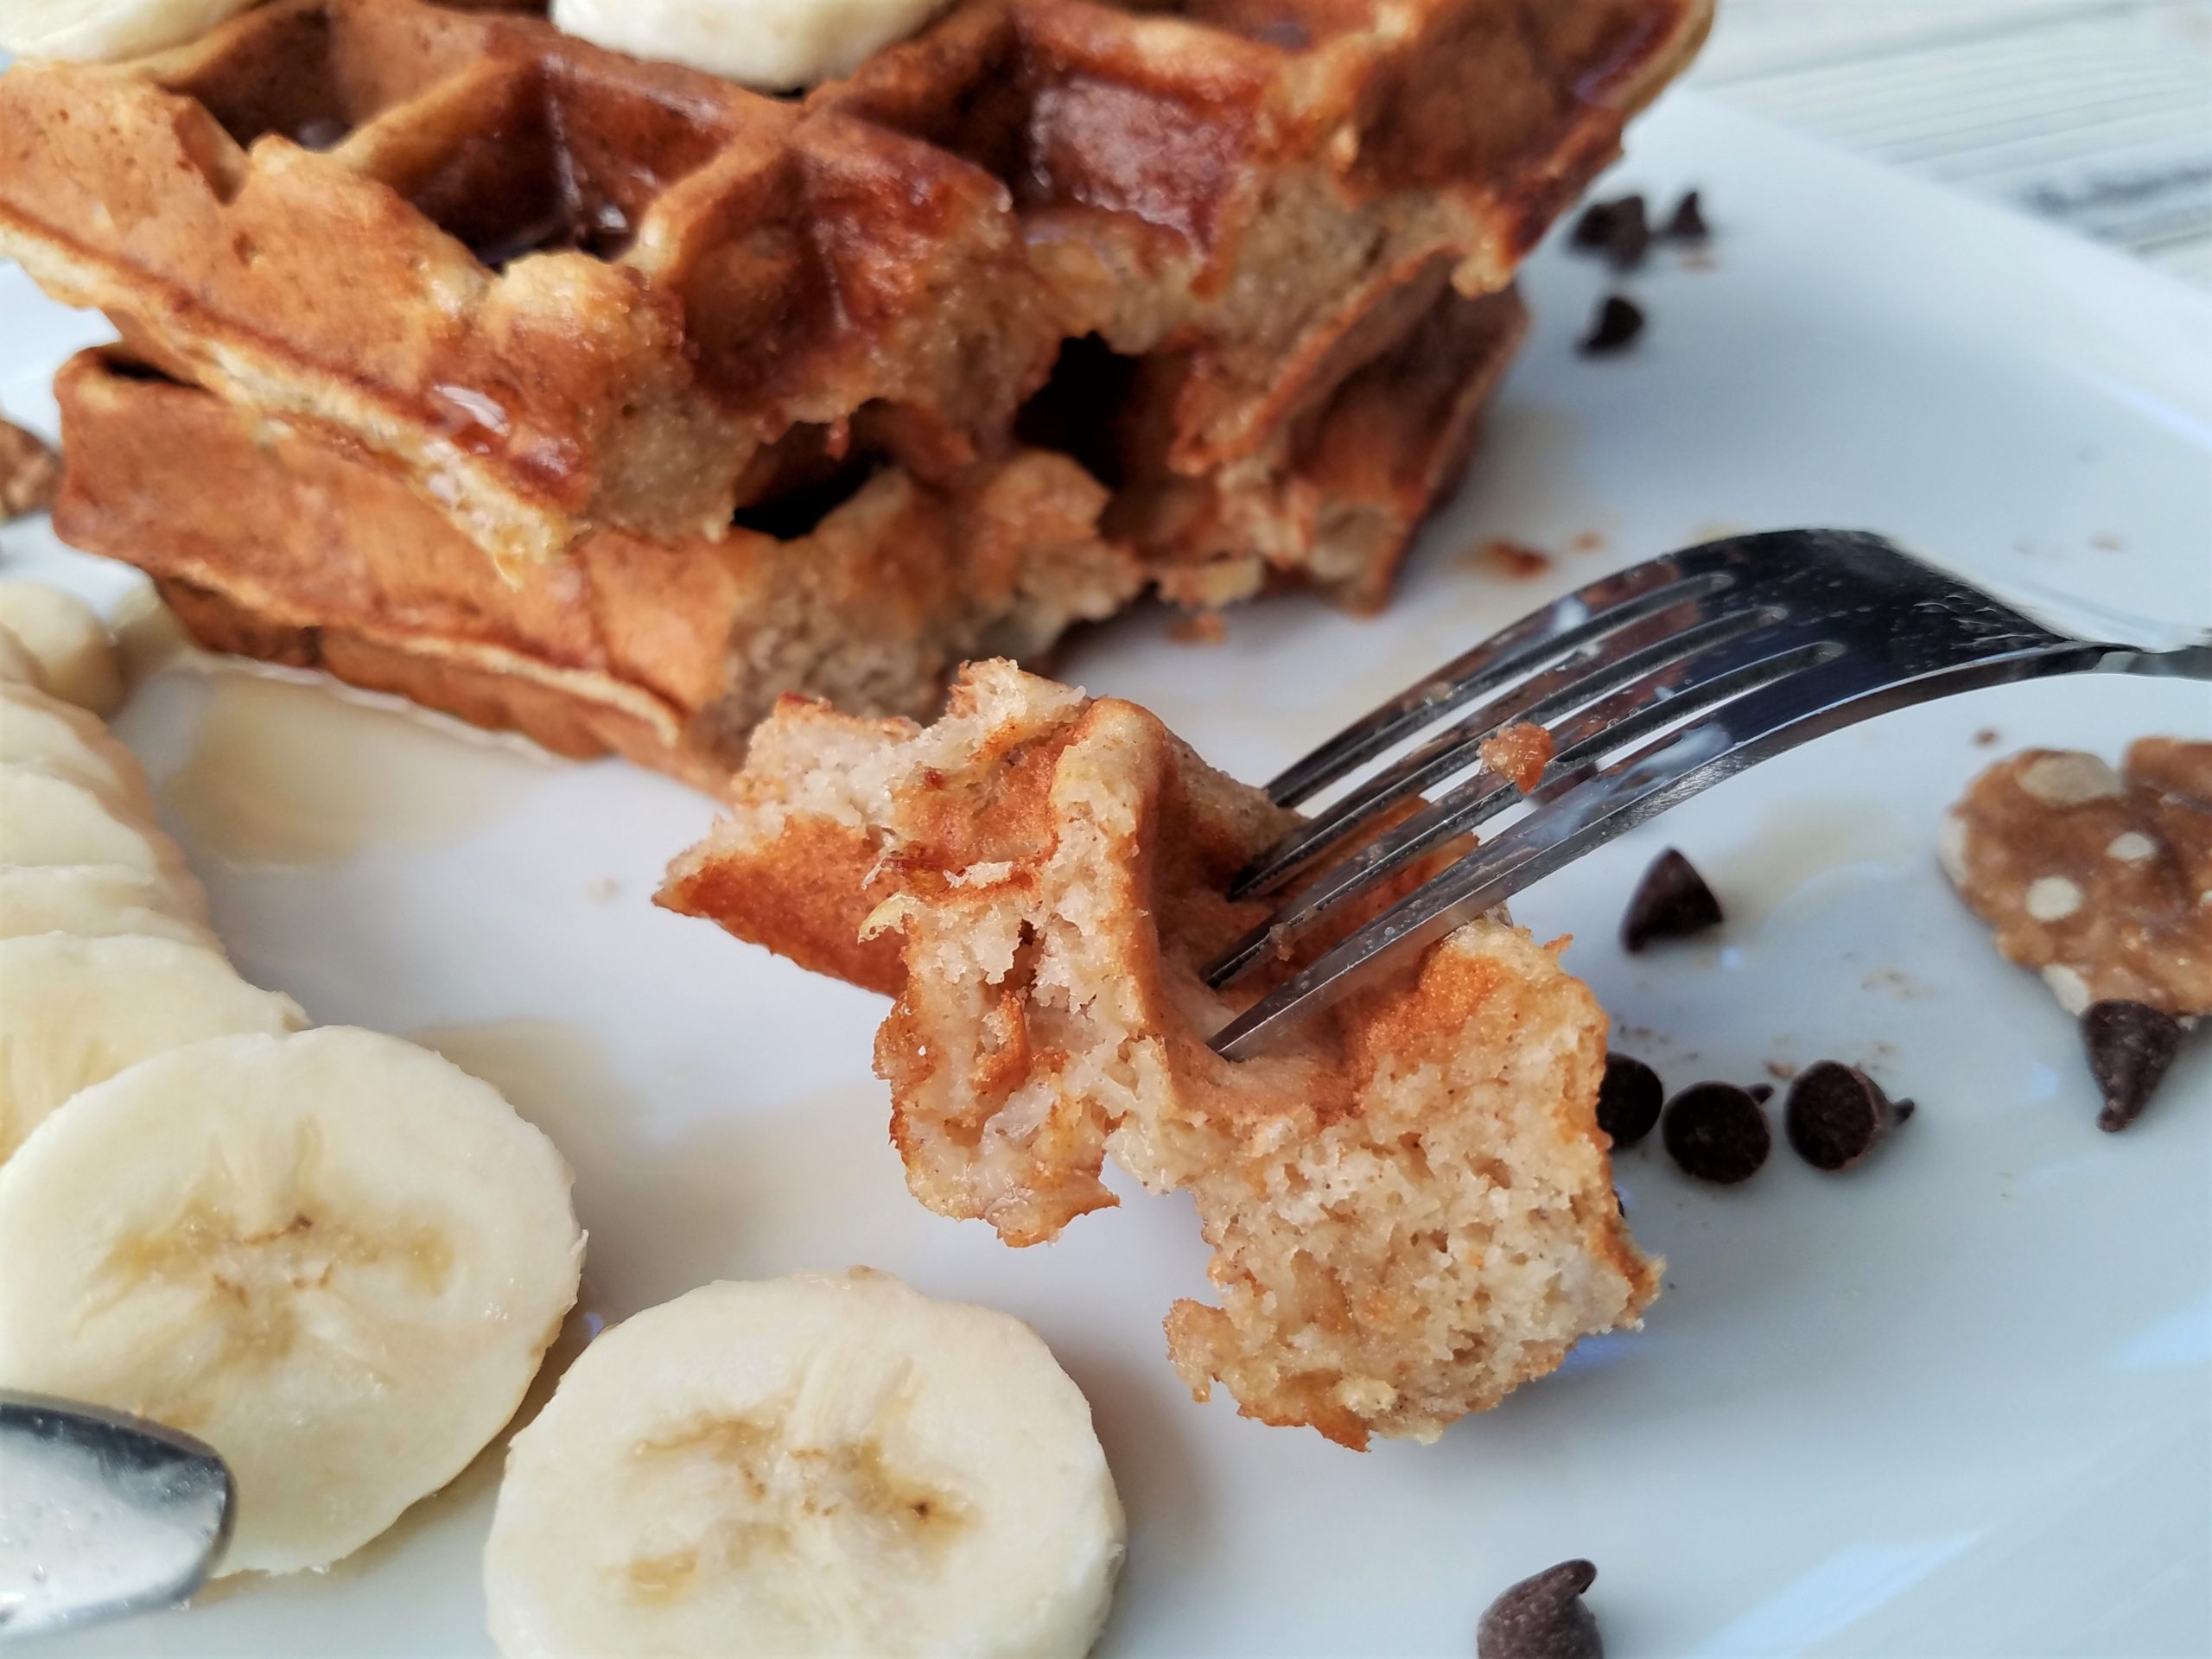
Since I already had the ingredients out for the bread, I said okay, how about banana bread waffles? His eyes lit up and this is how a recipe is born! I took my mom’s banana bread recipe (which we love) and tweaked a couple of things. I grabbed my waffle iron to see how they would come out, SUPER YUMMMMMMMY – that’s how! The waffles have everything you love about banana bread; they are naturally sweet from the bananas, soft and cakey like banana bread on the inside, and slightly crispy on the outside like a waffle.

banana bread waffle

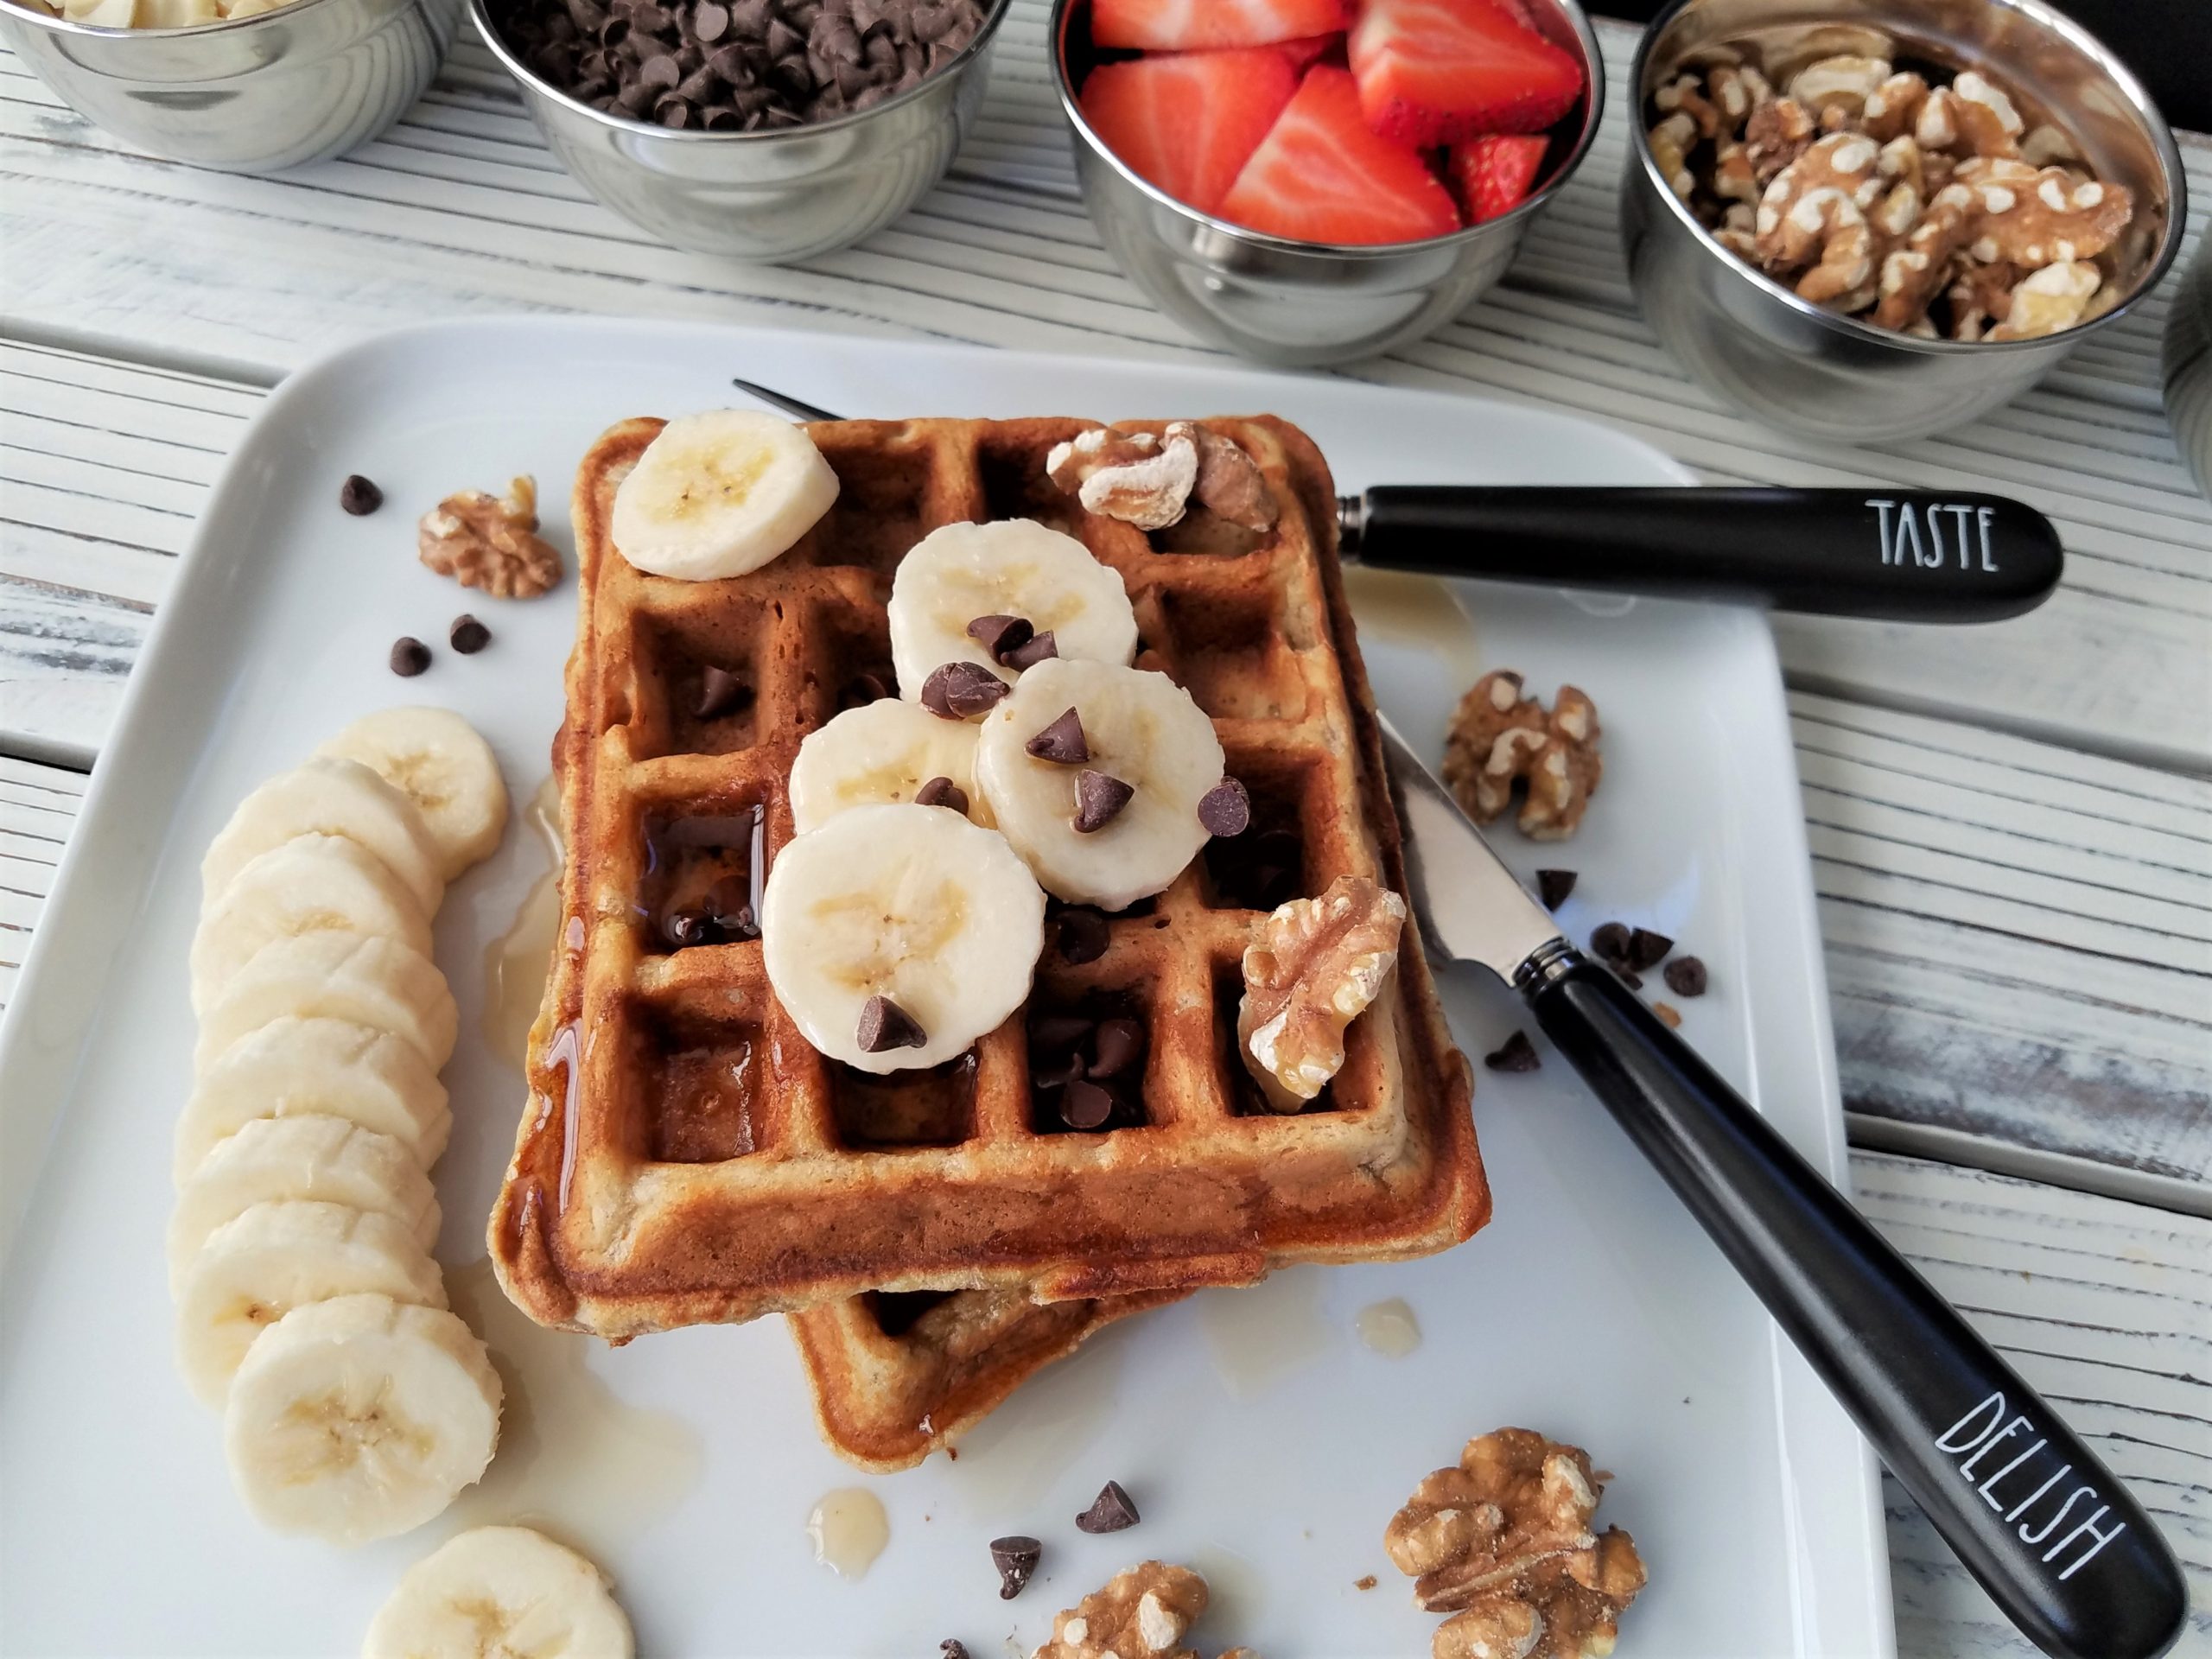
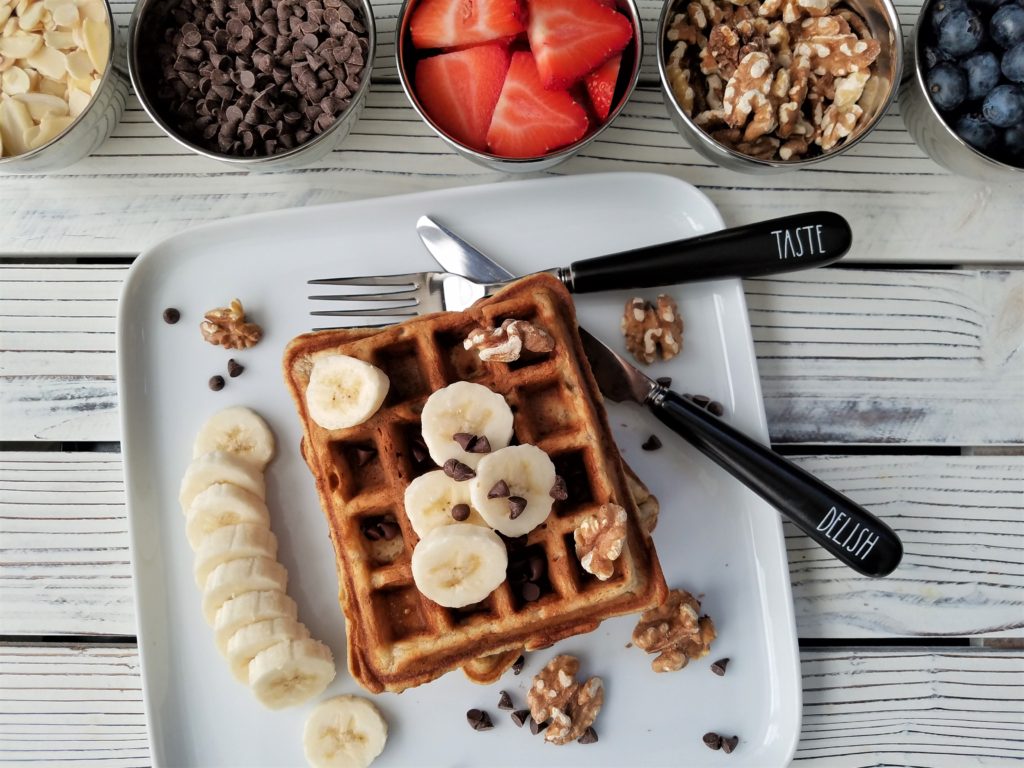
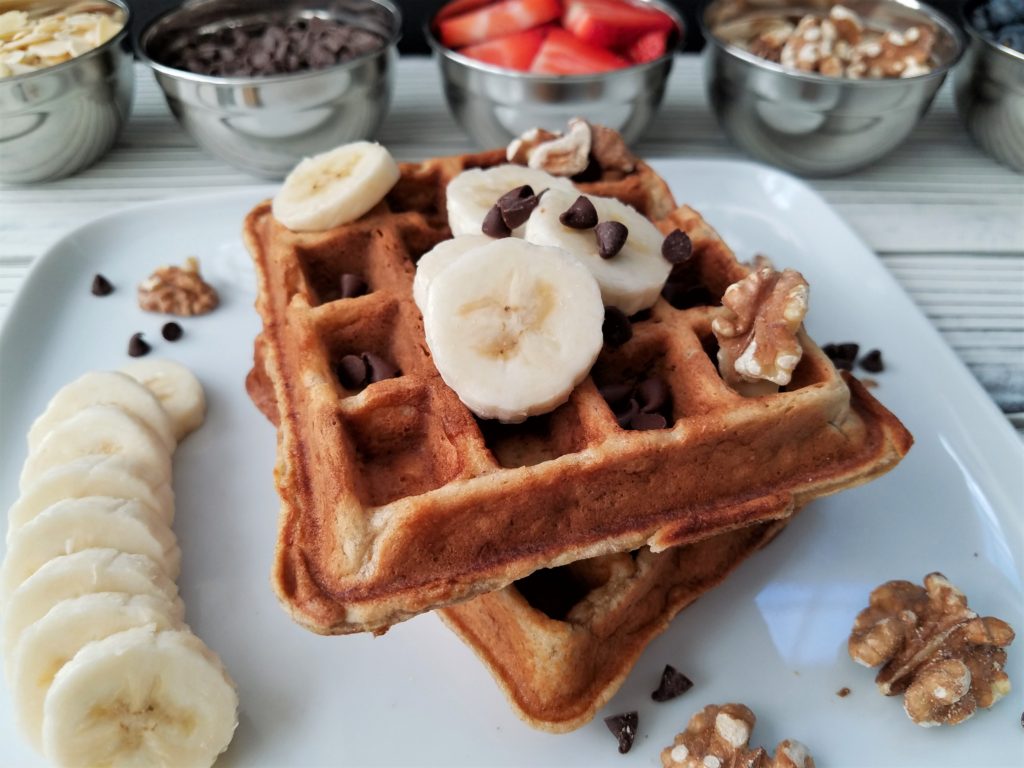
When I served them I turned it into a party and set out a topping bar with sliced bananas (because why not?), fresh blueberries, toasted walnuts, sliced almonds, chocolate chips, strawberries, and maple syrup. Toppings always make everything better, don’t you think? Get creative with yours and set out what you like. You can also add finely chopped walnuts or mini chips right to the batter.

banana bread waffles

Here’s the best part, now that little by little we are all taking steps to get back to life outside our homes, you can have your banana bread in a fraction of the time. Start to finish breakfast is ready in less than 30 minutes. If you’re still looking for something special to make Dad for breakfast/brunch today this is it! These are perfect anytime you want to make breakfast or brunch a little bit more special. The recipe makes 8 waffles depending on your waffle iron, you can them warm in the oven until ready to eat, and they freeze great, but I don’t think there will be leftovers! What are you waiting for? Start mashing some of those bananas on your counter! As always, Enjoy! And happy Father’s Day!

banana bread waffles

ingredients
1 ½ cups all-purpose unbleached flour
1 ½ teaspoon baking powder
½ teaspoon baking soda
3/4 teaspoon salt
2 to 3 large ripe bananas (1 cup mashed a little more will be fine)
2 extra-large eggs at room temperature
¼ cup sugar
½ cup Greek yogurt or low-fat sour cream
2 tablespoons melted butter
1 teaspoon vanilla extract
chopped walnuts (optional)
mini chocolate chips (optional)

directions
In a large bowl add all the flour, baking powder, baking soda and salt. Whisk to blend together and set aside. If you are going to add any of the optional ingredients like the walnuts or chocolate chips, add them to the flour mixture.

In a second bowl add the mashed banana, yogurt, eggs, sugar and butter and mix until well blended. Fold the dry ingredients into the wet and mix just until blended. Do not over mix.

I used a waffle iron with four squares using about a half cup batter in each well and yielded 9 waffles. Follow your waffle iron directions and cook accordingly.

My Version of Sadelle’s Salmon Salad

Sadelle’s is a restaurant in SoHo (NYC) and serves the perfect sized bagel (not the tremendous inflated ones) and delicious appetizing (smoked fish, sturgeon and salads). Recently I posted a photograph on Instagram of me sitting behind a tower of deliciousness from Sadelle’s. If you saw it, you probably didn’t even notice me! The tower is always a show stopper and when it’s delivered to your table – heads turn! I’m re-posting it here below so you can see for yourself.

Continue reading “My Version of Sadelle’s Salmon Salad”
everything bagel with vegetable cream cheese

vegetable cream cheese, it’s my favorite schmear!

everything bagel with vegetable cream cheese Vegetable cream cheese, it’s my favorite schmear!

It’s 11am on Sunday morning and if I was back in New York right now, I would be standing on line at a bagel place behind someone drinking coffee, maybe texting or talking on their cell phone, hair unkempt (lots of hats on Sunday mornings!) reading the Post patiently (or maybe not so patiently – it is NY after all). Standing there in the warmth of the store I would inhale the aroma of Sunday.

Chances are if you are one of my neighbors in Columbus, Ohio – you are not having this kind of experience today. It’s challenging to say the least to get a good bagel here but even more challenging to get vegetable cream cheese. Northeast friends, brace yourself and take a deep breathe… we don’t have bagel places like you do! The closest we have to a NY bagel is Bruegger’s Bagels https://www.brueggers.com/ (a 25 minute drive from my house) or we can get a bagel delivery from Sammy’s Bagels http://sammysbagels.net/  but we certainly don’t have vegetable cream cheese!

So today instead of standing “on line” –  yesterday I went “online” and placed my order for a dozen bagels which were then delivered to my doorstep at 4am this morning! I ran downstairs like a little kid and opened the front door to my house, only to find a big brown bag filled with bagels! I opened the bag and breathe in… Sunday has arrived!

So after all of this, you are probably wondering if there a recipe somewhere in here? Yes! I like to eat my bagel with a vegetable cream cheese schmear but it’s not sold in Columbus – so, I make it myself.  If you have never had vegetable cream cheese before it’s a must. It’s creamy and has crunchy little gems of carrots, green onion, radish, and celery. It’s so easy to whip up and to adapt the ratio to your liking. The real bonus is that I can make it lower in fat by using the reduced fat cream cheese. Next time you have a bagel try it with a vegetable cream cheese schmear. You’ll thank me! Enjoy!

This recipe is open for adaption. If you don’t like carrots, skip it or add red or green pepper instead. The same goes for all the other ingredients. Listed are what is traditionally found in vegetable cream cheese and how I like it. Recipe fills a little bit more than a 16 ounce container. In my house, that’s enough for one breakfast!

2 packages of 1/3 reduced fat Philadelphia cream cheese close to room temperature
6 tablespoons finely sliced green onions (scallions)
4 tablespoons finely diced carrots
4 tablespoons finely diced radish
3 tablespoons finely diced celery (place on a paper towel after dicing and pat it dry)

Dice all of the vegetables very finely. I have seen some recipes suggest grating the vegetables. I don’t recommend that. It makes for a very different texture and flavor.

With a hand mixer, cream the 2 packages of cream cheese until fluffy, about 1 minute. Add the vegetables and blend just to incorporate. That’s it! If you don’t have a mixer, you can use a food processor to whip the cream cheese, then fold the vegetables in by hand. Enjoy!

SONY DSC

Mother’s Day 2.0 – Baking Chocolate Babka!

SONY DSC

My mother wasn’t big on what she called Hallmark holidays. She believed that everyday should be mother’s day, just as much as she believed everyday should be children’s day and father’s day for that matter. If you think about it, she was right. Why celebrate someone you love only one day a year? Aren’t they special everyday? Do we need a card company to remind us to be nice to our mothers? I’m not suggesting bringing your mother flowers everyday, or making her breakfast in bed in every spare moment, and having dinners out every Sunday, but when you really think about it, it’s not that difficult just to do something nice for those we love.

What does this have to do with babka? Well, everything. I don’t like gifts on “mother’s day” – flowers yes, gifts not so much. I like spending time with my family; that’s my gift. This past Sunday, not the “official mother’s day” was my mother’s day. My son Ethan titled it Mother’s Day 2.0 – an upgraded version so to speak! We didn’t all sit down to breakfast together, I wasn’t served breakfast in bed, and yes, I did the dishes! What made it my day was that everyone did something with me and planned a day for us to be together. This started with making babka with my older son Jarred. I’m pretty sure he will be the one to carry on the family recipes and for that I’m extremely glad.

Babka is an Eastern European sweet yeast bread that is classified as a coffee cake. If you live in the northeast or you’re a Seinfeld fan you know there are 2 kinds of babka – a chocolate babka and a cinnamon babka. Check out this clip from Seinfeld with Jerry and Elaine, it’s truly a classic! Chocolate babka is the more popular of the two. In the show, they describe the cinnamon babka as the lesser babka, which in all honesty I don’t necessarily agree with. Chocolate is my favorite so we decided to try that one first. I have always thought it was difficult to make – turns out, the toughest part is waiting for the dough to rise! My friend Marcy makes babka all the time and now I know why! So here’s the recipe and be patient; enjoy a nice cup of coffee while you’re waiting.

SONY DSC

Recipe for the Yeast Dough (makes two 8″ loaves)

1/4 cup warm water plus 1 teaspoon sugar (around 110 degrees)
1  1/2 tablespoons active dry yeast (or 2 packages)
1/4 cup sugar
2  1/2 cups all-purpose flour
3/4 teaspoon salt (I used pink sea salt)
1 stick butter melted
2 extra large eggs (at room temperature)*
1 teaspoon pure vanilla extract
1 large egg for the egg wash (this will be brushed on before the streusel is added)

*eggs should always be room temperature when baking. You can put them in warm water for about 5 minutes if you forget to take them out ahead of time. Doing this will help the eggs blend well with the room temperature butter.

In a measuring cup add 1/4 warm water and 1 teaspoon sugar. Sprinkle in the yeast and stir. Set aside for about 5 minutes until the yeast has bubbled and created a foam on top.

While the yeast is blooming you can put the dough together. In a medium size mixing bowl add all the dry ingredients and stir with a fork to combine. In a separate bowl mix the eggs, butter and vanilla. Add the wet ingredients to the dry including the yeast. I kneaded the dough in the bowl for just a couple of minutes to combine. Cover the bowl with plastic wrap and place it in a warm spot to rise until double in size (about 1 hour or maybe a little more).

While the dough is rising, put together the filling and streusel topping below.

SONY DSC

Chocolate Filling

1 stick butter softened (not melted)
1/4 cup cocoa powder
1/2 cup sugar
pinch of salt

2/3 cup good quality mini chocolate chips

In a small bowl, sift the cocoa into the sugar and salt. Mix in the butter until well blended, cover and set aside. The chips will be sprinkled on top of the filling. Please note: If the mixture is too soft, put it in the fridge to firm up. It should be the consistency of easy to spread peanut butter.

SONY DSC

Streusel Topping

1/3 cup butter melted
1/2 cup all-purpose flour
1/3 cup sugar
1/2 teaspoon cinnamon
1/2 teaspoon pure vanilla extract (or almond extract)
1/4 teaspoon baking powder
1/4 teaspoon salt

In a small bowl, sift all the dry ingredients together. Add the melted butter and extract, stir with a fork until combined and crumbs form. Cover with plastic wrap and set aside.

Once the dough is doubled in size, punch it down, take it out of the bowl and place on a well floured surface. Split the dough into two pieces using a knife or dough scraper. Make sure you have enough flour on the board so that when you roll out the dough it doesn’t stick. Roll out one piece of dough into an 8″ x 12″ rectangle, it should be about 1/8″ thick.

With a spatula, spread 1/2 the chocolate filling mixture and then sprinkle 1/3 of the miniature chips on top.

SONY DSC

SONY DSC

Starting at the bottom edge, roll the dough into a tight log. There are many ways to form a babka, you can fold the log in half and twist it, you can cut it into pieces and place them on top of each other, or even make it like monkey bread. For my first time out, I thought simple was best and kept it in a log. Place the log into an 8″ x 4″ aluminum loaf pan that has been buttered generously or sprayed with canola oil. Repeat this process with the second piece of dough. Now they are ready for their second rising. Place plastic wrap on top and place in a warm place for another hour or more.

SONY DSC

Preheat your oven to 350 degrees with your baking rack in the center of the oven. After the second rising it should be almost double in size. Now it’s ready to brush with egg wash, do this very lightly as you don’t want them to deflate. Sprinkle each with 1/2 the streusel mixture and place in preheated oven. Bake for 30 to 35 minutes or until lightly brown on top. If they are browning too much, place a piece of foil on top.

SONY DSC


Popovers with Strawberry Butter

SONY DSC

How lucky can a girl get when her husband and son wake up early on Mother’s day to make delicious popovers? Pretty lucky, especially since I love popovers. I wouldn’t say they are my favorite breakfast, but they’re right up there with the best of them. Growing up, my mother would take my sister and I to Neiman Marcus department store for lunch. That’s where I ate my first popover. They were served with softened butter and warm jam, it was such a treat to go there for a ladies lunch and have them. When my sister Rochelle came to visit us in Florida we always went there for lunch, she loved it. For days after my mother would talk about their delicious popovers; they’re so crusty yet soft inside, how do they get that way, they must be difficult to make. Then one day we decided to make them. I was taking home economics in high school and there was a recipe for popovers in the cookbook I had. Imagine, a plain old Betty Crocker cookbook could have such a fantastic recipe. It was only 5 ingredients and we thought how easy is that, let’s try it? Turns out, they were easy and so delicious. They became our special occasion breakfast. For my birthday this past summer, my son’s Jarred and Ethan made them for me on my birthday for breakfast. I’m glad they remembered to make them for me today as well. As my mother always said, everyday is mother’s day so enjoy yours with this special treat!

2 large or extra-large eggs*
1 cup all-purpose flour
1 cup milk at room temperature 
1 tablespoon butter melted (plus extra to grease the muffin tins)
½ teaspoon salt

Preheat oven to 450 degrees.

Generously butter 6 muffin tins or six 5 ounce custard cups and set aside on a cookie sheet.

In a blender or with a mixer blend the eggs, milk, butter and salt. Blend just until mixed. Add the flour and blend on low just until smooth. Do not over beat.

Fill muffin tins ¾ full or if using custard cups about ½ full and bake for 20  minutes then lower the temperature to 400 degrees and bake about 10 to 15 minutes longer or until a deep golden brown. Keep an eye on them. If they get too brown on top, cover lightly with foil. Immediately remove from cups and serve.

You can serve them with butter or your favorite jam. Another delicious way to enjoy them is by making your own strawberry butter. There are a few recipes out there that add confectioner sugar to the butter and jam mixture. I find that too sweet and make it the way a restaurant in NYC taught me (coincidentally it was my first mother’s day). We went to a restaurant called Coconut Grill on the upper east side of Manhattan. Jarred was only about one month old and we were so tired we couldn’t even remember when we ate last. They put a basket of Irish soda bread on the table with a little cup of strawberry butter. It was the most delicious thing I ever tasted. The waiter was so nice he gave us the recipe.

1/2 pound (1 stick) of unsalted butter at room temperature
1/2 cup strawberry jam (or your favorite jam, berry jams work the best)

With a hand mixer whip the butter until smooth. Add the jam and incorporate just till mixed lightly. It’s okay if the butter has streaks of jam. It couldn’t be any easier then that!

SONY DSC

I took a bunch of photos of my son while mixing the batter but found out I didn’t have a chip in my camera!  How ridiculous is that? UGH!  So here is the beautiful finished product. Crisp and golden on the outside and soft and moist on the inside. So yummy!

*I always bake with extra-large eggs. Subbing large will work fine too.