Chocolate Chip Mandel Bread with Marzipan


While I’ve been on Instagram quite a bit, I haven’t posted here in way too long. So for those of you who have missed me, I’m back baby! And Chocolate Chip Mandel Bread with Marzipan is my Big Comeback. It’s also a great big thank you to SOS (splash of sherri) fans who have been emailing me asking for my return – I really appreciate it! You like me, you really like me! To continue the gratitude I am sharing one of my absolute favorite recipes! Now for the post…

If you walked into my mother’s house at any given time, she was always ready for company. Her coffee can was never empty, there were always a baked goods in the house, a bottle of seltzer ready to make an egg cream, and she could whip up an appetizer, meal or dessert in a matter of minutes with very little on hand. Like Monica on Friends, she was always the hostess! I suppose that’s where I get it from, and enjoy having inherited that trait from her.
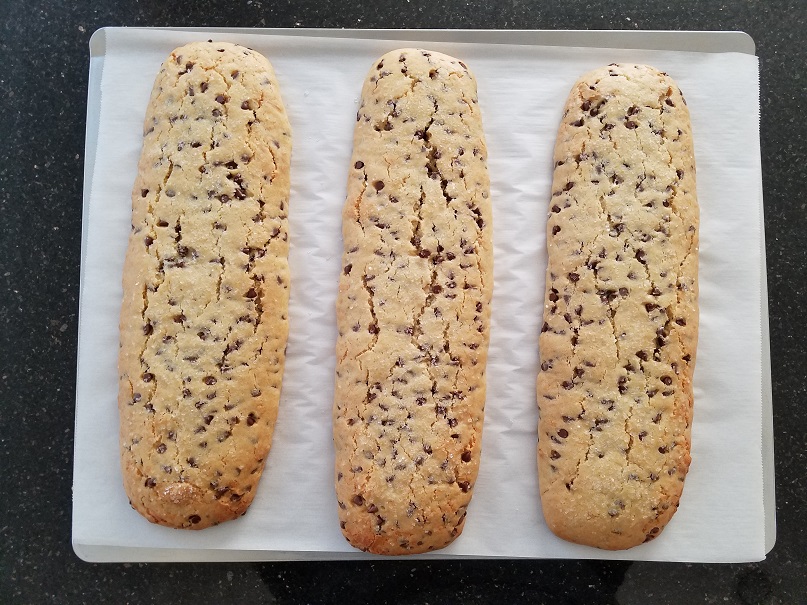
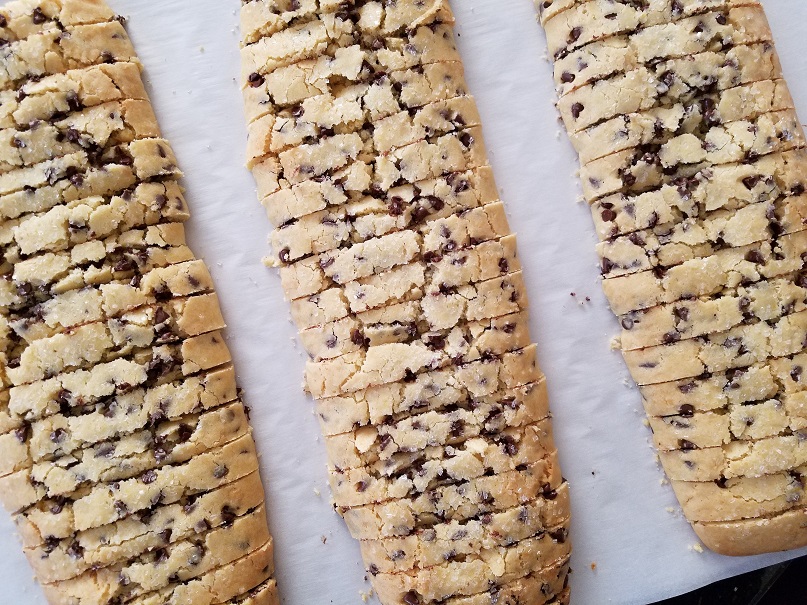
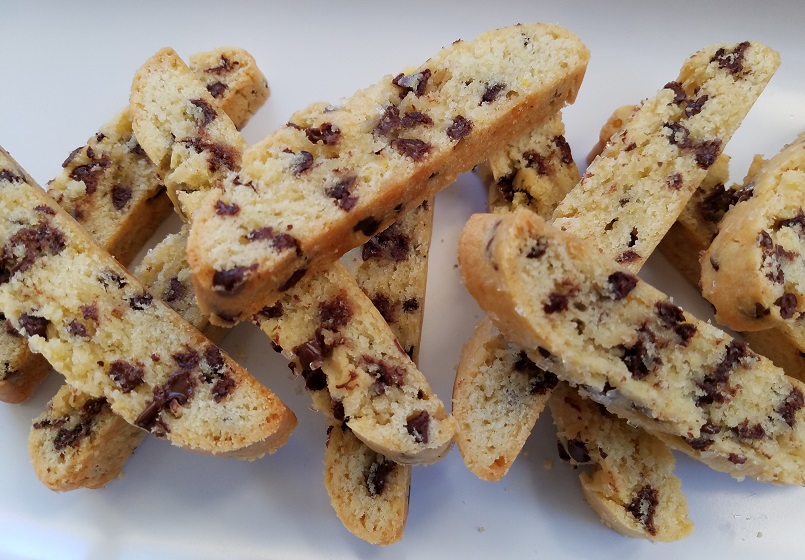
One thing she was never without was a container of her delicious and equally famous mandel bread (aka mandelbrodt). What is mandel bread you ask? The term mandelbrodt literally means almond bread in both Yiddish and German. It’s very similar to Italian biscotti and typically twice baked to get that crunchy biscotti like texture. My mom always made two versions: one loaf soft and one loaf twice baked so everyone was happy. I don’t double bake this particular mandel recipe. I like it to have that cookie dough texture and think it enhances the delicious chewiness of the marzipan. The addition of sanding sugar sprinkled on top adds a nice surprising crunch.

My mom generally made the three same flavors: chocolate chip, chocolate – chocolate chip, and raisin walnut. All three are delicious and each one having its own cheering section. Over the years I have enjoyed changing it up a little and adding different mix-ins like marzipan.
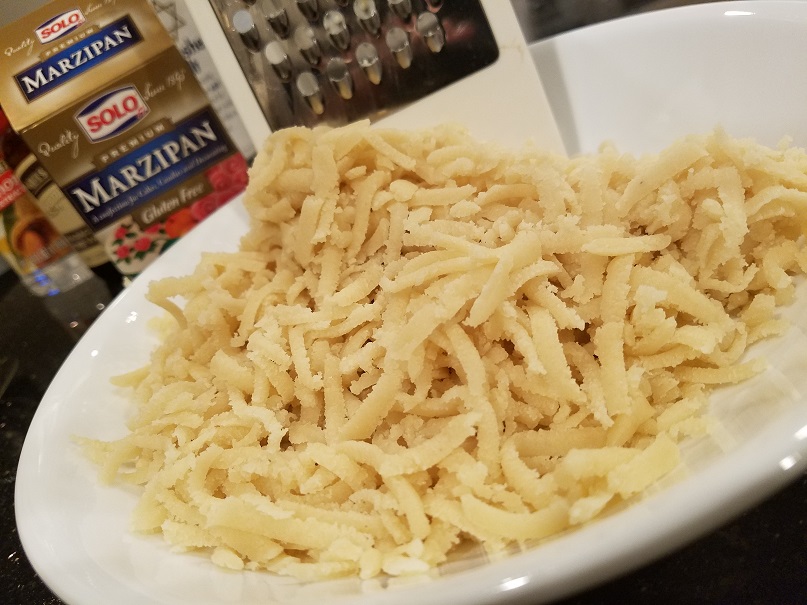
Marzipan is made from almond paste and sugar and has a smooth and chewy texture.  It is very pliable making it a perfect choice for bakers to use when creating realistic fruits and vegetables or decorating cakes. Somewhere I have a great photo of an Italian bakery in Brooklyn during Easter when the entire showcase was filled with the most beautiful marzipan creations. When I find it, I’ll update this post but after 3 hours, I gave up looking! You can buy it in many grocery stores and it comes in a can or a tube. It can also be purchased online.

Why marzipan? Well, my oldest son has always had a thing for marzipan. It started when he was in 5th grade and thought it was the best thing he had ever tasted. During those early marzipan years, he drove everyone just a little bit crazy with his love of everything marzipan! Over the years I have come up with fun recipes which incorporate his favorite treat and this is one of them. It has become a family favorite and when you make it, you will know why. I’m pretty sure my mom would approve!
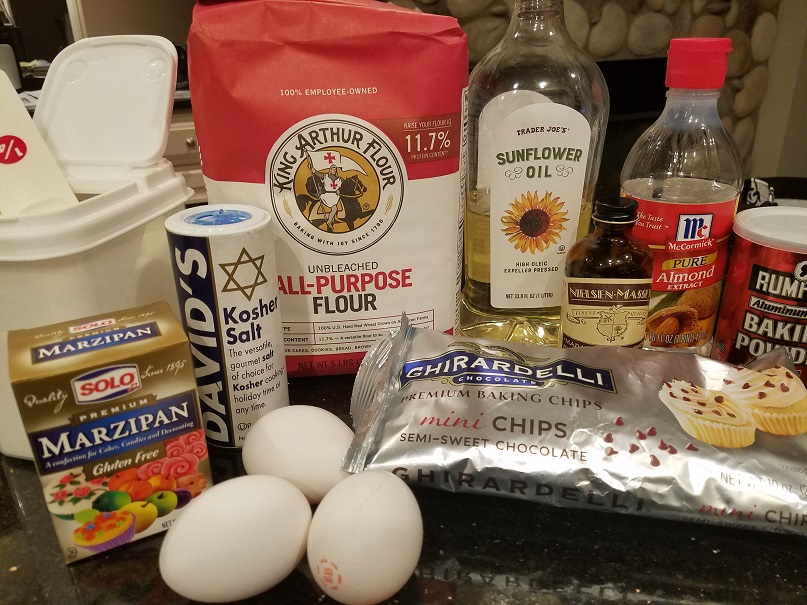
Please note, this recipe is best when chilled in the fridge for several hours so plan accordingly. You will yeild 3 loaves and each loaf yields approximately 20 pieces depending on the size you cut them. Enjoy!

Ingredients:
3 cups all-purpose flour
3 extra large eggs
¾ cup sugar plus 2 tablespoons
1 cup vegetable oil or other neutral oil (I like Trader Joe’s sunflower oil)
1 ½ cups mini chocolate chips (I use Ghirardelli brand)*
1 – 8 ounce package of marzipan grated on the large grate of a box grater (I used Solo brand)
2 ½ teaspoons baking powder
1 teaspoon fine kosher salt
1 teaspoons vanilla extract
1 teaspoon almond extract
Sanding sugar for the top (regular sugar will be fine too)

Directions:
In a large bowl whisk the flour, baking powder and salt and set aside. In another bowl whisk the sugar and oil until incorporated. Add the eggs, vanilla and almond extracts and mix until combined. Add half of the flour mixture – stir until combined and then continue with the rest of the flour.
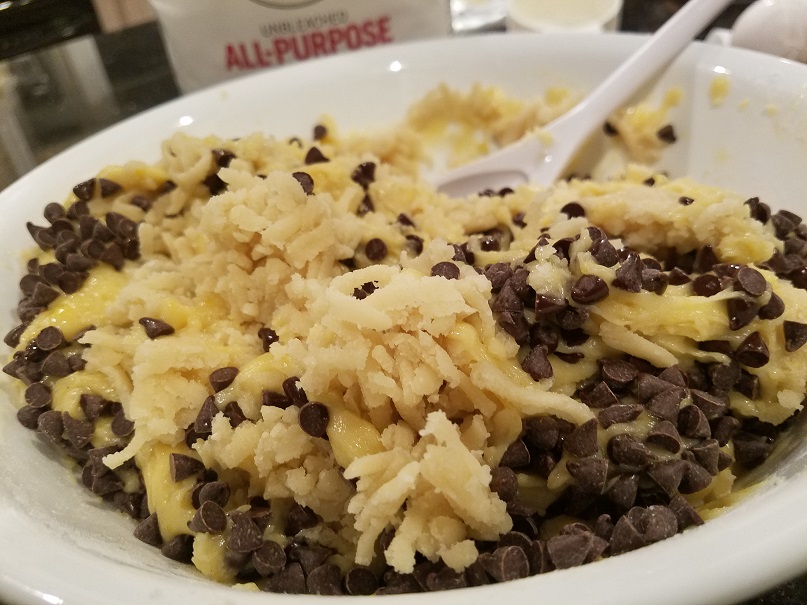
Add in the chocolate chips and grated marzipan mixing until distributed. Try not to over-mix the batter. At this point the dough needs to be chilled for at least 4 hours or overnight. I like to divide the dough in thirds and shape the logs before putting them in the fridge.

Take a long sheet of plastic wrap, lay it on your counter and place 1/3 of the dough in the center. Mold the dough it into a log about 12” long by 3” wide and about 1” high. Wrap it length wise first, and then flap the ends over. Once you have the width, the length won’t matter so much. I put the wrapped logs onto a small cookie sheet and place it in the fridge. Then when ready to bake, unwrap them and place them on the prepared cookie sheet.
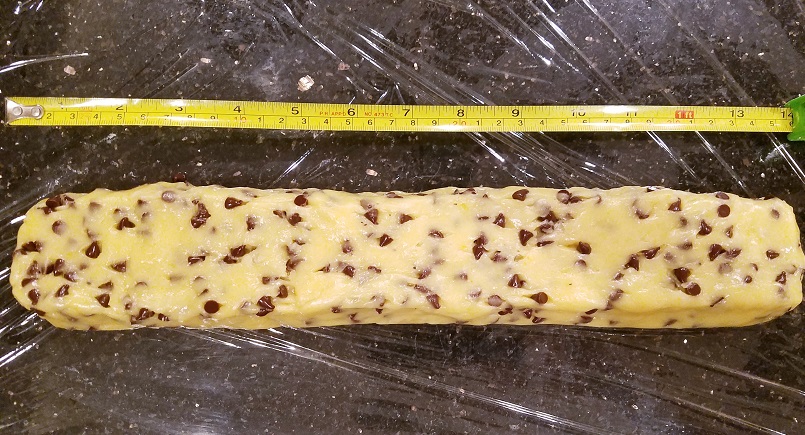
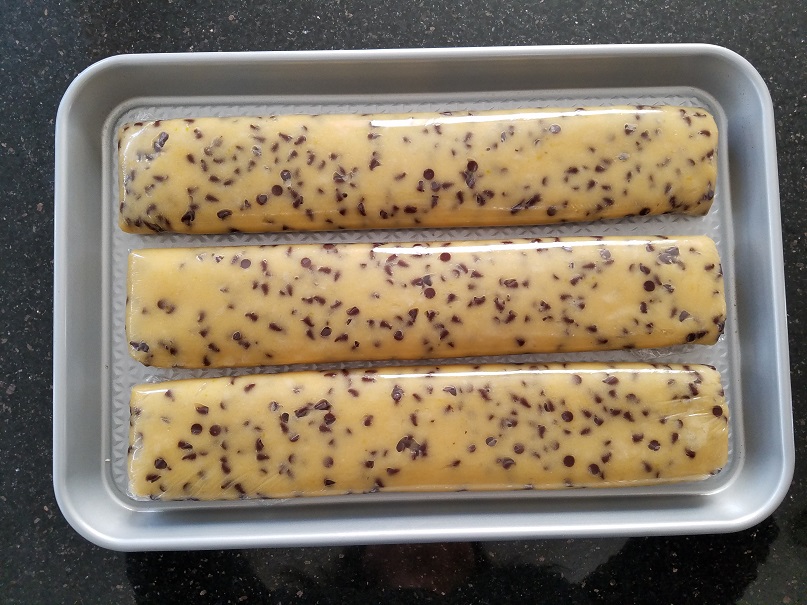
Alternatively, you can cover the bowl with plastic wrap and place it into the fridge. When you are ready to bake, take a third of dough and mold it the same way as above but make the log directly on the parchment paper – don’t worry how it looks, when it bakes, it will fine.

In either technique, you will sprinkle sanding sugar over the logs before they go into the oven.
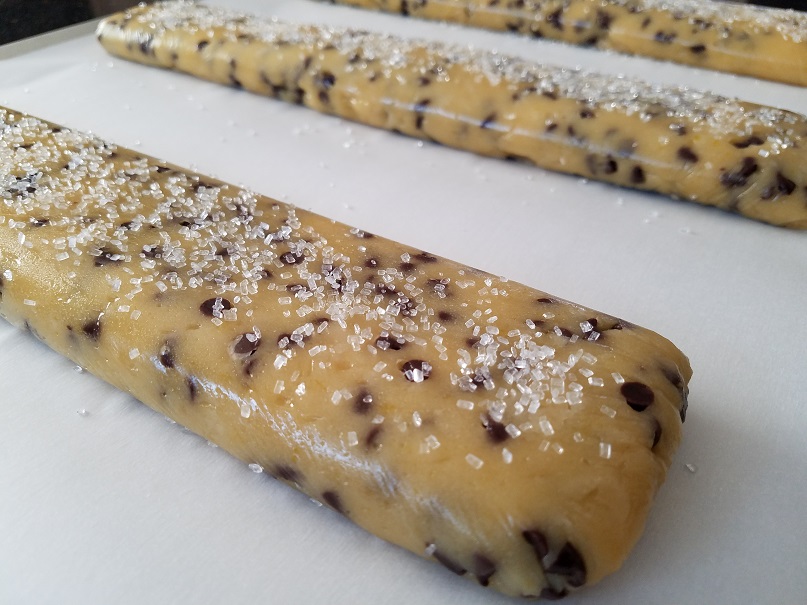
When ready to bake line 2 cookie sheets with parchment paper and set aside. Set your oven rack to the top 1/3 and bottom 1/3 of the oven and preheat to 350 degrees. If you have one oversized cookie sheet, all three will fit on that.

Take the loaves out of the fridge and one at a time unwrap it gently and turn it over onto the cookie sheet. Do the same with the other two loaves. The loaves will spread about 1 ½“ to 2” each way when baking so leave room on all sides to account for that.

Half way through the baking rotate the pans from front to back and if using two cookie sheets switch them top to bottom. Bake for 25 to 30 minutes. They will be golden around the edges and bottom but a little soft in the center. If they crack a little that’s okay.

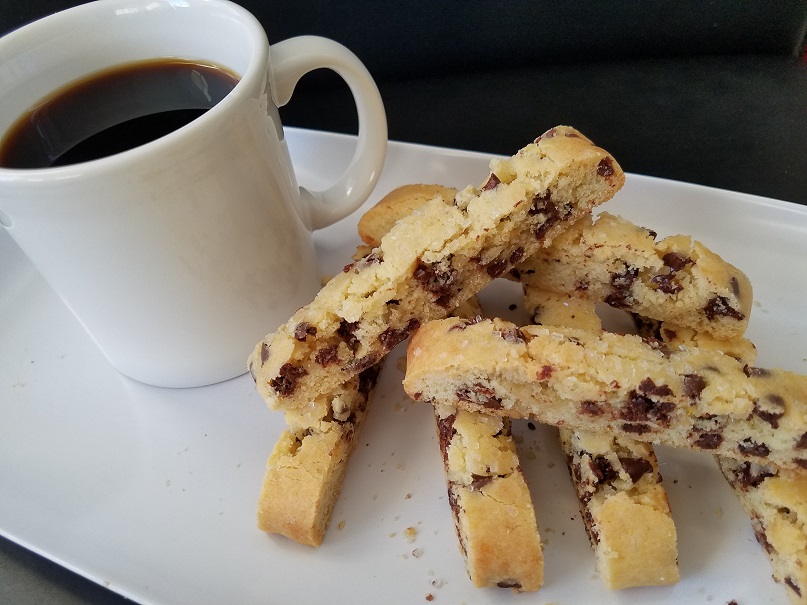
Let cool slightly on the cookie sheet. When the loaves are cool enough to handle but still warm, move to a cutting board and using a serrated knife slice each loaf into ½” slices. It’s easiest if you slice straight down instead of using a back and forth motion. Once in a while I struggle with the serrated knife and switch to a chef’s knife. Find what works easiest for you.

If you like them crispy, lower your oven to 250 degrees. Slice the mandel bread into 1/2″ slices and lay on their side on the cookie sheet. Bake for 10 minutes, turn and bake another 10 minutes.

The mandel will keep up to 2 weeks stored in an airtight container. If it lasts that long! They can also be frozen for 2 months and defrosted when needed.

* To make it parve (non-dairy) use Enjoy Life or Paskesz mini semisweet chips. You can also chop your favorite non-diary chocolate bar like Elite dark chocolate.
Have you ever Heard of a Schlissel Challah?


Have you ever Heard of a Schlissel Challah? Me either! Let me give you the 4-1-1…

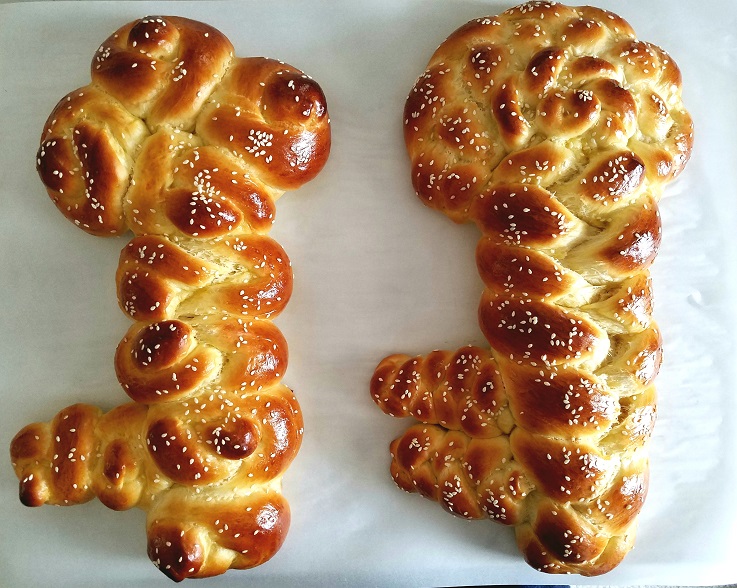
Last year I had the good fortune to meet a new friend named Yael and she introduced me to this unique challah. She is quite an amazing baker. I believe we met sometime around Passover and I started to follow her on Instagram, drooling at each and every photo of bread she created – every one of them a masterpiece. Check her out on https://www.babysbread.com/ and her Instagram @babys_bread and you’ll see what I mean. She was telling me about a key shaped challah she was making and even though it is a tradition dating back hundreds of years, I had never heard about it and was so intrigued.

Before I get to the recipe, here is some information I found online… The week after Passover it is customary to bake a key shaped challah also known as Schlissel Challah. The word schlissel means key in Yiddish and the significance is to bring “segulah for parnassah” or a blessing to your home. Some say the shape will bring financial blessing as well. I’m all in for that! There are a few people who still wrap a real key in aluminum foil and bake it right into the bread. When I asked my friend if she does this, she reminded me that’s a great way to break your teeth! There is so much more information online if you are interested, I have included a couple of places you may find interesting: http://kitchen-tested.com/2012/04/20/shlissel-challah-key-challah/ and  https://www.kosher.com/lifestyle/shlissel-challahs-why-how-102
Today I made my first attempt and I have to say, I’m very proud of the results!  Of course you can use your favorite challah dough recipe, but I have included one here which is very easy to handle, especially for the beginner.

It makes three 1 pound challahs or two larger ones. Tonight, one bread is for my Shabbos table, one is for a friend who could really use some good fortune and the other to a new friend I met last night. When you bake this challah, may your key open the doors to bring you and your family good fortune and many blessings.  Enjoy!

Ingredients
1 ¼ cups lukewarm water
1 ½ tablespoon active dry yeast
1 teaspoon sugar
4 ½ to 5 ½ cups bread flour (I use King Arthur or Bob’s Red Mill)
2 whole eggs (I use extra-large but large will be fine too)
1 egg yolk
1 tablespoon kosher salt
2/3 cup sugar
¼ cup extra light olive oil (or other vegetable oil)
Sesame seeds (optional)

Egg wash
1 egg
1 pinch salt
1 pinch of sugar
dash water

Directions
The temperature of the water used to bloom yeast should be warm like a baby’s bath. Add the yeast and 1 teaspoon sugar to the warm water. Mix it and set it aside for 5 or 10 minutes or until if foams up.

Into a large bowl, add 4 cups of bread flour and set aside.

I find it easier to use a large glass measuring cup for the wet ingredients so that I can pour it into the flour a little at a time. Add the eggs, sugar, salt, and oil and mix together well. Add the foamed yeast mixture and just stir once or twice. This helps to get the sugar off the bottom.

Make a well in the center of the flour and pour some of the egg mixture mixing slowly. Keep adding the wet ingredients into the flour until it’s all incorporated.  This will make a doughy slurry. Now add ½ cup flour at a time until you have dough that pulls away from the sides of the bowl and holds its shape. At some point it will be easier to mix with your hands.

I like to knead the dough directly in the bowl but you can turn it out onto the counter if you like. Once it feels like nice plump dough, you are done. Pour a little oil in the bowl and put the dough back in.

Cover the bowl tightly with plastic wrap and put it in a warm place to rise for 1 ½ to 2 hours, or until it has doubled in size. After it has doubled, punch the dough down and divide into 2 or 3 pieces depending on how many breads you want to make. This recipe makes approximately 3 one pound challahs.

Line a sheet pan with parchment paper and set aside. Into a small bowl add the egg, salt, sugar and water and beat well. This is the egg wash.

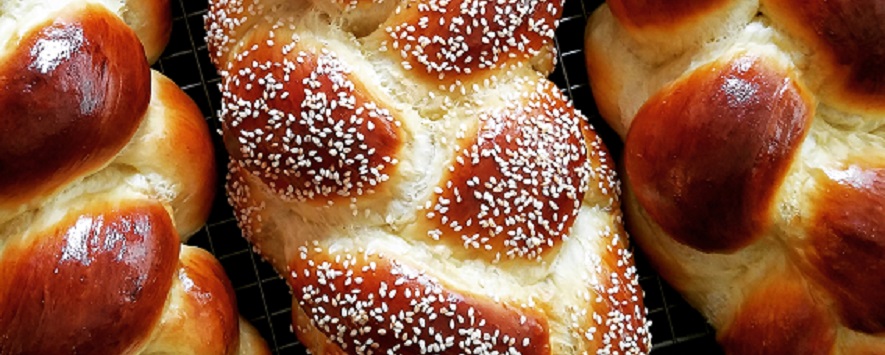
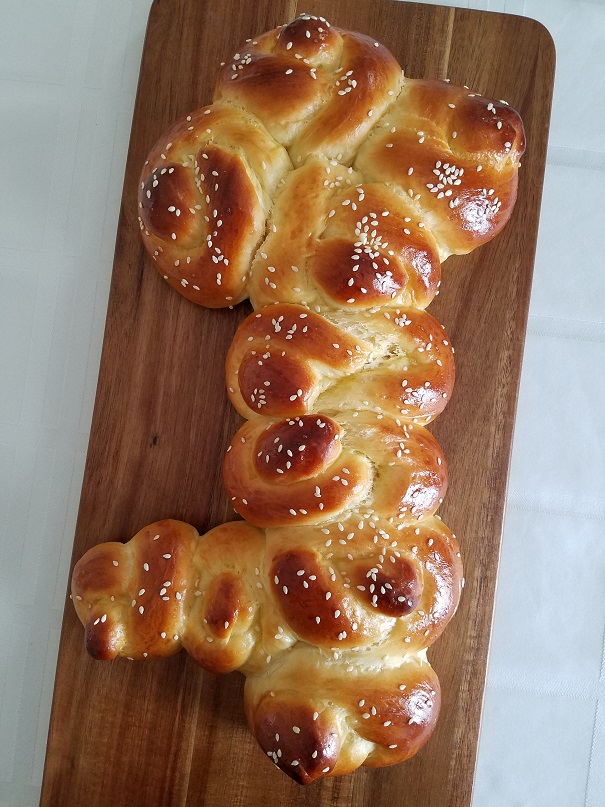
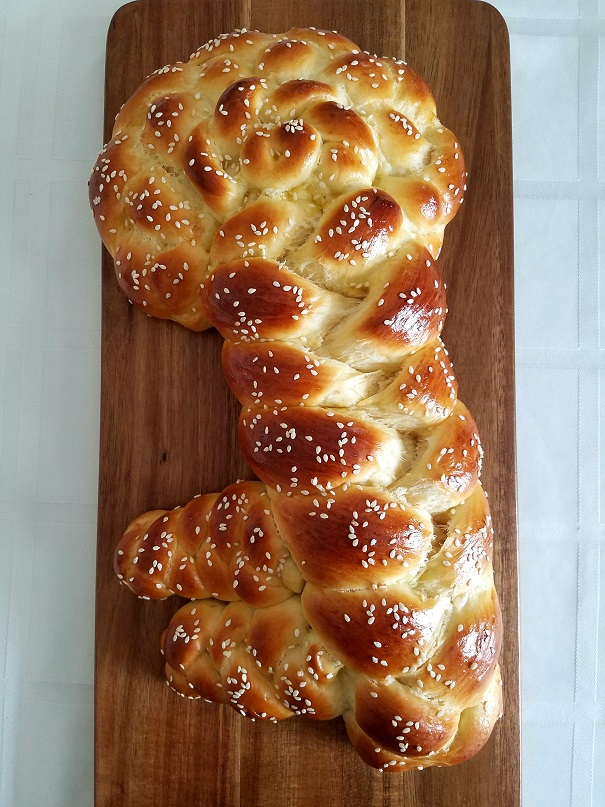
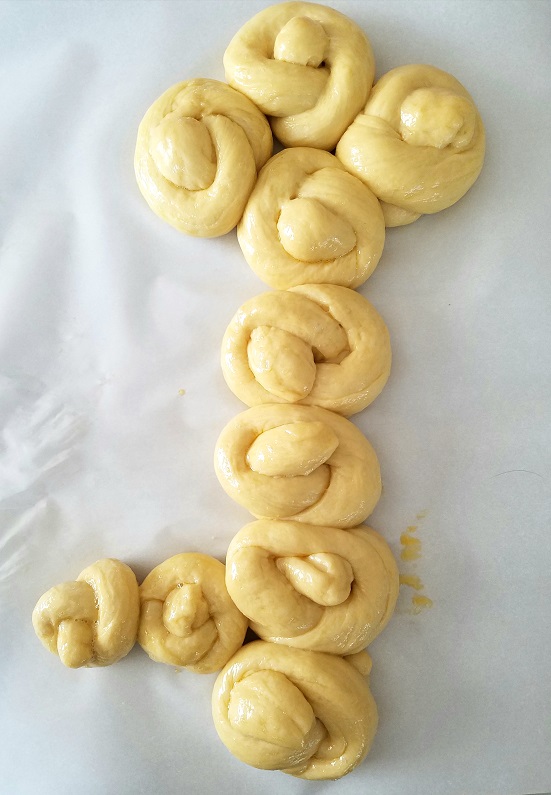
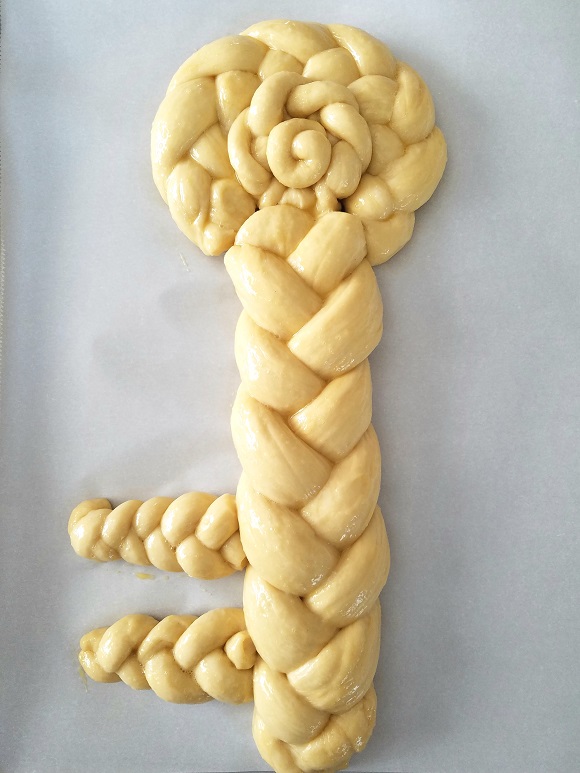
I made two different key shapes. One with basic braids and the other with rolls. There are many tutorials online if you need help. Here is how I did it…

For the rolls: Depending on how big you want your challah, will determine how many rolls you use. For mine I made 8 larger 1 ¾ to 2 ounce challah rolls plus two 1 ounce rolls (for the teeth of the key). To make the rolls, take your small dough ball and roll it into a snake about ½” thick by 5” long, tie it into a little knot. Place them as shown below
  
For the braided key: I used 9 ounces of dough for the shaft of the key, 6 ounces of dough for the head of the key, and 2 ounces for the teeth. These are estimates for the breads I made. You can make them larger or smaller as you like. Then I added a smaller braid to the center, but you can leave it an open key if you like as well.

Brush with a little of the egg wash and set it aside for the second rising -about 45 minutes.

Heat oven to 350 degrees with your rack in the center of the oven. Before they go into the oven, brush the challahs with egg wash one more time. Sprinkle with sesame seeds at this time if you like.

Place in the oven and bake for 25 to 30 minutes or until the loaves are golden brown. I like to set my timer for 15 minutes then turn the baking sheet and set it for another 10 minutes. You can use a cake tester or toothpick to make sure they are dry in the middle.

Enjoy!


Mushroom Barley Soup with Flanken… Just the way my mom always made it!


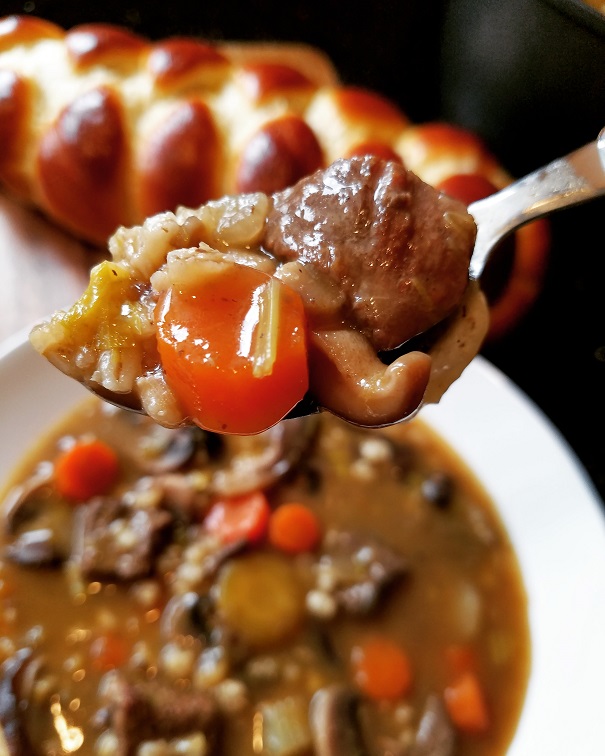
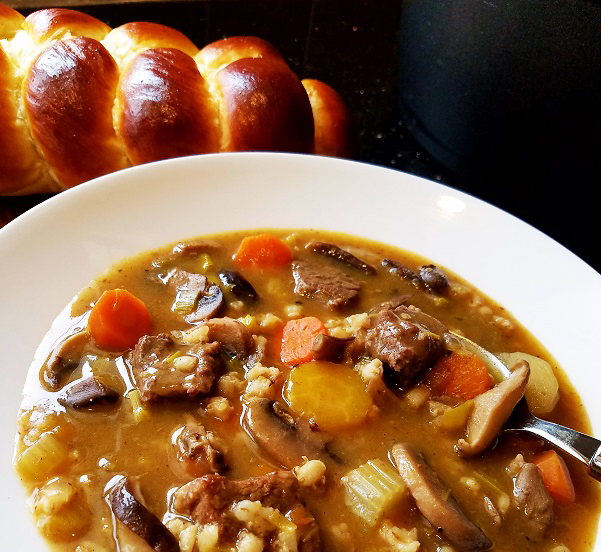
Mushroom Barley Soup with Flanken… Just the way my mom always made it! Walk into any Jewish deli and you will find Mushroom barley soup on the menu. If you are lucky, it will have flanken (short ribs for the unfamiliar). That’s the way my mom always made it. If you don’t live near a Jewish Deli (like me here in the Midwest – miles and miles, and miles away) don’t worry, I’ve got you covered! Even though the sun is shining today, and even though Passover is just a couple of weeks away and you are trying to rid your house of breads and grains, I am going to share my mother’s recipe with you! It’s super easy, tastes great and is so satisfying; it’s a meal all on its own. With this never-ending winter I think I have made this soup at least a dozen times and once you try it, you will too. Why have I made it so much?

In Ohio, we can get every type of weather all in one day – I kid you not. Last Thursday for example, I woke up and the sun was shining. It was quickly replaced by clouds, a mist of rain and then fog set in. As I drove to an appointment, it was hailing so badly I wondered if it would ruin my car. The worst of it was the white out of snow! Really?! By the time I got home, all I wanted to do was get in my pajamas, get under my covers and warm up (preferably with a steaming hot bowl of soup and an old movie on television). It was a Meshugah (me-shu-ga) day for sure! FYI… meshugah is Yiddish for crazy or nuts!

The only thing keeping me going was the thought of the mushroom barley soup with flanken I had waiting for me at home. It’s hearty like a stew, satisfying, and not too heavy. It’s the kind of soup which my mother would say will warm your bones. And while it does warm my bones, it also warms my heart thinking about how my mom would spend the day in the kitchen cooking for us.

If you can’t find flanken, brisket or stew meat will work equally well. It’s an easy soup that just simmers away without much babysitting needed. This soup can be made without the meat as well with much less cooking time and all in one pot. I’ll include the directions at the bottom of the recipe. If you go vegetarian, omit the wine. BTW… the wine is my splash on my mother’s recipe and I use Manischewitz because it’s always on hand and I love to cook with it. Feel free to use another cooking wine if you like. Lastly, you can also adjust the amount and type of mushrooms you add. While this recipe makes a large quantity, a half recipe can easily be made and it freezes very well. So while the sun may be shining today, and you are busy cleaning, you can enjoy a bowl while prepping your house for the holiday (insert smiley emoji here)! Let me know how it comes out! Enjoy! p.s. it’s still freezing cold here in Ohio!

This soup makes about 10 to 12 servings and can easily be cut in half

2 – 3 tablespoons olive oil
8 cups chicken or vegetable broth (I like Imagine brand low sodium no-chicken broth)
4 cups of water
3 pounds of flanken (brisket or stew meat would work well also)
1 large onion diced (2 cups)
3 cups of carrots sliced into 1/2” rounds
2 cups celery sliced
1 cup pearled barley
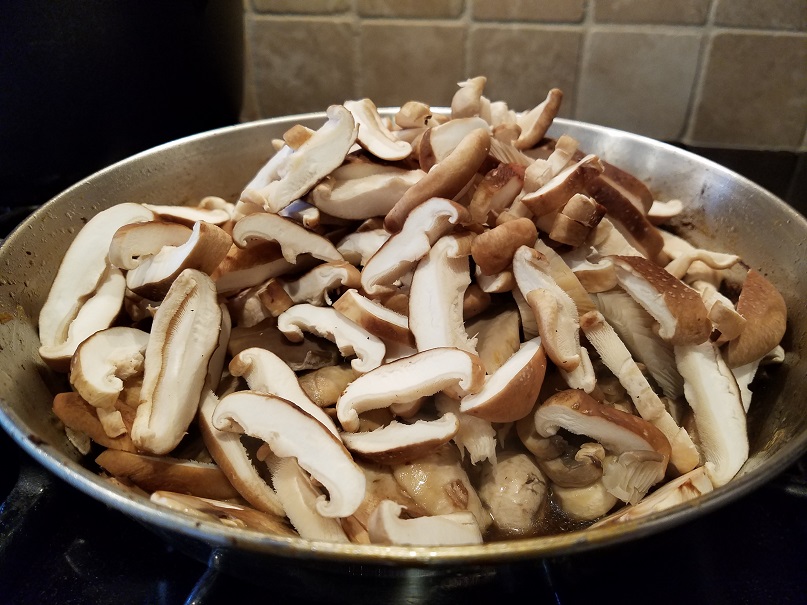
16 to 20 ounces baby bella mushrooms cleaned well and sliced
4 ounces shitake mushrooms cleaned well and sliced
4 ounces oyster mushrooms cleaned well and sliced
½ cup Manischewitz wine (any flavor – I use whatever is on hand)
4 cloves of garlic minced (about 1 tablespoon)
3 bay leaves
small bunch of fresh dill (about ½ cup) tied with string
2 teaspoons freshly ground pepper
salt to taste

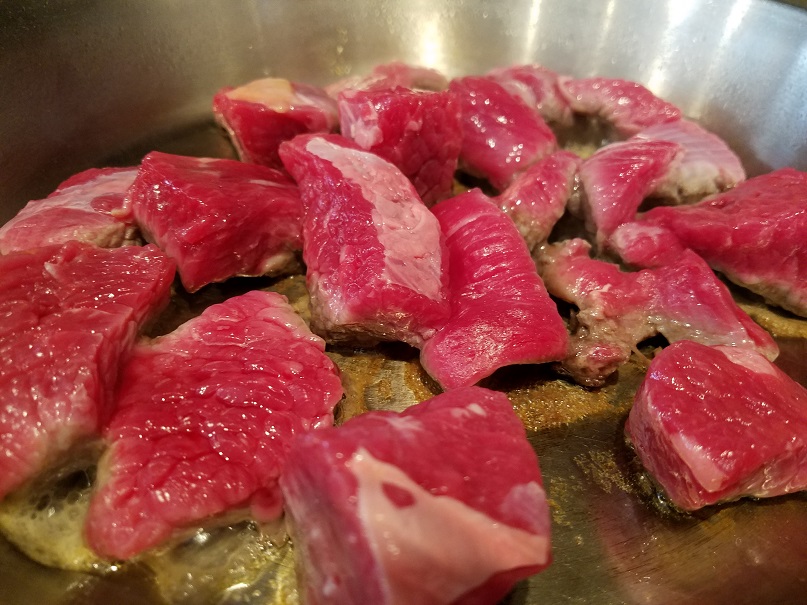
Heat 1 tablespoon of olive oil in a large frying pan. Add the flanken and cook over medium-high heat. If you leave the slices whole, brown them on each side. If you use brisket, cut the meat into 1 or 1½“cubes. I had the butcher cut the flanken off the bone and I browned it on all sides in batches. My mother always left it whole and then fished out the bones. That’s not for me but feel free to make it this way if you like.

In a large stockpot, add the broth and water and bring it to a boil. As each batch of meat is browned, add it to the stockpot. Bring it to a boil then when all of the meat is in the pot, lower the heat and simmer covered for at least 2 hours or until the flanken starts to become tender. While that is cooking prep the rest of your ingredients.

Once the meat comes out of the pan, add ½ cup of wine and deglaze the pan (click on this link to learn more about deglazing) making sure to scrape up all of the crispy bits on the bottom. Pour this off into a cup and set aside.

Into the same frying pan, add ½ tablespoon of oil into the pan and stir in the onion. Lower the heat to medium and cook stirring occasionally until the onion is translucent– about 10 minutes. Then add the celery, garlic and carrots and cook for another 5 minutes. Place the vegetables into a bowl and set aside.

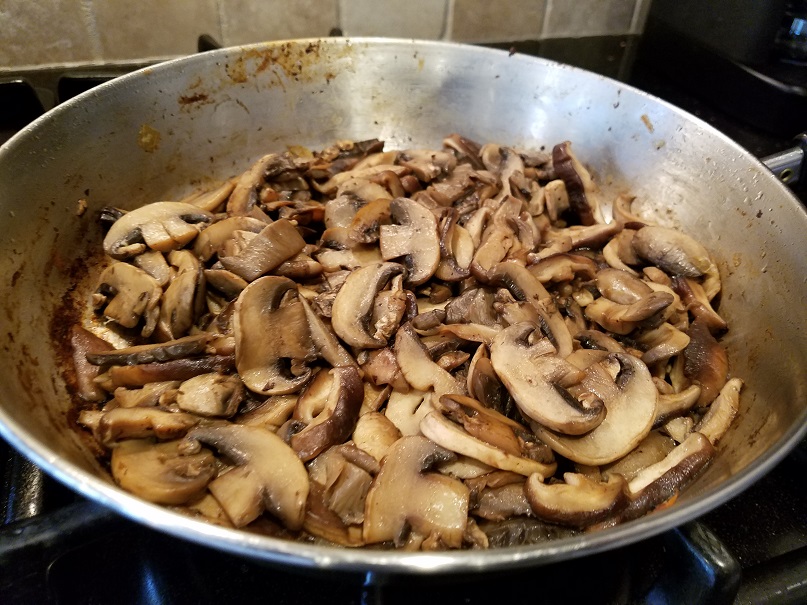
Add another ½ tablespoon of oil into the pan and add the sliced mushrooms. Sauté until they have reduced by half also about 10 minutes. Turn off the heat and leave the mushrooms in the pan.

After the meat has cooked for two hours, add the barley, vegetables, mushrooms, bay leaf, dill, salt and pepper. Simmer an additional hour or until the meat is very tender. Add the wine and cook another 10 minutes then all that’s left to do is Enjoy!
  

For the vegetarian version:
In a large stockpot (about 8 quart) add 1 tablespoon of oil into the pot and stir in the onion. Lower the heat to medium and cook stirring occasionally until the onion is translucent– about 10 minutes. Then add the celery, garlic and carrots and cook for another 5 to 10 minutes stirring occasionally.

Heat a 10 or 12” frying pan on medium heat, add 1 tablespoon of oil and add the sliced mushrooms. Sauté until they have reduced by half about 10 minutes.

Add the mushrooms, broth, water, barley, bay leaf, dill, and pepper to the stockpot. Bring the soup to a boil then cover and lower the heat and simmer for about 45 minutes to 1 hour or until the barley is tender. Taste for seasoning and adjust accordingly.


A Crazy Hamantashen Milkshake


I hear you loud and clear… “Hey Sherri, Purim is over and I’m out buying matzo, what’s with you and the hamantashen already?” My answer… I still have about 10 pounds of hamantashen crumbs to reinvent! So why not make a crazy hamantashen milkshake? Last year was the hamantashen ice cream sandwich so this isn’t so crazy – right?

Now to answer the burning question, why all the crumbs, I first need to give you a little backstory. I’m a member of a Jewish culinary group called the P2G Culinary Connection. Over the past several weeks, we had been putting together Shaloch Manos baskets (gifts of food given during Purim) for holocaust survivors in our area. Of course hamantashen are the star of any basket, but with everyone’s busy schedules we didn’t have time to all get together and bake so it was my job to find a way to buy them.

I reached out to Lilly’s Baking Company in Brooklyn, NY. I have ordered from them in the past and know their baked goods are absolutely delicious. Living in Columbus, we often need a black and white or rainbow cookie fix and if you’re not a baker, Lilly’s is the perfect place to order from. They have been my go to since we moved here because everything they make is reminiscent of our favorite bakeries in New York. Needing a very large quantity, I was hoping they would be able to give us a big discount. I emailed them our intentions, and the amount we needed (around 460). What happened next was unexpected. One of the CEO’s wanted to support our mission by donating the product and the cost of shipping! I almost started to cry; the generosity was overwhelming.

Sadly, the shipping company didn’t do such a great job getting them to us. All 3 cases were severely damaged and while we were able to salvage about 80 of them, the balance was all broken. What Lilly’s did next was even more generous, they shipped out more the very next day overnight air. The new ones arrived perfectly intact; we placed them gingerly on top of each basket.

Now the question was what to do with all of the crumbs? I couldn’t just throw them away. Any good Jewish mother would never let something like that go to waste! Ideas were spinning through my head: strawberry shortcakes, magic bars, dirt cups, yogurt parfaits, a trifle, mini cheesecakes, the world was my oyster (or in this case – my hamantashen)! If you follow me on Instagram, you know I made amazing yogurt parfaits and cookie pops. Then it hit me – a hamantashen milkshake.

To quote my son, “Mom, only you would think of making a hamantashen cookie milkshake – it’s amazing and I can’t believe it tastes like hamantashen ice cream!” This was the grand finale of my week and was so amazingly good; I suggest you drink it until you can’t tell the difference between Mordechai and Haman! That’s what we did. With these words I say drink and Enjoy! This recipe makes 2 servings.

First make the chocolate ganache:
½ bag of semisweet chocolate chips (6 ounces)
3/8 cup of cream or half and half
pinch of kosher salt
dash of vanilla extract

Add the chocolate chips to a narrow bowl and set aside. In a small saucepan, heat the cream until it just comes to a simmer. Pour over the chocolate and let it sit for about 3 minutes then whisk it together until smooth and shiny. Instead of making ganache (which I highly recommend) you can use a good quality hot fudge.

While the cream is heating, get all of your add-ins together. For me it was mini M&M’s, sprinkles, chocolate candies, KitKat bars, whipped cream of course, and one of my mini birthday cake hamantashen. Plus the crowning glory, a perfect Lilly’s hamantashen. You could also add pretzels, licorice, or other favorites you might have.

To assemble the glasses: take two tablespoons of the ganache and spread it inside the glass. Then, dip the rim into the ganache about 1” deep. Holding the glass over a cookie sheet or bowl to catch the overage, sprinkle with whatever adornments you want until it looks just right. If you want to stick things to the glass such as larger candies, you have to paint the candy with the ganache and hold it in place for a bit until it firms up.

Now for the shake: (this recipe makes 2 servings)
2 cups good quality vanilla ice cream plus an additional 2 scoops to float on top (one for each glass)
¾ cup of milk (any kind will work, I used 2%)
1 ½ cups hamantashen crumbs (including the filling pieces)

Blend together until well combined and pour into the glasses. Depending on the ice cream you use, and how thick you like your shakes, you may need more or less milk. Top each glass with one scoop of ice cream, add whipped cream, sprinkles and whatever treats you want to add. Then finish it off by topping it with a hamantashen. WARNING: These are addicting! Hamantashen lovers, BEWARE!


Turkey Sloppy Joes with a Surprising Indian Twist


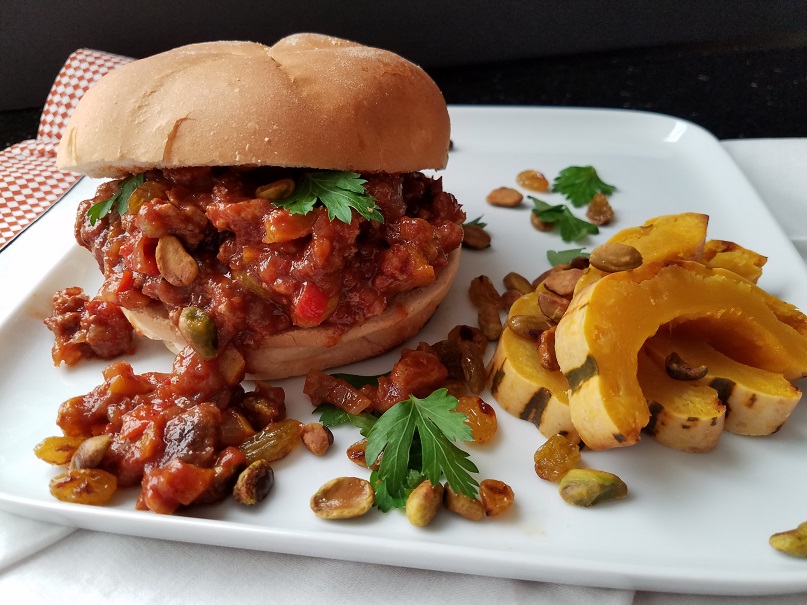
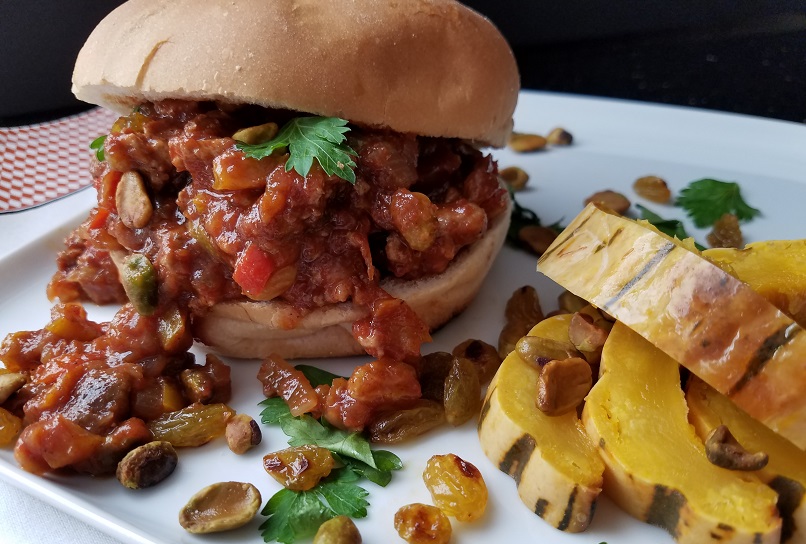
What’s for dinner tonight? Turkey Sloppy Joes with a Surprising Indian Twist!

You can say I’m kind of a cooking show junkie. Most people who know me aren’t surprised to hear this at all. Of course I’m a Chopped fan – who isn’t? And, don’t we all want to know what Ina is going to cook for Jeffrey Friday night – spoiler alert… it’s probably chicken. Then there is my summertime guilty pleasure – The Next Food Network Star. If you’ve never seen it, you must. I secretly fantasize about being on the show. However, I think the stress would get to me. There I stand as the clock is ticking, I run to get to get my ingredients, slip on olive oil and there you go! No, just kidding – I’m actually the winner of season 14!

Day to day I often feel like I’m a contestant on a cooking show. I’ll ask my husband what he wants for dinner and he will surprise me and say something I don’t expect – like sloppy Joes! Sloppy Joes – is he serious? Is he 12? This becomes my challenge and my show begins! I look through cookbooks, magazines and Google different recipes until I find something that sounds good and I can work with.

In this case, I remembered an episode of Aarti’s Party (NFNS season 6 winner), she made Sloppy Bombay Joes. It had ground turkey, raisins and pistachios. What’s not to love about that combo? But in sloppy Joes? Will that work? Of course it’s not exactly what my husband had in mind, but he loves Indian food, and he did ask for sloppy Joes! He knows I love to try new recipes and also knows I probably wasn’t going to give him exactly what he asked for anyway.

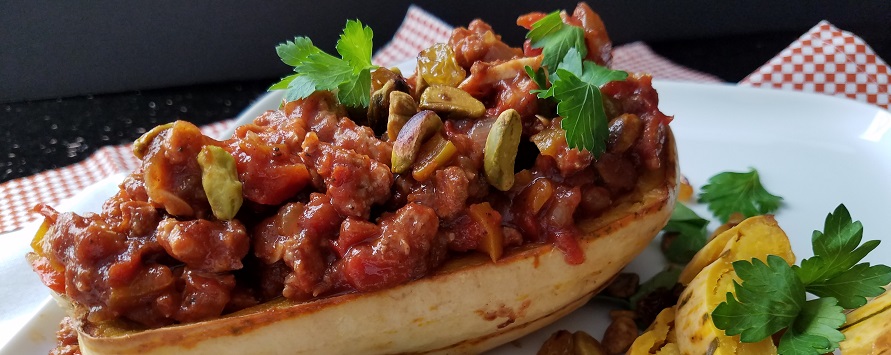
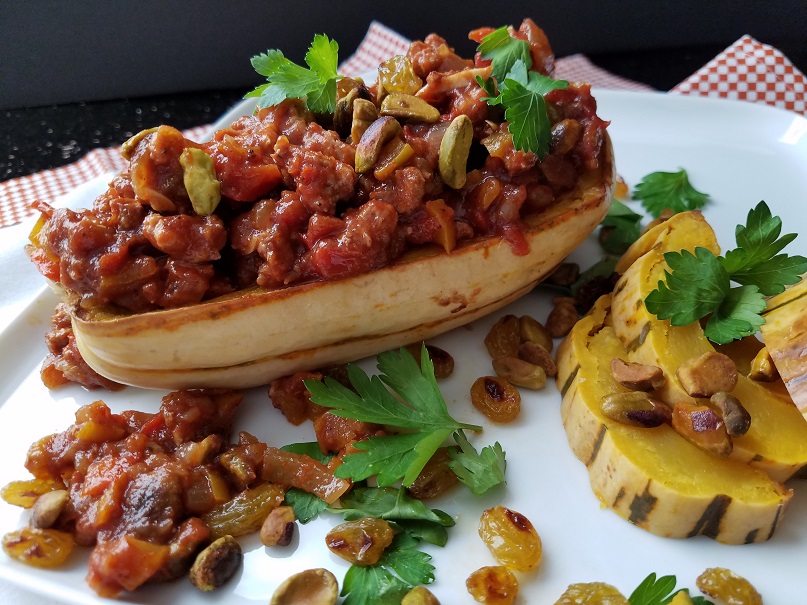
At the end of the day, it was a winner and we all loved it! The crunch from the pistachios, sweetness from the raisins and honey combined with the warmth of the Indian spices was so comforting and delicious. I now make it all of the time. While the traditional way to eat a sloppy Joe is to have it on a roll, I ate it in half of a delicata squash and it was amazing! I have also served it over rice – also delish!

The first time I made this dish, I made it close to the original recipe, then I put my splash on it: less oil, more spices, tomato paste to thicken and add richness to the dish. I did not use a serrano pepper: if I never mentioned this to you before, I have a fear of spicy peppers! Instead, I added heat to the dish by way of ground red pepper. The original recipe called for half and half and since I keep kosher (no meat and dairy together), that’s a no – no so I omitted it. There you go!
This recipe is adapted from Aarti Sequeira. Okay chefs, you have ground turkey, pistachio nuts, raisins, garam masala*, and tomato sauce… Your time starts now! Enjoy!

Ingredients

Sauce:
1/2 tablespoon extra-virgin or light olive oil
1 tablespoon minced ginger or 2 tsp. dry ginger
2 cloves garlic, minced
2 teaspoons garam masala*
½ teaspoon cumin (optional)
1 teaspoon paprika
¼ to 1 teaspoon ground red pepper (start with ¼ t. then add more to taste)
1 (15-ounce) can tomato sauce
1 cup water
½ to ¾ can tomato paste

Turkey:
2 tablespoons extra-virgin or light olive oil
¼ to 1/3 cup white or black raisins
¼ to 1/3 cup shelled pistachios
1 large white onion, finely diced (about 1 cup)
1 red bell pepper, seeds and membrane removed, finely diced
1 yellow bell pepper, seeds and membrane removed, finely diced
1 teaspoon kosher salt
1 pound ground turkey (I use white meat only and it’s okay if it’s a little over 1lb.)
1 to 2 teaspoons honey
Small handful chopped fresh cilantro or parsley
4 to 6 hamburger buns
optional: ½ roasted squash or brown rice

Begin by making the sauce:
Warm the oil in a medium saucepan over medium heat, until it shimmers. Add the ginger and garlic. Sauté until the ginger and garlic become fragrant, this takes less than a minute so stand and watch it. Add the garam masala and paprika and sauté for 30 seconds. By adding spices to oil, it deepens the flavor. Stir in the tomato sauce and water. Bring to a boil, and then reduce the heat and simmer, uncovered, until thickened, about 15 minutes.

While the sauce is cooking, prepare the turkey:
In large skillet, warm 2 teaspoons of oil. When shimmering, add the pistachios and raisins. Cook until the raisins swell up and the pistachios toast slightly. Remove from the pan and set aside on a plate lined with paper towel.

Return the pan to medium heat, add 1 ½ tablespoons of oil, stir in the onions and bell pepper; saute until softened and starting to brown. Stir in the turkey, breaking up the big lumps. Cook about 5 minutes or the turkey is opaque and cooked through.

Your sauce should be ready at this point. It’s at this point I add a little tomato paste to thicken. Add in the red pepper to taste. Pour the sauce into the skillet with the turkey. Stir and bring to a boil, then lower the heat and simmer until the mixture has thickened slightly, about 10 minutes.

Once the turkey is cooked and the sauce has thickened a little, add the honey, pistachios and raisins. Stir through and taste for final seasoning. Before serving, garnish with fresh cilantro or parsley.

Toast the buns, fill with the turkey mixture and serve and eat with your hands! Oye I can’t believe I’m telling you to eat with your hands… enjoy!

*Garam masala is an Indian spice containing cardamom, cinnamon, cloves, cumin, black pepper and cardamom. I use a brand from Whole Foods, it’s a company called Fronteir Co-op. There are various brands and can be found in most grocery stores.