Just in time for National Coffee Day… I present to you an Amazing and Delicious New York Crumb Cake


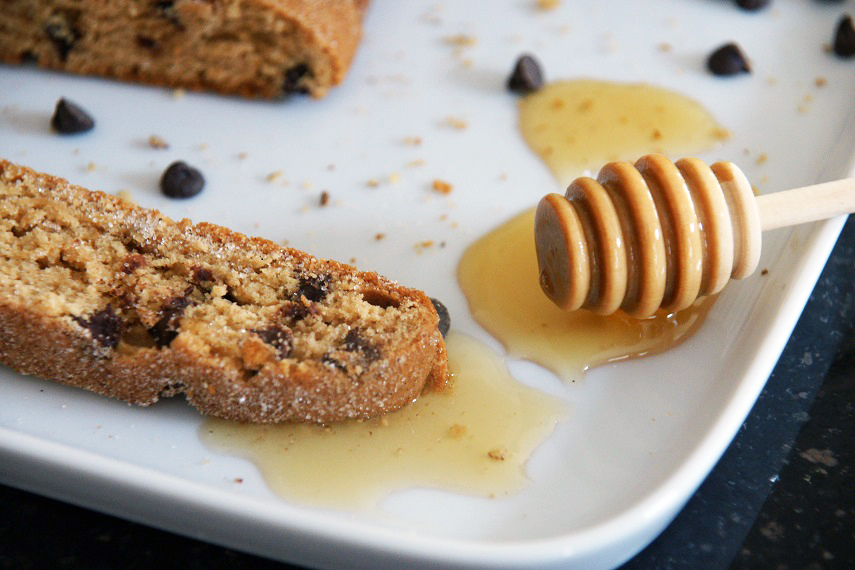
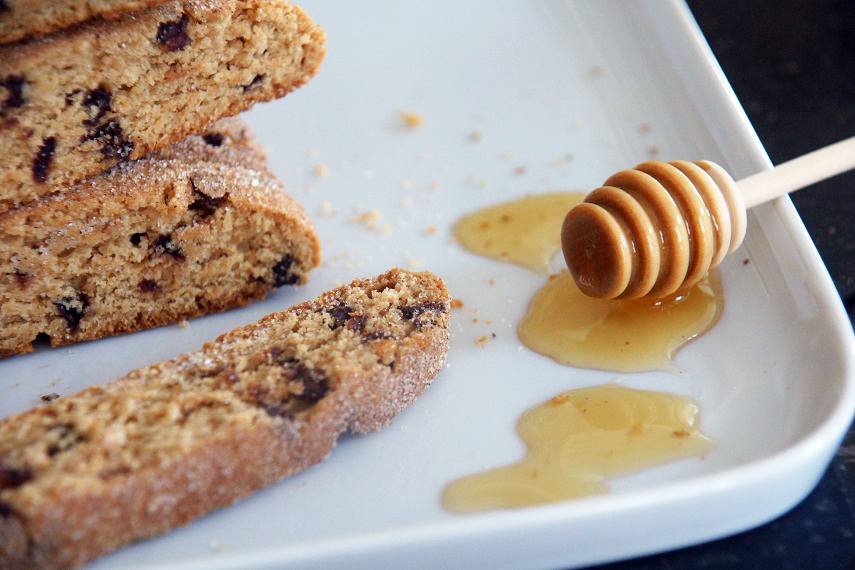
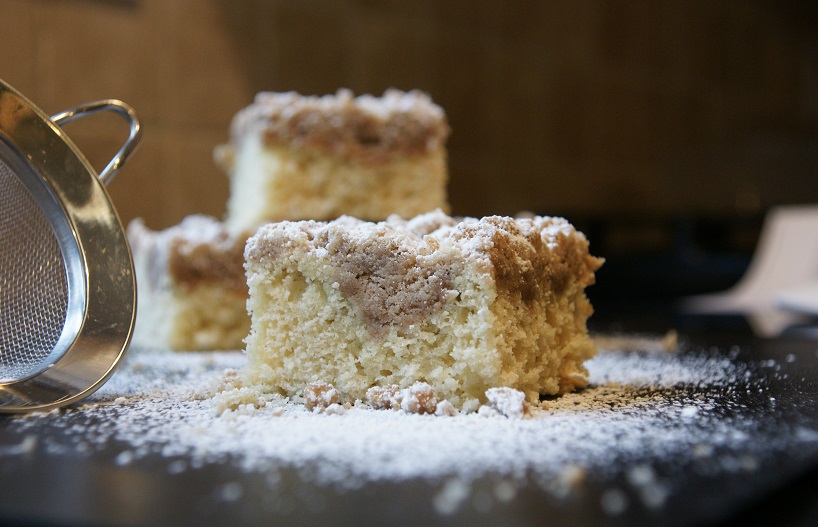
Usually I miss a big national food holiday, but not this time! Just in time for National Coffee Day…. I present to you an Amazing and Delicious New York Crumb Cake. Let’s face it, coffee is great on its own, but who can pass up a good piece of coffee cake? Not this Jewish girl from Brooklyn! Plus, all of you will need something to go with the free coffee you’re going to score today – Am I Right?

You all know by now how much I love my iced coffee, but did you also know how much I love my crumb cake – or any coffee cake for that matter? Let’s just say my husband doesn’t call me his little coffee cake for nothing! The love runs deep, both for the husband, and the coffee cake!

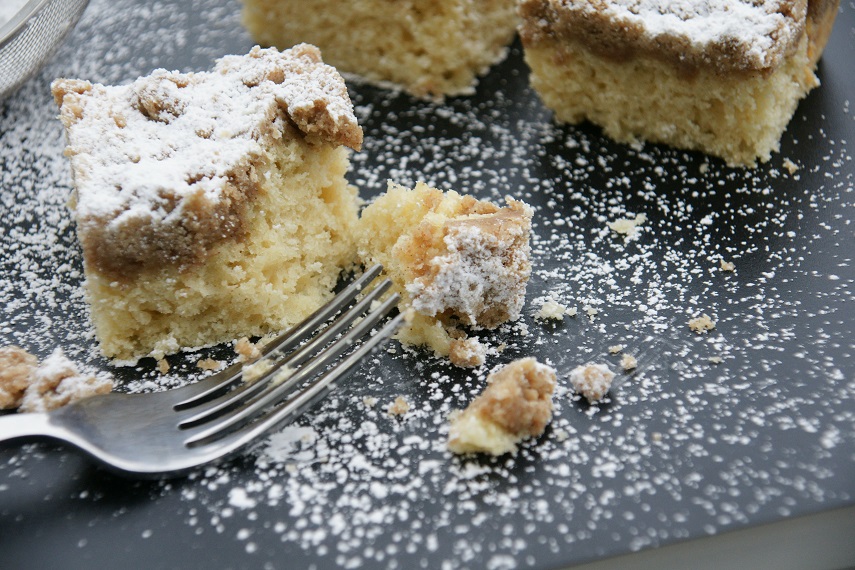
A quick coffee cake lesson because you may have noticed I’ve been using the term coffee cake interchangeably with the term crumb cake…

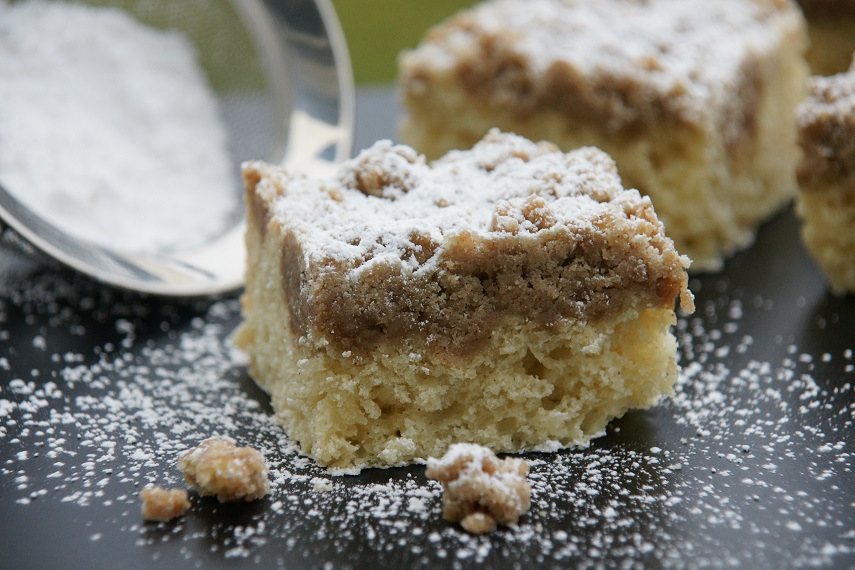
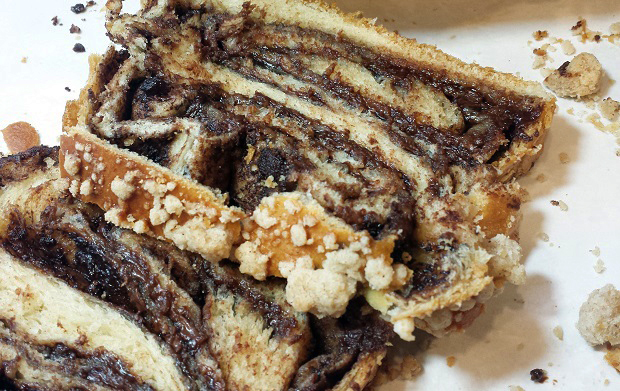
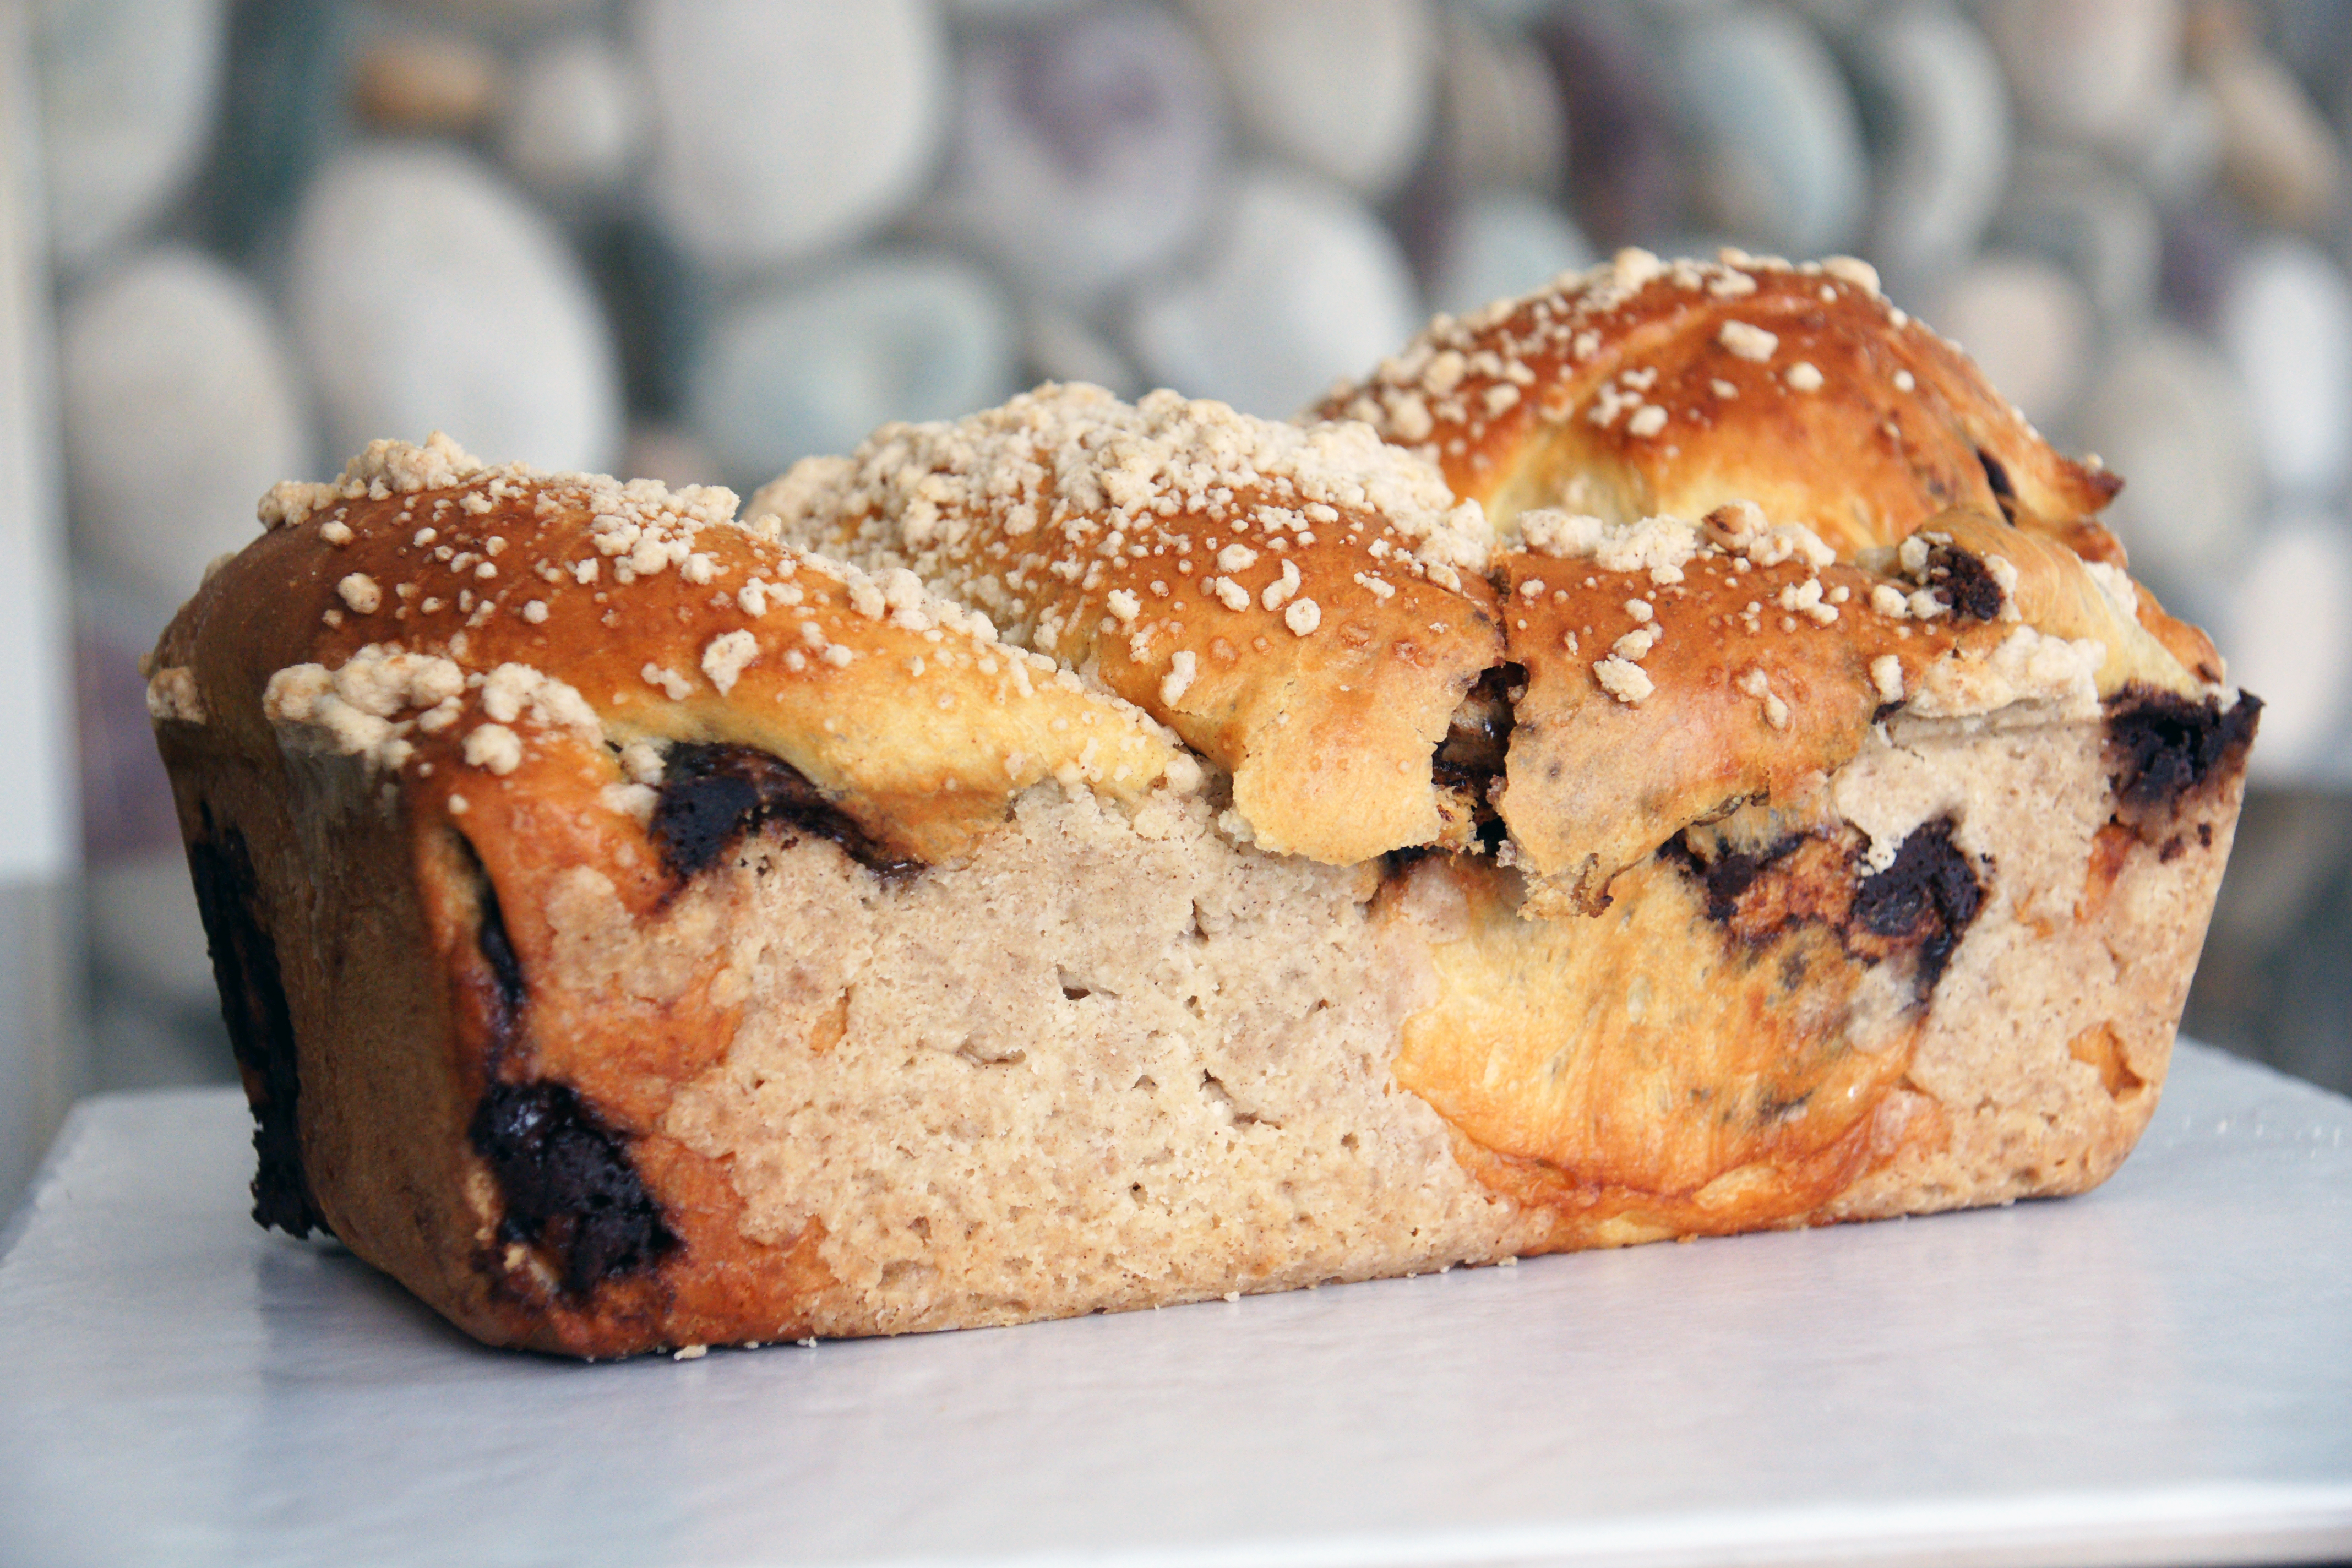
Coffee cake is quite literally cake you have with coffee. Crumb cake falls under that umbrella just like it’s cousins the sour cream walnut cake, streusel squares, or marble cake. Crumb cake is a type coffee cake, and no two coffee cakes are alike – but are similar if that makes sense. Crumb cake implies a crumb or streusel topping. All coffee cakes may or may not have a crumb topping, but all go well with coffee. Most people use the term crumb and streusel interchangeably, however, the sugar/butter/flour ratio is a little different. A real crumb cake will be about a 50/50 crumb to cake ratio. A streusel cake will have less and a lighter sprinkling on top. One more quick note, sometimes you have cake with coffee, but that doesn’t automatically make it a “coffee cake” take for example birthday cake – this is not coffee cake. There you have it, everything you wanted to know about coffee cakes but were afraid to ask! However, if you do have more questions, just ask and I’ll get back to you in-between bites!

So now on to the recipe… I’ve tried my fair share of crumb cake recipes and while I have loved them all, this one is by far the best I have found. I think it’s the crumb to cake ratio which really hits the mark for me. I adapted it from Johnny Iuzzini’s cookbook Sugar Rush. If you have a chance, you have to check it out – it’s just beautiful, informative, and with clear instructions for the home baker to follow. Oddly enough, he got the recipe from a home baker who was one of his interns. I think all home bakers should have a good coffee cake in their repertoire – you’ll be an instant hero to all of your friends! This recipe could not be easier, the cake is moist and tender and the buttery, cinnamon crumb does not disappoint. Coming from this New York Girl, this is quite an endorsement! Of course, I did change a couple of things, but not much. A little extra salt here, a little less fat there and voilà my splash is added. I used low-fat milk and low-fat sour cream but feel free to use whole if you’d like. I made the recipe both ways and didn’t notice that much difference, so I might as well save the calories, and then maybe enjoy a second piece!

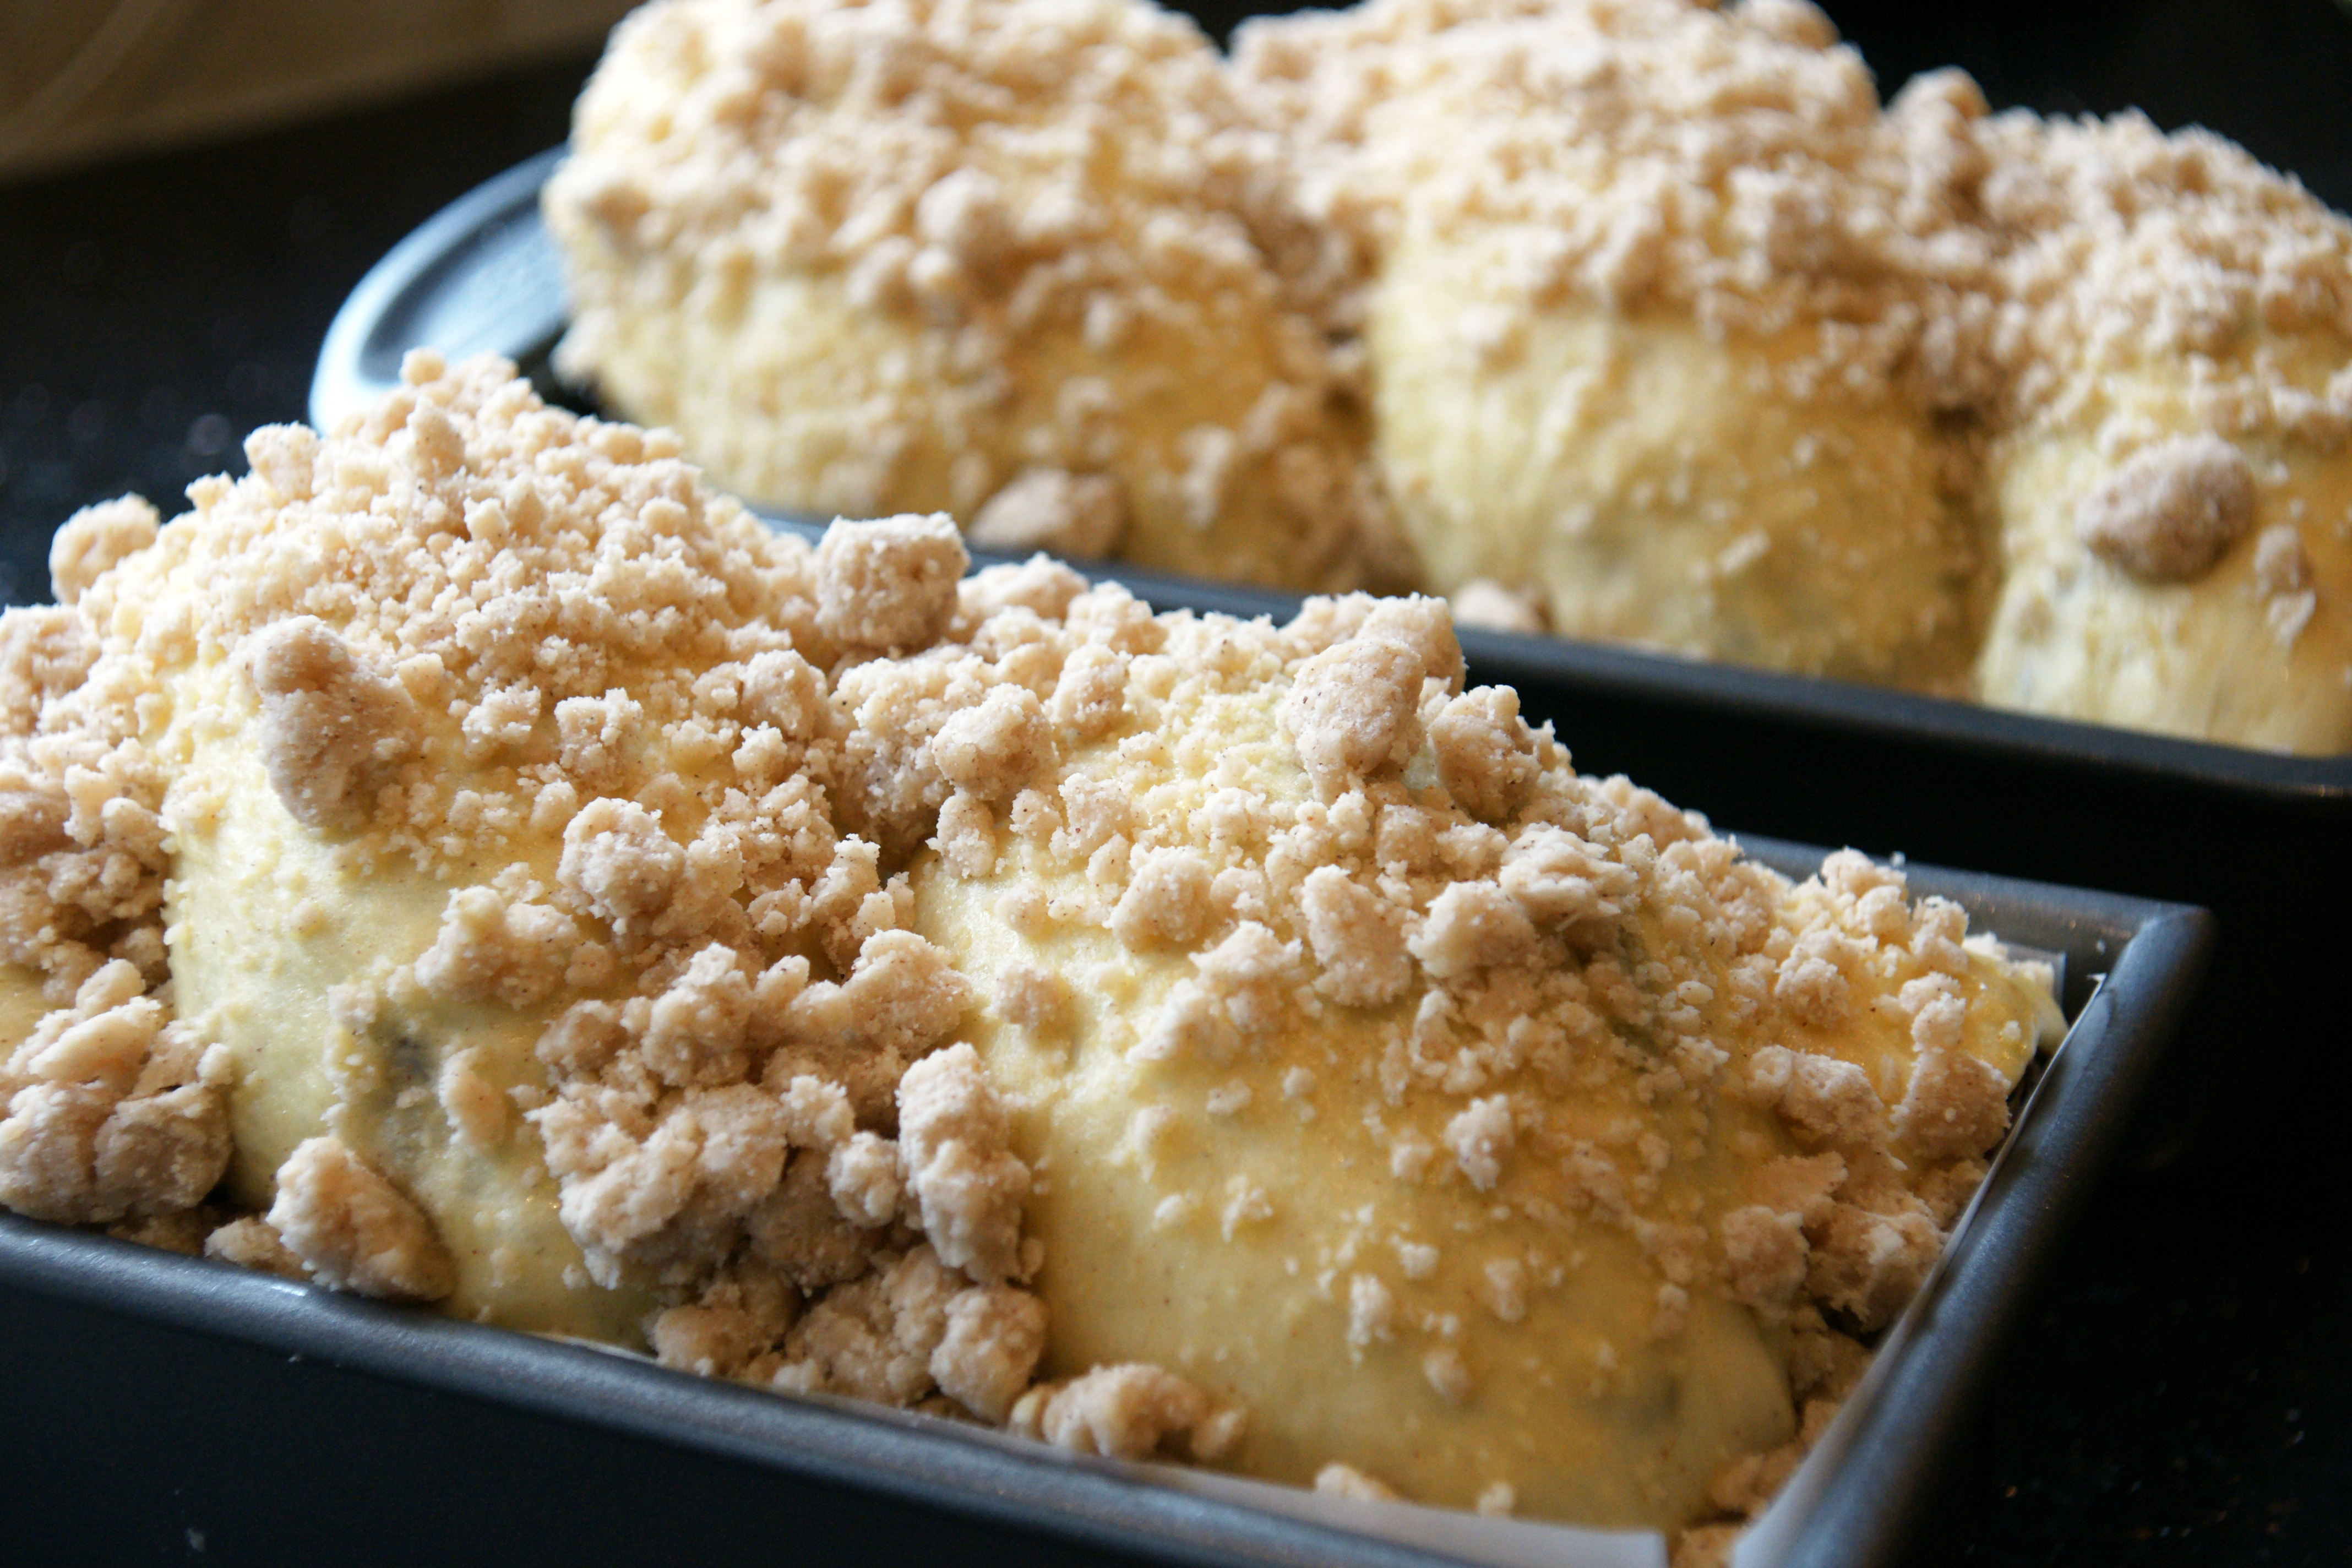
Just remember, I said this is a crumb cake (50/50 topping to cake). It will look like you don’t have enough batter, but you will. It is a very thin layer that when baked, puffs up. You will also think you have way too much crumb topping… nonsense! You can never have enough! What happens is the cake rises because of the baking powder/sour cream reaction and the crumb, not so much so even Steven.

One more last thing, before you get started baking, here are a couple of National coffee day links to find free or discounted coffee near you. Enjoy!

http://time.com/money/4961486/free-coffee-deals-national-coffee-day-2017/
https://www.columbusonthecheap.com/free-perks-on-national-coffee-day/

Cake:
2 cups all-purpose flour, plus more for the pan
1 tablespoon baking powder
½ teaspoon of kosher salt
5½ tablespoons (1/3 cup) unsalted butter
½ cup granulated sugar
¼ cup low fat sour cream, at room temperature
⅔ cup 1% milk, at room temperature
1 large egg, at room temperature (I used extra-large it’s all I ever bake with)
1 tablespoon good vanilla extract

Crumb Topping:
2¼ cups all-purpose flour
1¼ cups packed light brown sugar
1 tablespoon ground cinnamon (I use Vietnamese cinnamon)
½ pound (2 sticks) unsalted butter, melted
Confectioners’ sugar, for dusting

Makes one 9 x 13 inch cake and serves 12 to 16 people. I guess that depends if you are New Yorker or not!

Preheat the oven to 350 degrees F. and set your rack in the center of the oven. Spray a 9 x 13 inch glass baking dish with cooking spray, dust it lightly with flour and invert it over the kitchen sink to tap out the excess. Set aside.

I like to start with the crumb topping and then set it aside until the batter is done. Whisk together the flour, brown sugar, cinnamon and salt until combined. Add the melted butter and stir until the dry ingredients have absorbed the butter. With your hands, gently mix the crumb mixture and roll it in-between your palms and fingers to create the crumbs. Set aside.

For the cake… In a large bowl, whisk together the flour, baking powder and salt. Set aside.

In the bowl of a mixer set to medium, use the paddle attachment and mix together the butter and sugar until light in color. Add in the egg and sour cream blending until it is mixed well.

In a separate bowl, whisk together the milk and vanilla. With the mixer on low, alternate the wet and dry ingredients starting and ending with the dry ingredients. Don’t forget to scrape don’t the sides of the bowl with a rubber spatula. Mix until just combined – do not over mix.

Spread the batter evenly into the prepared pan. It’s a thick batter; you can use an offset spatula to spread it as evenly as you can. Using your hands, scatter the topping evenly over the cake batter.

Bake for about 30 minutes or until the center of the cake is firm to the touch and springs back lightly. If the cake is not baked through, reduce the temperature to 325 degrees and continue baking in 5 minute increments until it is set in the center making sure the topping doesn’t get too brown. If this happens, you can lightly cover it with foil.

Let the cake cool completely then dust it with the Confectioners’ sugar. While it’s cooling, go put on a pot of coffee!

Baked Apple Doughnuts with Spicy Cinnamon Sugar

SONY DSC

Baked apple doughnuts with cinnamon sugar is an oldie but a goodie so I’m replaying it! This recipe was originally published in October of 2015. I made them the other day and thought it’s a perfect recipe to replay for apple season and the holidays. Enjoy the rewind!

You guessed it… Another apple recipe! That basket on my kitchen counter is getting smaller by the day! This time it’s baked apple doughnuts with cinnamon sugar. Why baked doughnuts you ask? Because they are delicious – that’s why! When my family was at Lynd Fruit Farm a couple of weeks ago, their snack stand was open where they sell a variety of goodies. They make fresh kettle corn, roasted candied nuts, hot cider, funnel cakes, fresh doughnuts and apple fritters among other things. Usually we will buy one doughnut and one apple fritter and split it among the family, then go back for 2 more!

On this visit, it was Pumpkinpalooza day at the farm and to say it was extremely busy is an understatement! I guess the word palooza should give you an idea to the fun activities they had going on! In the urban dictionary palooza is defined as an all-out crazy party; partying at one place with a ton of people like there’s no tomorrow! It wasn’t quite that crazy, but the line was pretty long and we were tired from the couple of hours we just spent apple picking and shopping in the farm stand, so we went home. However, the sweet smell of the candied nuts, doughnuts and cider never left me and have been on my mind for the past couple of weeks.

SONY DSC
I love doughnuts, but I don’t like eating fried foods. I save that for times I want a really special treat. My search for a healthier doughnut lead me to this baked doughnut. I found it on the King Arthur Flour website and promise you won’t miss the extra calories frying would add! It tastes like an old-fashioned cake doughnut, which was my father’s favorite! This recipe uses 100% whole wheat flour, and apple sauce which makes a very tender and delicious cake style doughnut. I changed it up quite a bit due to the ingredients I had on hand (or didn’t have on hand in this case), and added more spices to it. Their recipe calls for orange juice and apple cider reduction which I didn’t have and they gave substitutions for. I always have small cans of pineapple juice in the house and it’s a wonderful sub for orange juice. I’m anxious to try the cider reduction one day, I think it will add great flavor to this already yummy treat!

I did try the maple glaze and while it was very good, it was too sweet for me. Instead, I went with a dusting of cinnamon sugar and my family agreed it was a winner. It is very close to the cinnamon sugar doughnuts they had at the farm-stand. This is an adapted version of the King Arthur Flour recipe. They came out fantastic, are quick to put together, and are a healthier doughnut, using white whole wheat pastry flour, very little oil and baking instead of frying. The only problem… they don’t last long – I can promise you that! Enjoy!

2 cups King Arthur white whole wheat flour*
2 teaspoons cinnamon
1  1/2 teaspoons kosher salt
1  1/2 teaspoons baking powder
1 teaspoon apple pie spice
1/4 teaspoon ground ginger
1  1/4 cups granulated sugar
1  1/8  cups plus applesauce
1/3 cup vegetable oil
3 large eggs
2 tablespoons pineapple juice (or orange juice)
2 teaspoons pure vanilla extract
cinnamon sugar (1/2 cup sugar plus 2 teaspoons cinnamon**)

Glaze recipe (if you’re a glaze lover!)
1  1/2 cups confectioners’ sugar
3 tablespoons pure maple syrup***
3/4 teaspoon maple extract
pinch of salt
2 teaspoons milk or heavy cream (enough to make a spreadable glaze)
Mix all the glaze ingredients together until smooth
SONY DSC
Preheat the oven to 350 degrees. Lightly grease or spray two standard doughnut pans.

In a large bowl, sift together the flour, baking powder, salt, cinnamon, apple pie spice, and ginger then set aside. In a smaller bowl, whisk together the eggs, sugar, oil, applesauce, pineapple juice, and vanilla. Stir the wet mixture into the dry ingredients just until combined.

Spoon the batter in the doughnut pans, filling each one a little more than three quarters full. Some people use a pastry bag for this step. I was fine spooning the batter in the wells of the doughnut pan. Bake for 15 to 18 minutes or until a toothpick comes out clean.

Allow to cool for 5 minutes in the pan, then take them out. Combine the sugar and cinnamon in a small bowl. While still warm, dip each doughnut into the cinnamon sugar to coat on both sides. Set on a wire rack to cool. If you’re glazing, allow the doughnuts to cool completely before spreading on the glaze.

This recipe yields 12 to 18 regular size doughnuts or 48 mini doughnuts

*White whole wheat flour is lighter in color and milder in flavor than 100% whole wheat flour with all of the same benefits. If you want to substitute all-purpose flour use 1  3/4 cups plus 2 tablespoons.

**I use Vietnamese Cinnamon in all my baking. It’s strong, rich and has a sweet flavor I really like. It can be found in most groceries or specialty spice shops.SONY DSC


Dear Marcy Goldman, Thank you for the most Delicious Majestic and Moist Honey Cake Recipe! xoxo Sherri


Dear Marcy Goldman, Thank you for the most Delicious Moist and Majestic Honey Cake! Thank you for sharing your recipe with us. I have always loved your cookbooks and any recipes I have tried.  xoxo, Sherri

Have you ever had a honey cake that was anything but dry and heavy? They are usually like hockey pucks. Not this one, it’s exactly what the name says it is and more. You’ll have to take my word on this, because I never liked honey cake, hated it actually. Last week I found myself somewhat like Elaine in the Seinfeld episode where she ate the $29,000 piece of cake and was dancing around as she ate it. If there was surveillance video of me in my kitchen last week, it would have showed the same. Of course she was missing her sugar fix in the afternoon, I was tasting a little of it every day, to see how long it could actually stay moist. I figured at some point, it had to get dry and heavy, but it never did. Maybe I’ll have to video tape myself and share that with you. If I get enough people requesting it, I just might! To put a number on it, if 25 people subscribe to my blog and comment on this post, I’ll do it!

So let’s rewind… why did I even make a honey cake when I don’t like it? Short answer, It’s Rosh Hashanah, it’s tradition, you can’t buy them in Columbus, Ohio and my husband loves them!

Long Sherri answer… I love family traditions especially around the holidays. Since moving to Columbus one of my favorite family traditions has been at Rosh Hashanah. I always set the holiday table with my sons’ shofars which they made as young children, beautiful flowers, my mother’s candle sticks, apples and mini honey jars. Even my wine bottle gets a little outfit! The excitement of the holiday prompts me to set the table well in advance just so I could have a few extra days to marvel at the table setting. It always makes me so happy. It’s also the time of year when my in-laws would visit for the holiday and stay for a few days.

My in-laws always arrived the day of Erev Rosh Hashanah right after lunchtime. As my father-in-law walked into the house, he would give me a big bear hug and comment how he could smell my cooking in the street as they pulled up. Year after year it was the same scene in my kitchen. The chicken soup was simmering away on the stove, the counter was filled with challahs fresh out of the oven, apple cake and mandel bread (my mother’s delicious recipe). Everything lined up like little soldiers.

The initial excitement of their arrival is one I looked forward to every year. It was even more special because I was the only one home to receive them and had them all to myself for a couple of hours. They came with suitcases and bags of gifts, but more importantly, the honey cakes! I seem to remember one year when my mother-in-law Joan brought five or six of them! I wish I could remember why she said she brought so many, but assume it was because her son loved them so much. Our first holiday without her, I still expected to see her walk through the door arms filled with honey cakes saying “I brought you some honey cakes, it didn’t come out too dry this year!”

It was something I never made (probably because I don’t like them) but more importantly it was her specialty. I’m a good daughter-in-law and would never have stepped on her toes. Last year, I decided to make my husband a honey cake – he does love them afterall. I didn’t have her recipe so what is a girl to do? Look through every Jewish cookbook and Google until she finds one that looks good. When a recipe has the words moist and majestic in it, especially for a honey cake, you look no further.

So thank you Marcy Goldman for bringing us all this most delicious cake! Just for the record, I made it last year as is but this year tweaked it just a little to accommodate my taste. I can now say I’m a honey cake lover, hence my Elaine dance in the kitchen! Remember, if you want to see my honey cake happy dance, make a comment on this post!

The tradition and excitement of years past fills my heart. My mother’s mandel bread fills my soul, alongside it sits this majestic and moist honey cake which I think my mother-in-law would have just loved. Shana Tova… Enjoy!
Majestic and Moist Honey Cake
adapted from Marcy Goldman’s Treasure of Jewish Holiday Baking. Here is what I changed… I omitted the cloves (I don’t like them), I used pineapple juice instead of orange juice because I always have cans of pineapple juice on hand, and never have orange juice! I cut down the sugar to see if I would miss it – I didn’t! Finally, I don’t care for the taste of whiskey and even in the cake it was a bit strong. My friend Susie and I baked honey cakes together last week and she suggested I try brandy. She uses it in a sweet potato dish she makes and said it adds a nice flavor. She was right; the brandy was a perfect choice, not as strong as the whiskey and when you eat the cake you wonder, what is that. FYI… I think my brandy is a little bit majestic as well. I started with ¼ of a bottle, have made 14 honey cakes this year and haven’t run out of brandy yet!

Ingredients
3 1/2 cups all-purpose flour
1 tablespoon baking powder
1 teaspoon baking soda
1/2 teaspoon kosher salt
4 teaspoons ground cinnamon
1/2 teaspoon ground cloves (I omitted this)
1/2 teaspoon ground allspice
1 cup extra light olive oil
1 cup honey
1 cup granulated sugar
1/2 cup brown sugar
3 extra large eggs at room temperature
1 teaspoon vanilla extract
1 cup warm coffee
1/2 cup pineapple juice
1/4 cup brandy
1/2 cup slivered or sliced almonds (optional)

Directions
I made mine in a variety of ways. My favorite, was the mini loaf pans (5 ¾ x 3 ¼) which yielded 8 and are great to give as gifts. I have also made this recipe in three 8 x 4 ½” loaf pans. The 9” or 10” angel food pan makes for a very pretty presentation and Marcy Goldman’s favorite choice. Finally you can use a 9×13” sheet pan. This is pretty versatile if you ask me.

Preheat oven to 350°F. Generously grease pan(s) with non-stick cooking spray. For tube or angel food pans, line the bottom with lightly greased parchment paper, cut to fit.

In a large bowl, whisk together the flour, baking powder, baking soda, salt, cinnamon, cloves and allspice. In a separate bowl, mix the warm coffee with the brown sugar. This helps the clumps you can sometimes get. Then add all of the wet ingredients plus the sugar and mix together. Make a well in the center of the flour mixture and add the wet ingredients. (If you measure your oil before the honey, it will be easier to get all of the honey out.)

Using a strong wire whisk or in an electric mixer on slow speed, stir together well to make a thick, well-blended batter, making sure that no ingredients are stuck to the bottom.

Spoon the batter into prepared pan(s). Sprinkle top of cake(s) evenly with almonds, if using. Place cake pan(s) on two baking sheets, stacked together (this will ensure the cakes bake properly with the bottom baking faster than the cake interior and top). Hmmm… I somehow missed this step, but they came out perfectly when I baked them on one cookie sheet, or directly on the oven rack.

Bake until cake tests done, that is, it springs back when you gently touch the cake center. For angel and tube cake pans, this will take 60 to 75 minutes, loaf cakes, about 45 to 55 minutes. For sheet style cakes, baking time is 40 to 45 minutes. The minis only took 30 minutes. If you are using throw away aluminum tins, the bake time will be a little less for all of the above.

Let cake stand fifteen minutes before removing from pan and enjoy!

Honey Cake Biscotti/Mandel Bread with Chocolate Chips


Full disclosure, I spent more time trying to figure out the title for this post than I did baking the actual cookies! In the end, all I know is this Honey Cake Biscotti Mandel Bread with chocolate chips is super delicious!

I first saw this recipe in Paula Shoyer’s cookbook The Holiday Kosher Baker, and knew I had to try it. Paula calls them honey cake biscotti but after I tasted them, I felt the texture was really more like mandel bread. Just a quick mandel vs. biscotti clarification…  While most people are familiar with the more popular and sexy Italian biscotti made in a myriad of flavors which are crisp and dunked in coffee, the mandel is a traditional Jewish cookie and something your bubbe (a Jewish grandmother) enjoys with a glass of tea and bakes enough to share with everyone she knows – and I mean everyone! When you look at them side by side, they resemble each other and taste similar. The main difference is mandel is usually a little softer than, and not as dry as biscotti because it contains more oil. Biscotti are always twice baked whereas mandel can be sliced and served as a softer cookie or twice baked.
With the holidays quickly approaching, I’ve been spending time trying new recipes to share with family and friends (just like the bubbe!). I’m lucky to have a nice support system of taste testers! When I sent some to my son last week he said “I don’t know how you did it, but you somehow managed to make mandel bread taste just like honey cake.” I told him I couldn’t take all of the credit for that but thanked him just the same. I am really glad I tried this one; it’s a winner. They really taste like honey cake, it’s amazing! Thank you Paula Shoyer!

The original recipe calls for shaping them and baking them right away. I found the dough too loose so I put it in the refrigerator for an hour. This is how I prepare my mom’s recipe so I’m sure it’s just second nature for me to do it that way. You can also leave the dough in the bowl and place it in the fridge, then mold it into logs after you take it out. If it seems firm enough for you to skip the refrigerator, go for it and get it in the oven.


When baking with honey, here is a good tip… A trick to help the honey slide out of the measuring cup is to measure the oil first. Then when you put the honey in, it won’t stick to the glass. I love this trick! This is also good when using molasses, corn syrup or any other sticky liquid.

My mother’s mandel recipe has chocolate chips added, so I figured why not try adding chocolate chips in these – it was a good decision! Honey and chocolate are a nice marriage. You could also add white raisins and walnuts which are equally as delicious or leave them plain. This recipe is a great start to a sweet new year! Enjoy!

Ingredients:
3 cups plus 2 tablespoons all-purpose flour
½ teaspoon cinnamon*
½ teaspoon ground ginger
1/4 teaspoon allspice
1/4 teaspoon nutmeg (I like to grate it fresh)
1 teaspoon baking powder
1 teaspoon kosher salt
2 extra large eggs (at room temperature)
½ cup extra light extra light olive oil
½ cup honey
½ cup dark brown sugar
2 teaspoons vanilla extract
1/4 cup warm coffee (regular or decaf)
½ cup mini semisweet chocolate chips
Cinnamon sugar to sprinkle on top

Optional version: You can also make this with raisins and walnuts by using ½ cup white or black raisins and ½ cup chopped walnuts or make them plain. This recipe is adapted from Paula Shoyer’s Honey Cake Biscotti recipe.
Line a cookie sheet with parchment paper and set aside.

Mix all of the dry ingredients in a large bowl and sift together. In another bowl add the oil, honey, eggs, brown sugar and vanilla, coffee and whisk together well. Slowly add the wet ingredients to the dry and mix gently to incorporate. If using chips or other addition, add in at this time.

Divide the dough in half and shape it into a rectangular log about 10 to 12 inches long by 4 inches wide. I placed mine in plastic wrap which helped to mold them and put them in the fridge for an hour.

When ready to bake, preheat oven to 350 degrees.

Once the dough is chilled, place on the cookie sheet leaving 2 to 3 inches in between the loaves. Sprinkle with cinnamon sugar and bake for 30 – 35 minutes or until the loaves are set and a little browned on the bottom. Slide the parchment onto a cooling rack and let sit for 5 minutes. Place back on the cookie sheet and slice to the thickness you like. I like a thinner cookie so I sliced mine ½” but you could easily make them ¾ – 1” if you want them thicker like biscotti. If you want a softer mandel, don’t double bake them. If you want them crunchy, bake them a second time. Lower the temperature of the oven to 300. Place the cookies cut side down. Bake for 8 minutes take them out and turn them and bake them another 5 – 8 minutes until crisp. Let the cookies cool on the pan. Store them in an airtight container for up to five days or freeze for up to three months.

This recipe yields 30 to 40 pieces depending on the size you slice them.

*I first tried Vietnamese cinnamon at my mother-in-law’s house several years ago and have never used another cinnamon since! It is strong, rich and sweet, just the way cinnamon should taste. It has a higher oil content helping it disperse more thoroughly in baked goods. If you love the taste of cinnamon, you must try it! It’s a little more expensive than what you are currently buying, but well worth the money and a little goes a long way. I find it at spice shops, Sur La Table, and  specialty groceries. Here is a link to purchasing it online.  http://www.kingarthurflour.com/shop/items/vietnamese-cinnamon-3-oz

King Arthur Flour – You had me at Babka!


King Arthur Flour… you had me at babka! For me, a chocolate babka is tied for first place with crumb cake. Both are delicious Eastern European coffee cakes making them even more delicious by the addition of a cup of coffee. Both have ample crumb topping and both quintessentially New York. So let’s talk babka! It’s been over 20 years since the Seinfeld episode “The Dinner Party” aired bringing this little coffee cake into the mainstream of pop culture. I could probably recite verbatim the scene when Jerry and Elaine are waiting in the bakery to buy a chocolate babka. Can’t you hear Elaine saying “YOU CAN’T BEAT A BABKA – they’re gonna be heroes!” Let’s face it, she’s right – you can’t beat a babka, especially chocolate! Plus, while perfect anytime, it is especially perfect to enjoy during your weekend brunch.

The month of April was the King Arthur Flour chocolate babka bakealong. If you don’t know about the King Arthur bakealong, join the club. I stumbled upon it accidentally on Instagram. Each month they announce a new recipe for us to try, with tips and step-by-step instructions on their blog. After you have created your delicious masterpiece, they invite you to share a photo of your final product tagging it with #bakealong.

I found out about this at the most inopportune time; it was during the week of Passover (which was a couple of weeks ago). Passover is a holiday when Jewish people celebrate their freedom from slavery. It is also a time when we don’t eat bread (or babka for that matter!), instead we eat unleavened products like matzo. Here I was, smack in the middle of Passover, a holiday I love by the way, enjoying my matzo (LOL) and everyday there were beautiful photos of babka being posted on Instagram. Since then, I have had babka on the brain! Which, if you know me is not so unusual! What’s a girl to do? My only challenge was blocking out 5 hours or so to make it. Don’t be frightened; it’s only about 45 minutes hands-on time, other than that it’s just waiting for it to rise.

Coming in just under the wire, as tomorrow is the last day of April, I finally found the time and have been noshing on it all week! While keeping the integrity of the recipe I still managed to put my splash on it. I noticed in the photos posted by other bakers it seemed there was a higher cake to chocolate filling ratio. I’m all about the filling so I made twice the recipe called for. Being a self-proclaimed babka connoisseur, and crumb topping lover, I doubled that as well. I also rolled mine a little thinner so there was a denser chocolate marbling.


It was an easy recipe to follow and yielded a perfect and delicious babka. If I had one comment, it felt like there was too much dough to fit in the two 9” loaf pans. I ended up trimming the excess and made muffins out of some of the extra dough. These are the times when I hear my mother’s voice… “having too much babka dough should be the biggest problem you have in your life!” Next time I will make 3 instead, wishing I could share one with her.

Once in the oven, my babkas took on a life of their own which I took notice of when they were rising. I placed the loaf pans on a lined sheet pan before I put them in the oven and boy I’m glad I did; there was a bit of crumb spillage over the edges. Overall, the outcome was perfect and I loved the recipe.  The flavor is really what you expect this delicious coffeecake to taste like. The chocolate was luscious and rich, the cake very tender, and the crumb topping added just the right contrast. The extra crumb topping and chocolate filling really hit the mark. There is no better way to enjoy a weekend than with a piece of chocolate babka and a nice cup of coffee!

The recipe which follows is adapted from the King Arthur Flour blog post from their April bakealong challenge. The recipe makes two very large loaves. They suggest keeping one, and giving one away, (which I did and it got rave reviews). One person said it was the best babka she ever had. King Arthur got inspiration for their recipe from Maggie Glezer, and her book, A Blessing of Bread. I recently checked it out of the library and am in the middle of reading it now. Of course I will have to try her recipe as well. I was excited to learn the word babka in Polish means grandmother! When I have grandchildren, if not Bubbe, I’ll be Babka! Enjoy!

Prep:  25 to 35 minutes
Bake:  50 to 60 minutes
Total:  5 to 6 hours 15 minutes
Yield:  2 loaves is what the original recipe states, but I suggest 3

Dough
1 to 1 1/4 cups lukewarm water (more if needed)
2 large eggs
6 1/4 cups King Arthur Unbleached All-Purpose Flour
1/3 cup Baker’s Special Dry Milk or nonfat dry milk (I used Carnation)
2 tablespoons instant yeast, SAF Red or SAF Gold instant yeast preferred (I used Fleishmann’s Yeast)
1/2 teaspoon ground cinnamon
1/2 cup sugar
2 1/2 teaspoons salt
10 tablespoons unsalted butter, at room temperature (I melted it)
1 tablespoon vanilla extract

Egg wash

1 large egg beaten with a pinch of salt and a pinch of sugar until well-combined

Filling (below is already doubled)
1 cup sugar
1 teaspoon ground cinnamon
2/3 cup Double-Dutch Dark Cocoa, Triple Cocoa Blend, or the cocoa powder of your choice, Dutch-process or natural (I used Hershey’s Cocoa powder)
1 teaspoon espresso powder (I omitted)
1/2 cup melted butter
2 cup finely chopped semisweet chocolate or semisweet chocolate chips, mini chips preferred (I used 1 heaping cup Ghirardelli mini semisweet chocolate chips)
2 cup diced pecans or walnuts, toasted if desired (I omitted)

Topping (below is already doubled)
8 tablespoons melted butter
1 teaspoon ground cinnamon
1 1/3 cups confectioners’ sugar
1 cup King Arthur Unbleached All-Purpose Flour


Directions
Combine all of the dough ingredients (starting with the lesser amount of water), mixing until everything is moistened. Add additional water if necessary to enable the dough to come together. I started with larger amount of water and added another ½ cup. It was very dry dough. Cover the bowl, and let the dough rest for 20 minutes. Then mix/knead it until it’s soft and smooth.

Place the dough in a lightly greased bowl, and cover the bowl. The dough is going to rise for about 1 1/2 to 2 hours, until it’s quite puffy.

Gently deflate the dough, and divide it in half (or thirds). Set the pieces aside, covered, while you make the filling.

To make the filling: Combine the sugar, cinnamon, cocoa, and espresso (which I omitted). Stir in the melted butter. The mixture will look grainy and slick; that’s okay.

Shape each half of the dough into a 9″ x 18″, 1/4″-thick rectangle. If the dough “fights back,” let it rest for 10 minutes to relax the gluten, then stretch it some more. Don’t be fussy about this; 19″ or 20″ is as good as 18″.

Smear (if you’re Jewish, schmear!) each piece of the dough with half the filling, coming to within an inch of the edges.

Scatter half the chocolate (you’ll make a thin layer), half the nuts, and half the chopped chocolate/chips over each piece. If using standard-size chips, process them in a food processor first, to create smaller bits of chocolate and a less chunky filling.

Starting with a short end, roll each piece gently into a log, sealing the seam and ends. Working with one log at a time, use a pair of scissors or a sharp knife to cut the log in half lengthwise (not crosswise) to make two pieces of dough about 10″ long each; cut carefully, to prevent too much filling from spilling out. With the exposed filling side up, twist the two pieces into a braid, tucking the ends underneath. Repeat with the other log. Place each log into a lightly greased 9″ x 5″ loaf pan. (In addition to spraying the pans, I lined them with parchment paper. This made it much easier to take out)

Brush each loaf with the egg wash. Mix together the topping ingredients until crumbly, divide it in half and sprinkle the topping over each loaf.

Tent each pan with plastic wrap, and let the loaves rise until they’re very puffy and have crowned a good inch over the rim of the pan, 1 1/2 to 2 1/2 hours. Towards the end of the rising time, preheat your oven to 300°F.

Bake the bread for 35 minutes. Tent lightly with foil, and bake for an additional 15 to 25 minutes (for a total of 50 to 60 minutes); the loaves should be a deep-golden brown.

To ensure the loaves are baked through, insert a digital thermometer into the center of one loaf. It should register at least 190°F. (I used a cake tester and it came out clean. Baking time was just about spot on.

Remove the loaves from the oven, and immediately loosen the edges with a heatproof spatula or table knife. Let the loaves cool for 10 minutes, and then turn them out of the pans onto a rack to cool completely.

Slice the babka and serve it at room temperature; or rewarm individual slices briefly in a toaster, if desired. Store any leftovers, well wrapped, at room temperature for several days; freeze for longer storage.